Your logo and favicon are the two most visible branding elements on your knowledge base site. The logo appears in the top-left corner of the primary navigation bar on every page - clicking it redirects readers to the knowledge base home page by default, or to any custom URL you configure, making it a consistent navigational anchor. Document360 lets you upload separate logos for light and dark themes, so your branding stays visually optimised regardless of which mode a reader is using.
The favicon identifies your site in browser tabs, bookmarks, browsing history, and search engine results - it appears before readers even open your site. Document360 automatically generates a root-level /favicon.ico fallback so browsers and search engine crawlers can find it even if they only check the standard path. Both elements are configured from the Site customization settings and apply across your entire knowledge base project.
When to update your logo and favicon
- When setting up a new knowledge base - upload your logo and favicon before publishing. Readers will see the Document360 default icon in browser tabs and search results until a favicon is configured.
- When enabling dark mode - if your knowledge base supports both light and dark themes, upload a separate dark mode logo. If you don't, the same logo is used for both themes, which may result in poor contrast on dark backgrounds.
- After a brand refresh - update the logo and favicon to match any changes to your company's visual identity. Note that favicon updates in search engine results can take 2–4 weeks to reflect, as Google crawls and caches favicons independently.
Upload a logo
You can upload separate logos for the light and dark themes of your knowledge base site. If only one is uploaded, it is used for both themes automatically.
- Navigate to Settings () in the left navigation bar of the Knowledge base portal.
- In the left navigation pane, navigate to Knowledge base site > Site customization.
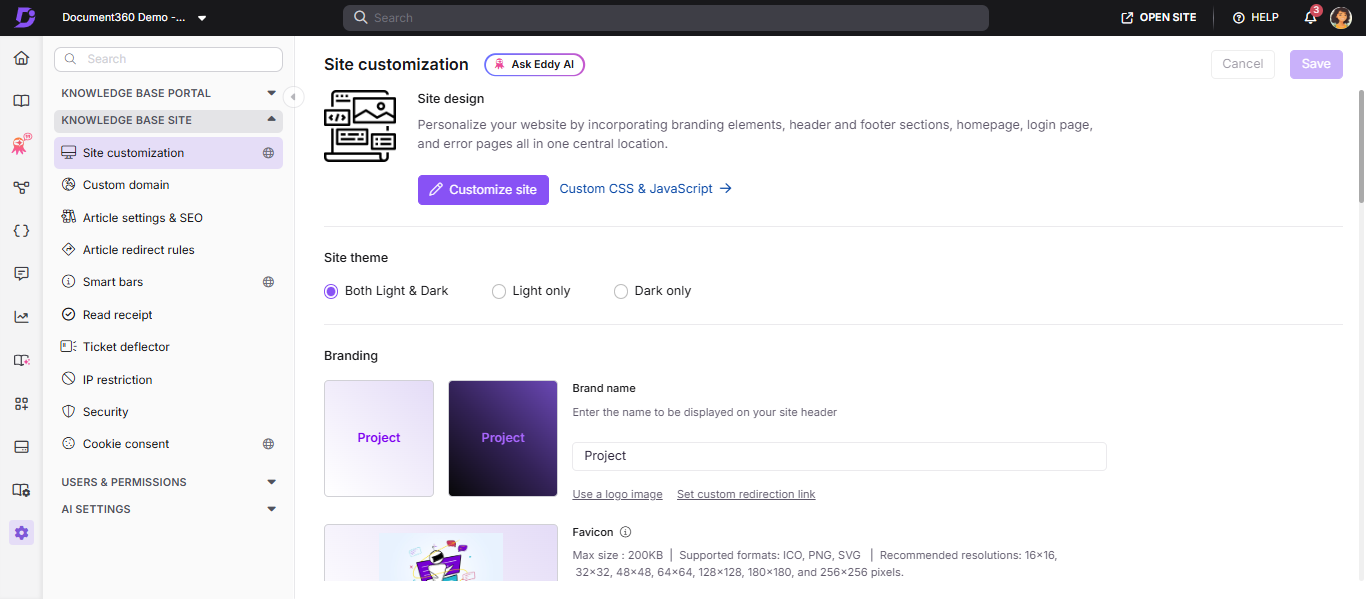
- In the Branding section, hover over the logo placeholder for the desired theme and click Click to change.
- Choose one of the two upload options:
- Using a URL - Paste an image URL from any external source and click Insert.
- Upload an image - Choose a file from the Drive or upload from your local storage and click Insert.
- Click Save.
- The maximum logo size is 40px (height) × 270px (width).Max size : 200KB | Supported formats: ICO, PNG, SVG | Recommended resolutions: 16x16, 32x32, 48x48, 64x64, 128x128, 180x180, and 256x256 pixels.
- Larger logos are scaled down proportionally to fit within the maximum size, preserving the original aspect ratio.
- If no logo is set for one theme, the logo from the other theme is used as a fallback.
- Existing logos and favicons are not affected until you navigate to Site customization and save changes.
- Logo on the Knowledge base portal is displayed with an optimized background tone to ensure consistent visibility across both light and dark modes.
Use text as a logo
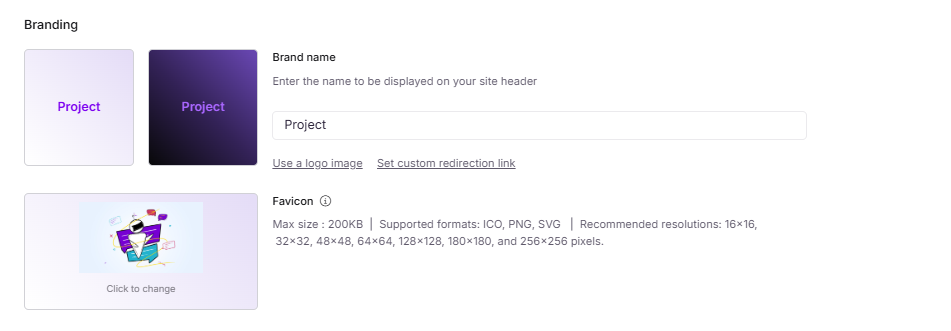
If you don't have a logo image, you can display your company name or a short text label instead.
- Navigate to Settings () in the left navigation bar of the Knowledge base portal.
- In the left navigation pane, navigate to Knowledge base site > Site customization.
- In the Branding section, click Don't have a logo? Use name instead.
- Enter the desired text in the input field.
- Click Save.
Logo text is limited to 30 characters.
Add a custom redirection link
By default, clicking the logo redirects readers to the knowledge base home page. You can override this with any URL - for example, your company website or a specific landing page.
- Navigate to Settings () in the left navigation bar of the Knowledge base portal.
- In the left navigation pane, navigate to Knowledge base site > Site customization.
- In the Branding section, enter your desired URL in the Custom redirection link field.
- Click Save.
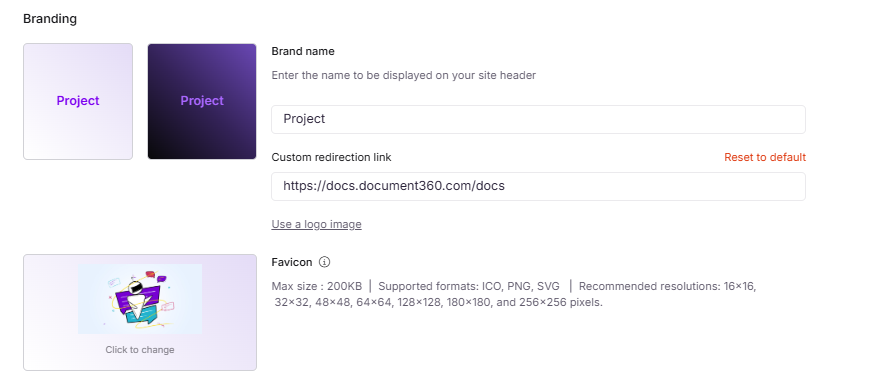
- The Logo URL must start with
https://. URLs starting withwww.withouthttps://will show an "Invalid URL" error. - The Logo URL field is optional. If left empty, clicking the logo takes readers to the knowledge base home page.
Upload a favicon
The favicon is the small icon that appears in the browser tab, bookmarks list, browsing history, and search engine results.
- Navigate to Settings () in the left navigation bar of the Knowledge base portal.
- In the left navigation pane, navigate to Knowledge base site > Site customization.

- In the Branding section, hover over the favicon placeholder and click Click to change.
- Choose one of the two upload options:
- Using a URL - Paste an image URL from any external source and click Insert.
- Upload an image - Choose a file from the Drive or upload from your local storage and click Insert.
- Click Save.
After uploading a new favicon, do a hard browser refresh to see the updated icon. The change may not appear immediately due to browser caching.
Favicon formats, sizes, and requirements
| Requirement | Details |
|---|---|
| Maximum file size | 200KB |
| Supported formats | ICO, PNG, SVG |
| Shape | Must be square |
| Recommended resolutions | 16×16, 32×32, 48×48, 64×64, 128×128, 180×180, 256×256 px |
| Optimal resolution | 48×48px for best rendering across platforms |
Format guidance:
- ICO is the most reliable format for browser and search engine compatibility. Use ICO as your primary format, especially if your image has a transparent background.
- PNG is widely supported and a good alternative to ICO.
- SVG is supported but search engines may take significantly longer, sometimes weeks or months to index SVG-only favicons.
Images with a transparent background should be converted to ICO before uploading. Document360 automatically generates a root-level /favicon.ico fallback at https://your-domain.com/favicon.ico, regardless of the format you upload. This ensures compatibility with browsers and crawlers that only check the root path.
How Google handles favicons
Google uses Googlebot-Image to fetch and process favicons. There are several behaviors to be aware of:
- Favicon display in Google search results is not guaranteed, even with a fully compliant setup.
- Google may show no favicon, display a default icon, or delay updating an existing one.
- Delays are common after recent favicon changes, with SVG-only setups, on newer or niche subdomains, or when Google continues to serve a cached older version.
- Domains without an established favicon history may take longer to surface a favicon in search results.
- You cannot control when Google re-crawls your site, whether a favicon is displayed, or how long older favicons remain cached.
What you can do:
- Allow 2–4 weeks after making changes for Google to reindex your favicon.
- Submit your sitemap through Google Search Console to prompt re-crawling, though this does not guarantee updates.
- Avoid frequent favicon changes — repeated updates reset Google's evaluation cycle and delay visibility.
- Always provide an ICO or PNG fallback alongside any SVG favicon.
Best practices
- Use ICO or PNG for your favicon - avoid SVG-only setups if search engine visibility matters to you.
- Keep your favicon at 48×48px for the most consistent rendering across platforms and browsers.
- Set a custom logo URL to your company website so readers can navigate back from the knowledge base easily.
- Avoid changing your favicon frequently; each change can reset Google's indexing timeline.
FAQ
Why is the favicon not appearing on the knowledge base site?
The uploaded favicon may not meet the format or size requirements. Check that the image is square, within 200KB, and in ICO, PNG, or SVG format. Re-upload after making corrections. If the favicon still doesn't appear after re-uploading, do a hard browser refresh (Ctrl + Shift + R on Windows, Cmd + Shift + R on Mac) to clear the cached version.
Why is the favicon not updating after I changed it?
Your browser may be serving a cached version of the old favicon. Do a hard refresh (Ctrl + Shift + R on Windows, Cmd + Shift + R on Mac) to clear it. If the favicon is also not updating in search engine results, note that Google can take 2–4 weeks to reindex favicon changes. Submitting your sitemap through Google Search Console can help prompt re-crawling, but does not guarantee a faster update.