The glossary overview page URL follows this format:
https://yourdomain/docs/glossary-overview
Before you begin
- You need Admin or Owner permissions to modify site customisation settings.
- Site changes require a Publish step before they are visible to readers.
Add the glossary link to the header
Adding the glossary to the primary navigation makes it accessible from every page of your knowledge base site.
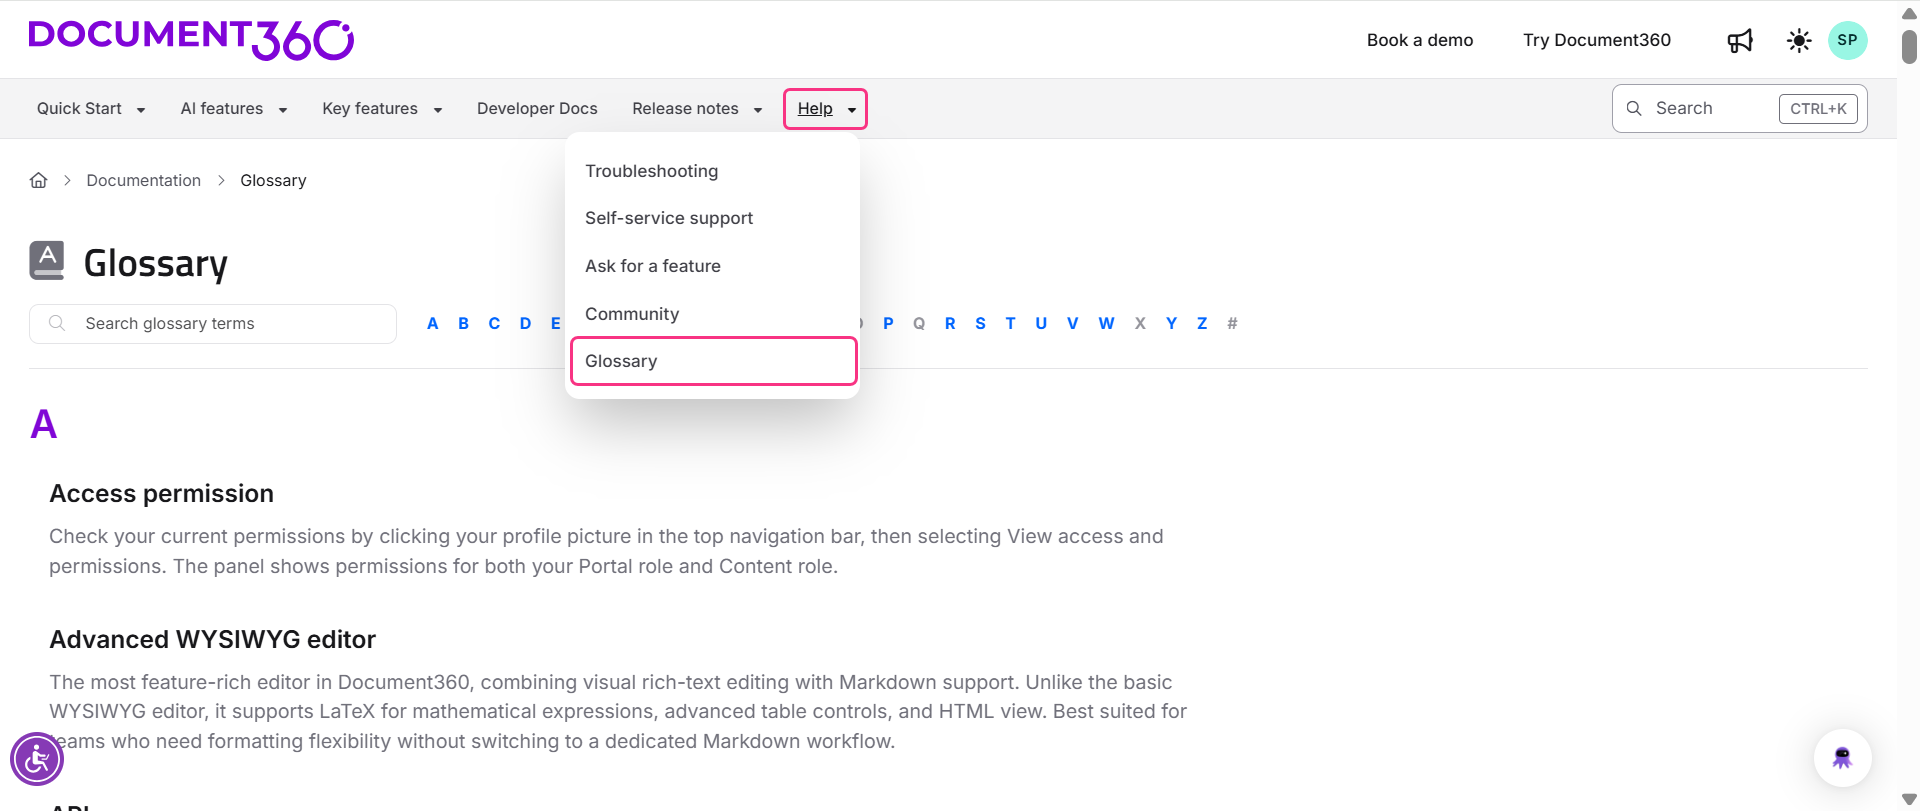
- Navigate to Settings () > Knowledge base site > Site customization.
- Click Customize site.
- Select Site header & footer from the dropdown and expand the Header section.
- Select Primary navigation and click Add new item on the left or right side.
- In the Add new item dialog, configure the following:
- Set Select type to Glossary.
- In the Title field, enter the label that will appear on the knowledge base site.
- Select Open link in new tab if you want the glossary overview page to open in a new tab.
- Click Add.

- Click the Save icon, then Publish to apply the changes.
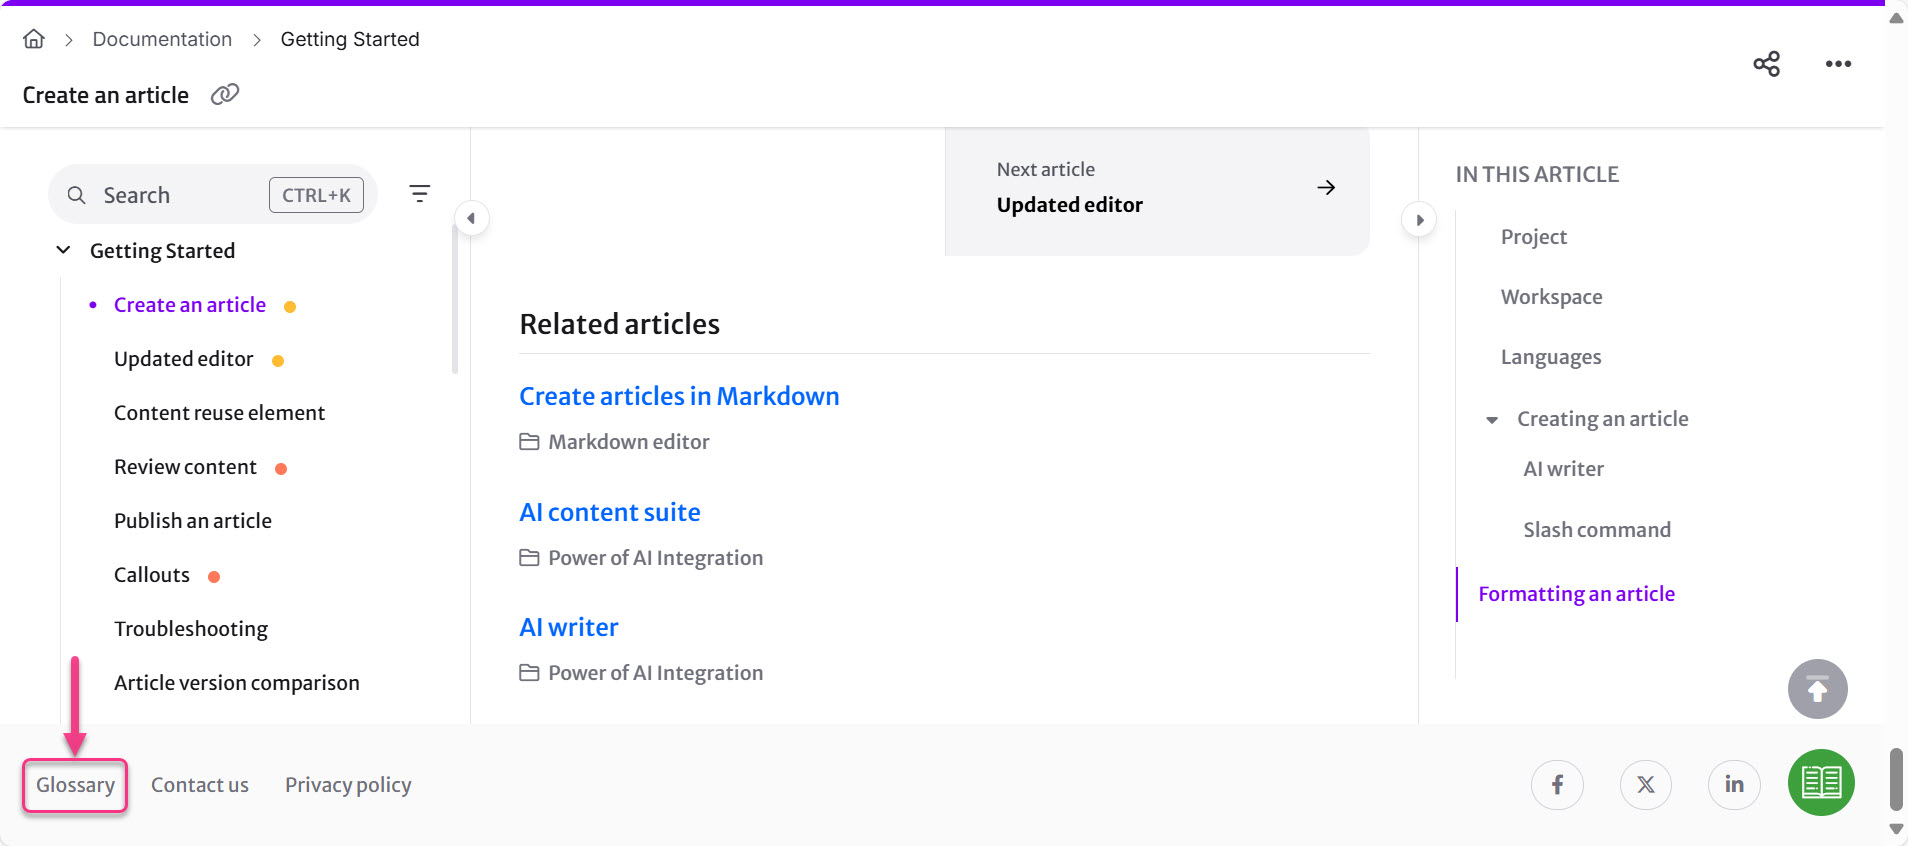
Add the glossary link to the footer
Basic footer
- Navigate to Settings () > Knowledge base site > Site customization.
- Click Customize site, then select Site header & footer.
- In the Footer section, select Basic footer.
- In Navigation items, click Add new link.
- In the Add new item dialog, configure the following:
- Set Select type to Custom URL.
- In the Title field, enter the label for the footer link.
- In the Link field, enter:
https://yourdomain/docs/glossary-overview - Select Open link in new tab if required.
- Click Add.
- Click the Save icon, then Publish.
Custom footer
If you are using a custom footer, add the glossary URL directly in the relevant section of your footer HTML code:
https://yourdomain/docs/glossary-overview
Click Save after making the change.
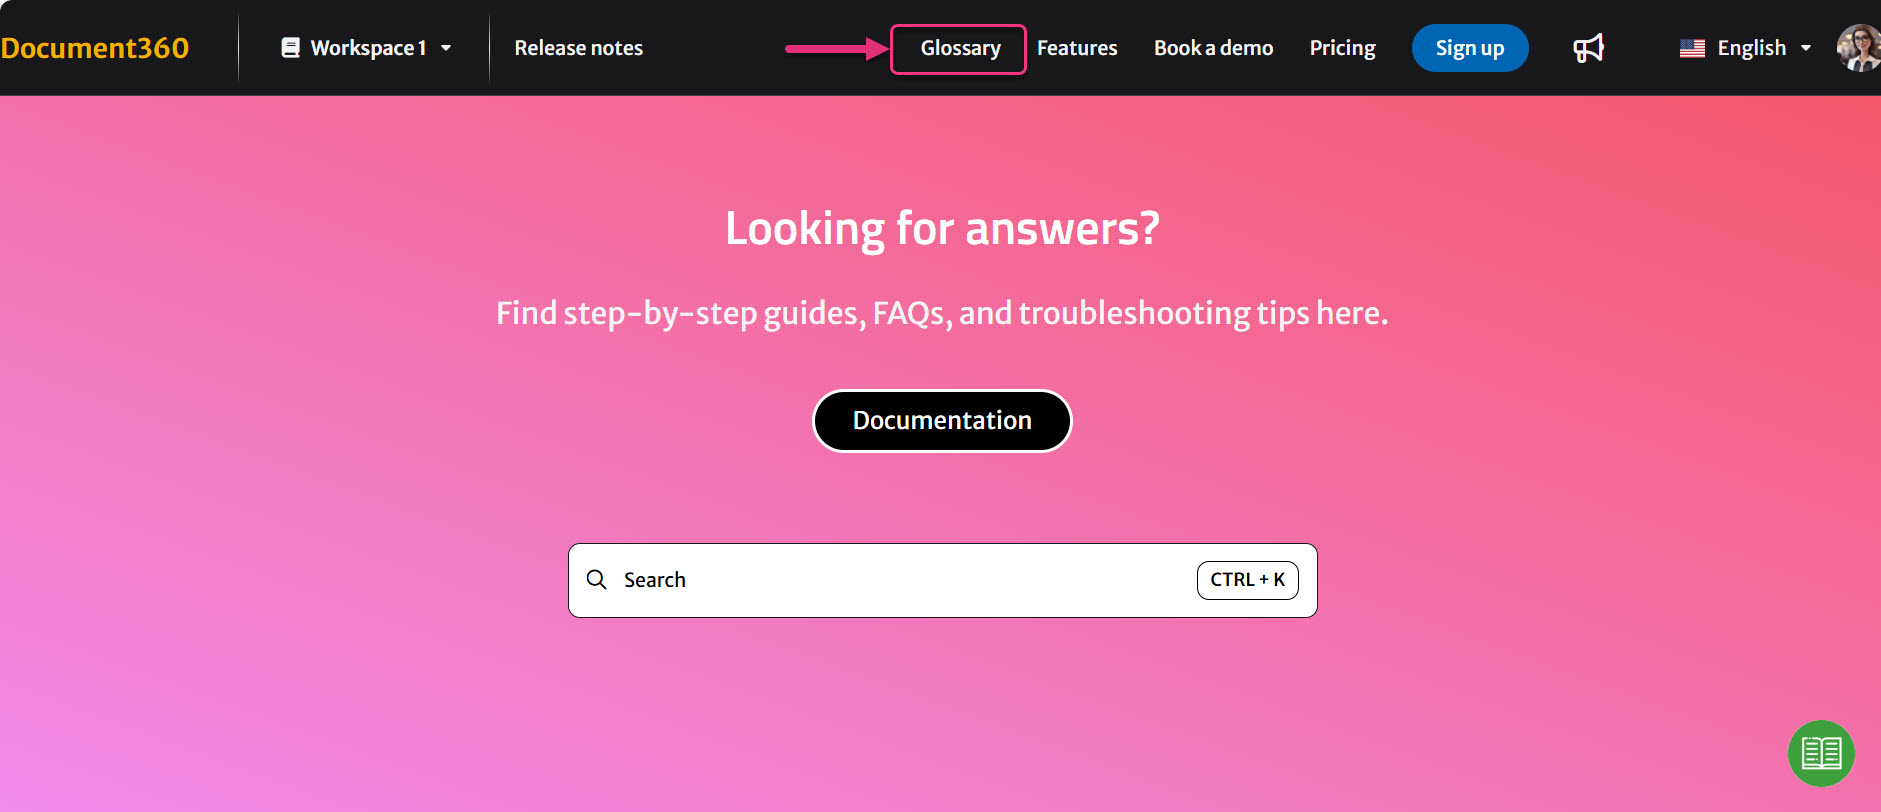
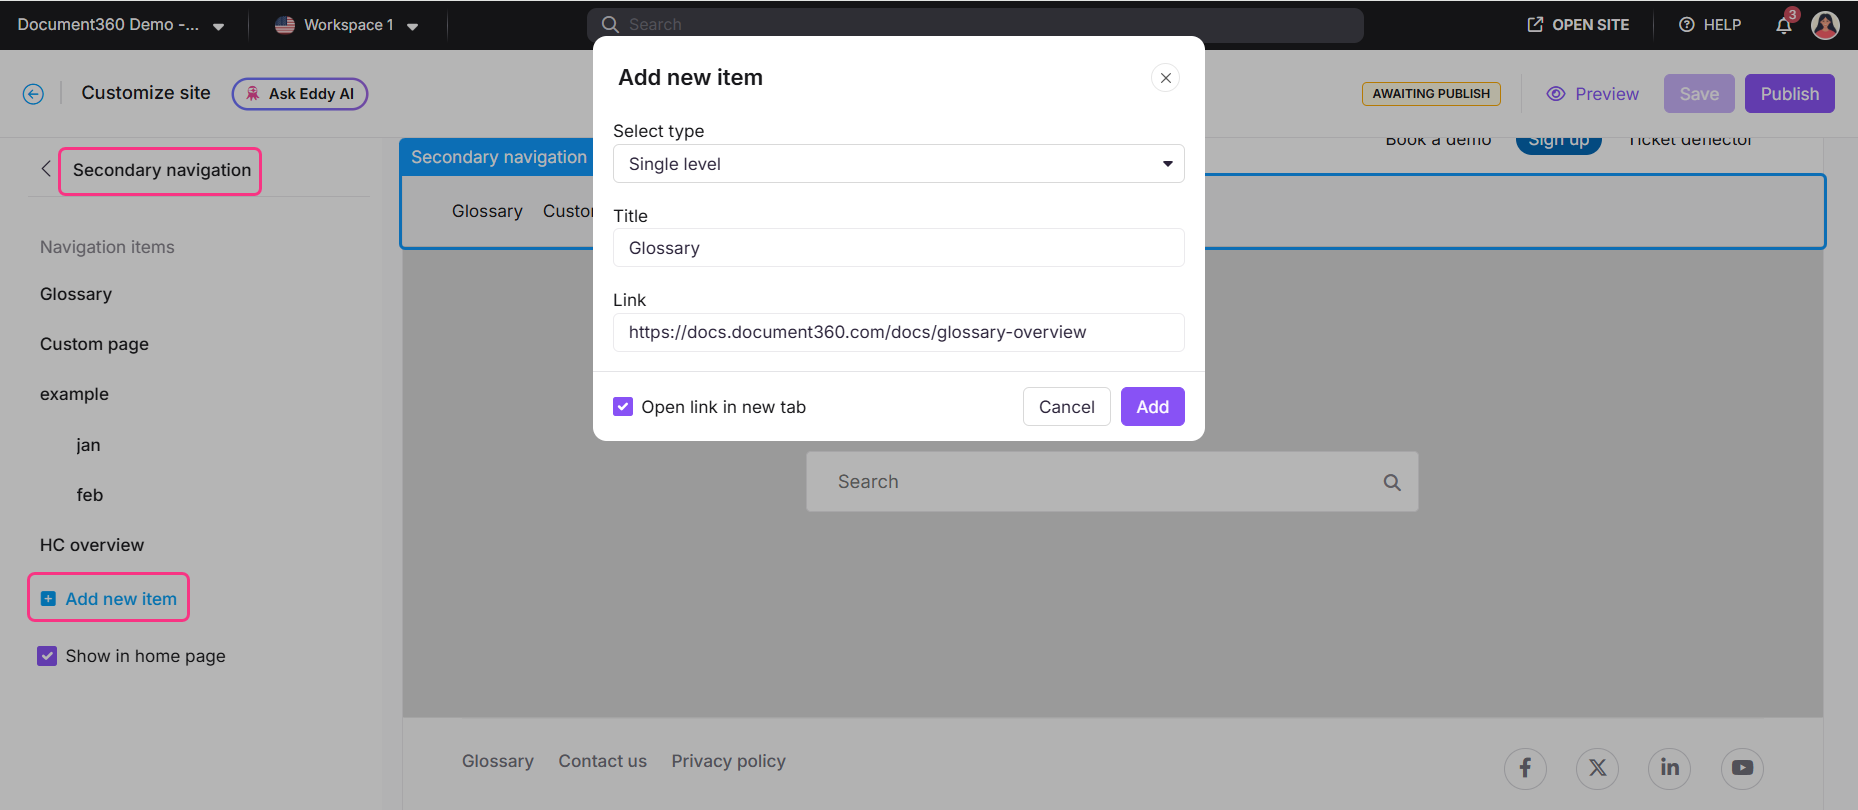
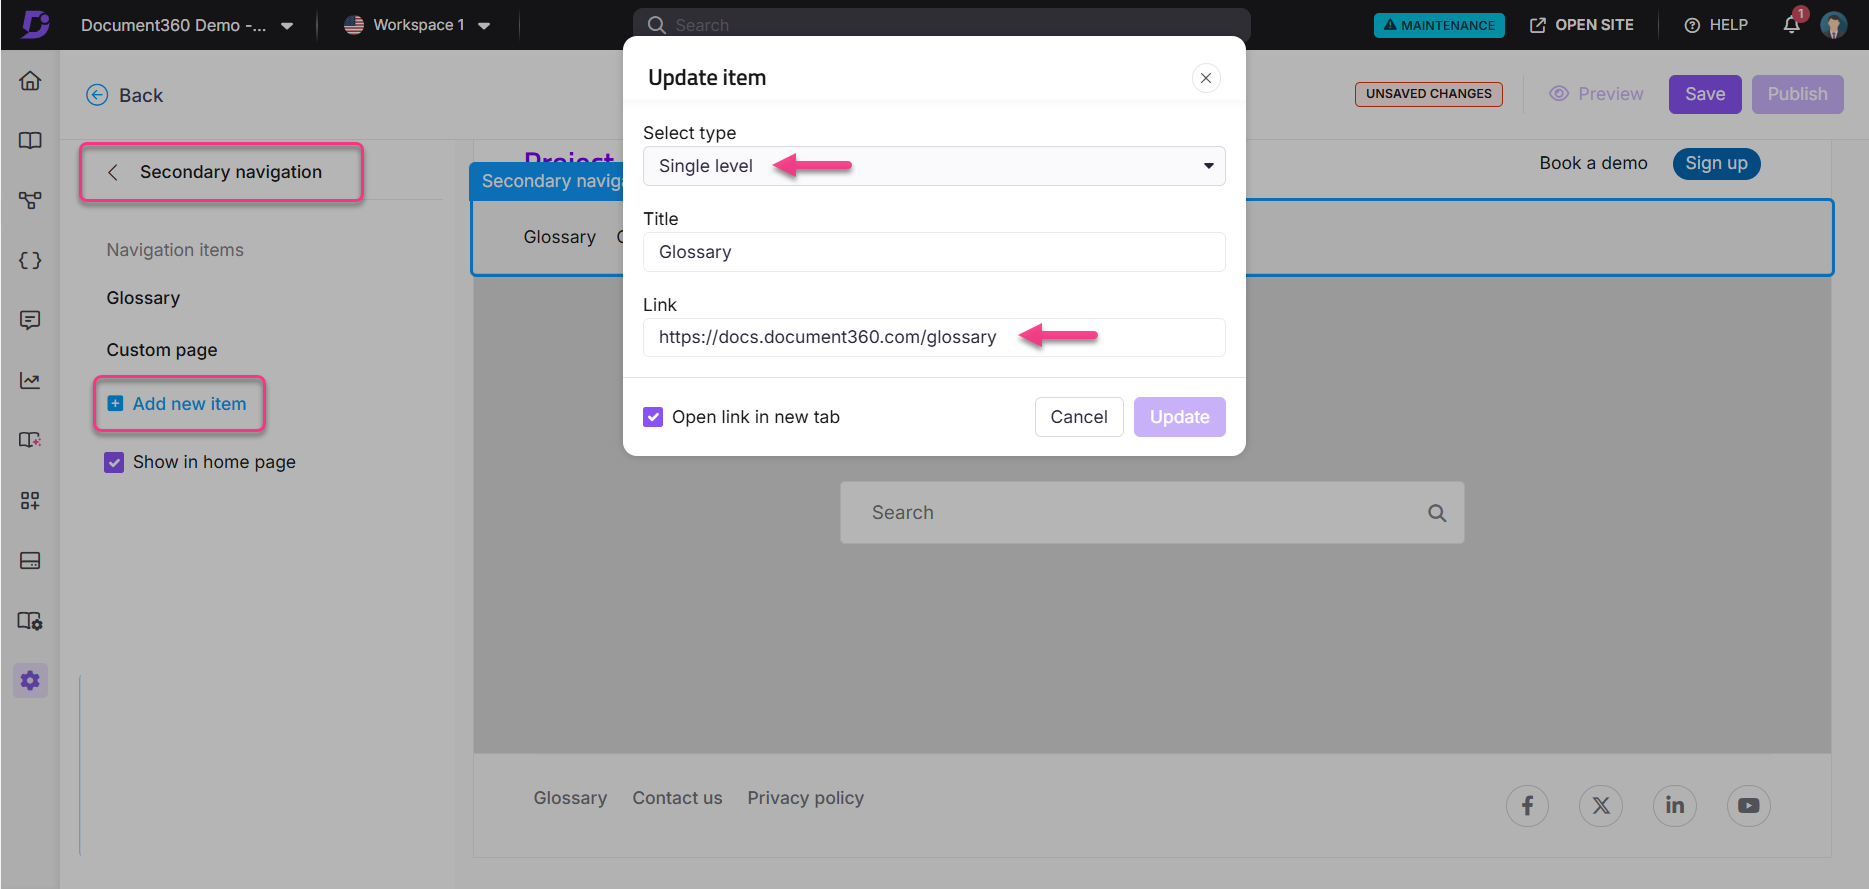
Add the glossary link to secondary navigation
Secondary navigation lets you group multiple related links in your site's header without cluttering the primary navigation bar.
- Navigate to Settings () > Knowledge base site > Site customization.
- Click Customize site, then select Site header & footer and expand the Header section.
- Select Secondary navigation and click Add new item.
- In the Add new item dialog, configure the following:
- Set Select type to Single level or Multiple level based on your navigation structure.
- In the Title field, enter the label to display on your knowledge base site.
- In the Link field, enter:
https://yourdomain/docs/glossary-overview - Select Open link in new tab if required.
- Click Add.
- Select the Show in home page checkbox if you want the link to appear on the home page.
- Click the Save icon, then Publish.
NOTE
You can also add the glossary overview page link in any custom section of your home page based on your site's layout or widgets.
Best practices
- Add the glossary to the header if your knowledge base serves an audience that frequently encounters unfamiliar terminology. Placing it in the primary navigation signals to readers that definitions are available.
- Use the footer for supplementary access when the glossary is useful but not central to the reader journey. It keeps the primary navigation focused.
- Customise the link label to match your audience. "Glossary", "Term definitions", or "Key concepts" are all valid choices depending on your documentation style.
- Add the glossary link to the home page for new readers who may not know the glossary exists. Use the Show in home page toggle in secondary navigation or add it to a custom home page section.