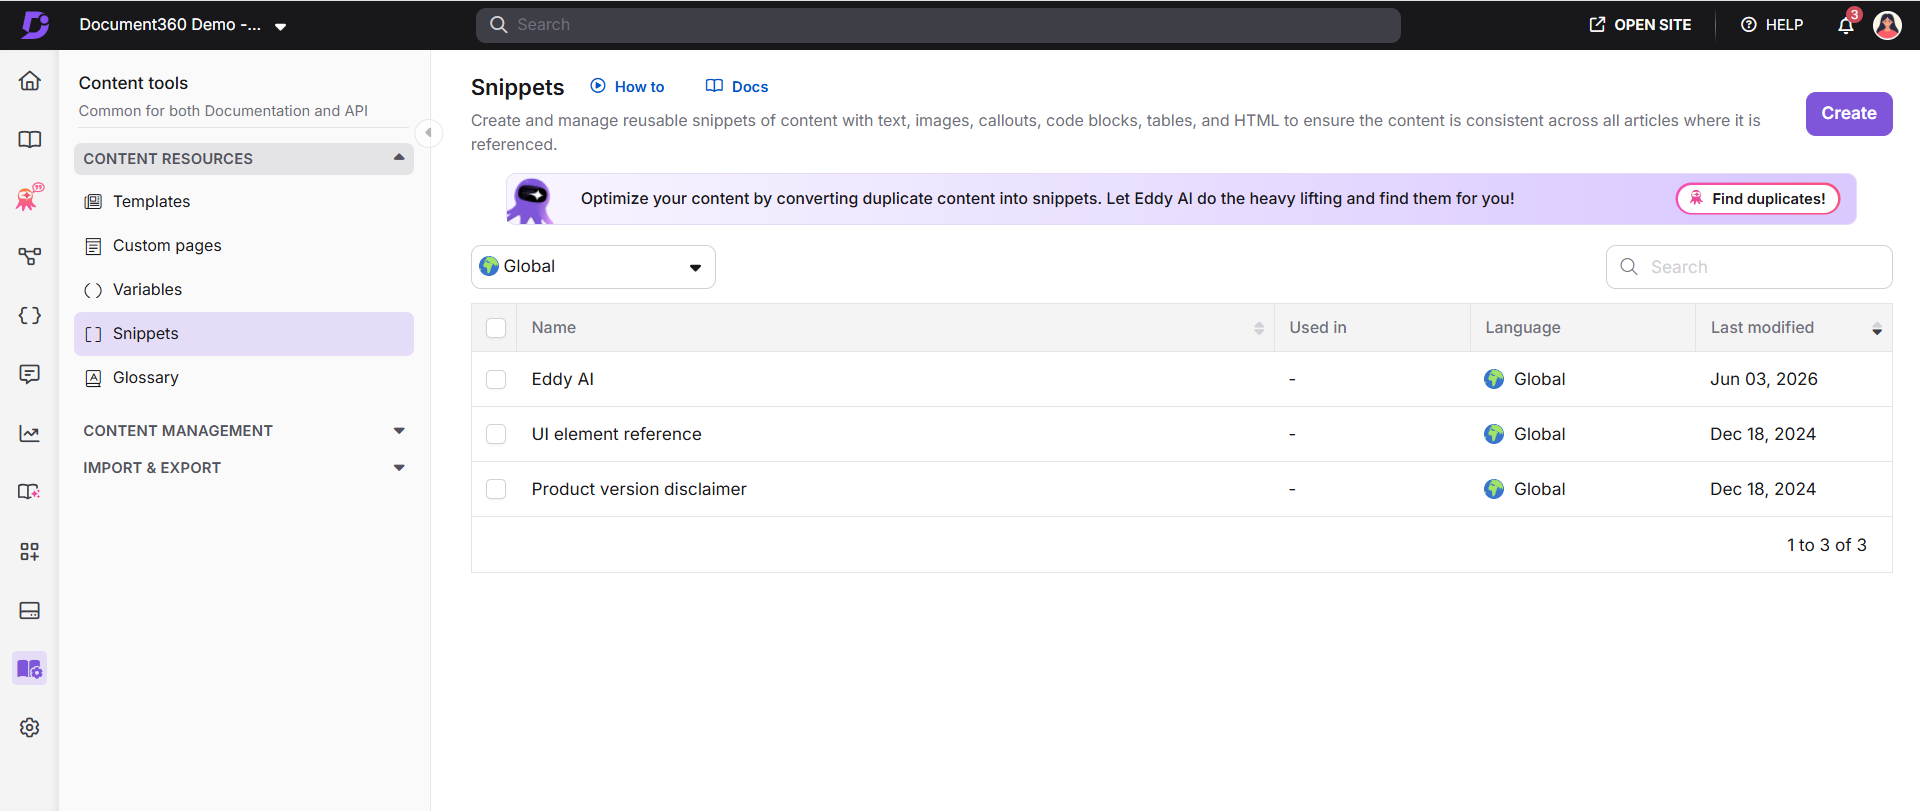
Snippets in Document360 worden aangemaakt en beheerd vanaf de Snippets-pagina onder Contenttools. Vanaf deze pagina kun je nieuwe snippets maken, je editor kiezen, Eddy AI gebruiken om content te verfijnen, controleren waar snippets in je kennisbank worden gebruikt, en ze afzonderlijk of in bulk bewerken of verwijderen.
De Snippets-pagina
- Navigeer naar Content-tools () in de linker navigatiebalk.
- Selecteer contentbronnen > fragmenten in het linker navigatievenster.
| Element | Beschrijving |
|---|---|
| Creëer | Maakt een nieuw fragment aan. |
| Detectie van dubbele inhoud | Identificeert dubbele tekst in je documentatie en stelt voor om deze om te zetten in fragmenten. |
| Talen | Filtert de snippetlijst op Global of een specifieke taal. |
| Zoekfragmenten | Zoekt naar fragmenten op naam. |
| Selectiebox | Selecteert één of meer snippets voor bulk delete. |
| Naam | Klik op een snippetnaam om de inhoud te bekijken. |
| Gebruikt in | Toont waar het fragment wordt gebruikt. Toont een streepje als het niet wordt gebruikt. Als het wordt gebruikt, klik dan op Weergeven om de artikelen of categoriepagina's te zien waar het is ingevoegd. |
| Taal | Geeft de taal aan die aan het fragment is toegewezen. |
| Laatst gewijzigd | Toont de datum en tijd waarop het fragment voor het laatst is bijgewerkt. |
| Vertaalstatus | Klik op het globe-icoon om de voortgang van de vertaling te controleren. Een groene check betekent dat het fragment in die taal is vertaald. Een X betekent dat het dat niet is. |
| Bewerking | Opent het fragment om te bewerken. |
| Verwijderen | Verwijdert het fragment. Voor bulk delete selecteer je de selectievakjes en klik je bovenaan op Verwijderen . |
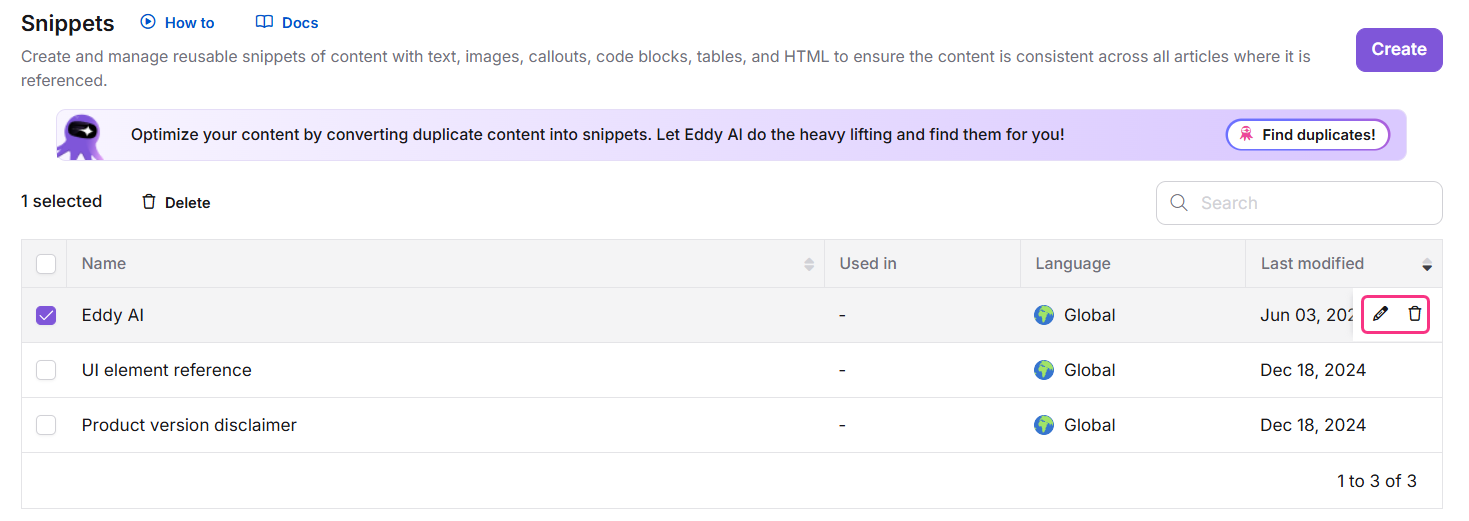
Detectie van dubbele inhoud
De banner voor detectie van dubbele inhoud bovenaan de pagina Snippets helpt je om herhaalde tekst in je documentatie te identificeren en te beheren. Deze functie wordt aangedreven door Eddy AI. Het scant je project op paragrafen die meerdere keren in artikelen voorkomen, genereert een rapport waarin blijkt waar dubbele inhoud voorkomt, en stelt voor om deze om te zetten in herbruikbare fragmenten.
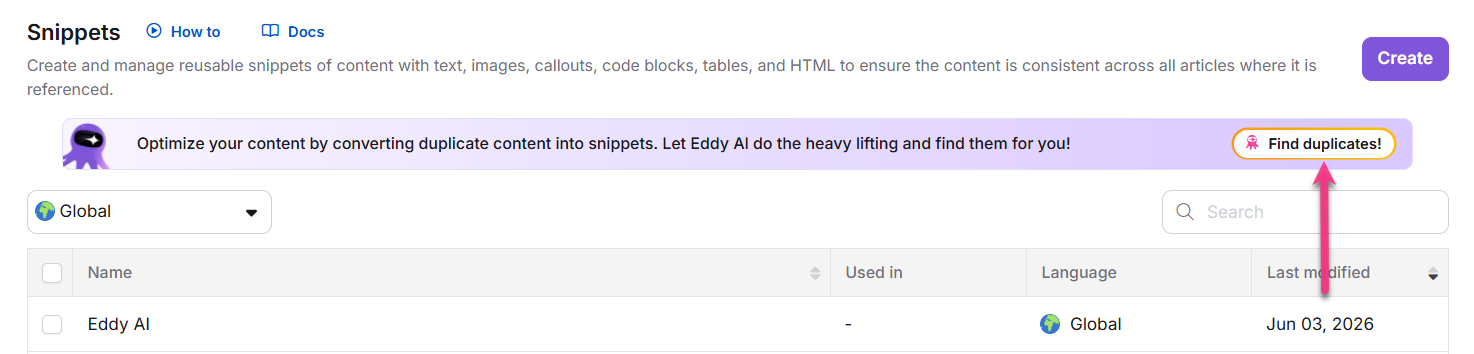
- Klik op 'Duplicaten zoeken' op de banner om je project te scannen.
- Zodra de scan is voltooid, wordt het totale aantal gedetecteerde dubbele tekstblokken weergegeven.
- Als er al een scan is uitgevoerd, klik dan opnieuw op Scannen om het proces opnieuw uit te voeren.
- Klik op Suggesties beoordelen om het rapport Duplicate Content Detection te openen en de bevindingen te bekijken.
Voor meer informatie, lees Duplicate content detection →
Maak een fragment
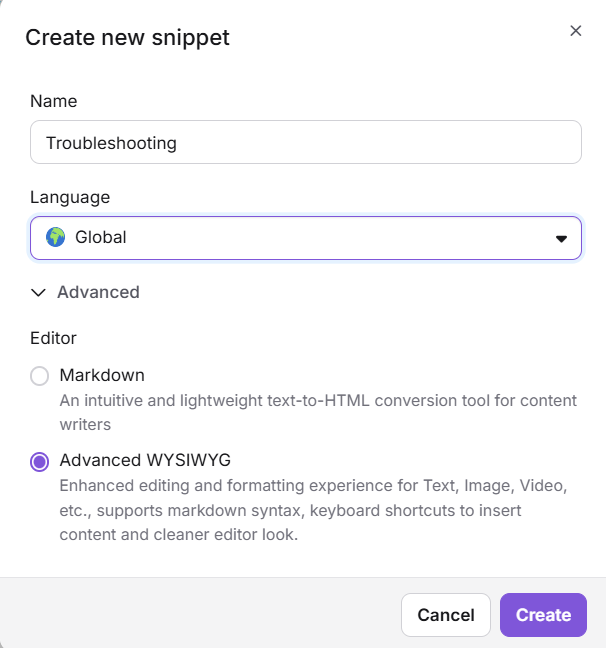
- Klik op de pagina Snippets rechtsboven op Aanmaken .
- Configureer in het menu 'Nieuw fragment aanmaken ' het volgende:
- Naam: Voer een naam in van maximaal 50 tekens. Je kunt letters, cijfers, koppeltekens en onderstrepen gebruiken.
- Taal: Kies een taal. De standaard is Global.
- Redacteur: Expand Advanced en kies Markdown of Advanced WYSIWYG. De standaard is gebaseerd op je projectinstellingen.
- Klik op Aanmaken.
- Voer je inhoud in de editor.
Markdown-editor: Gebruik de opmaaktools om je tekst te formatteren.
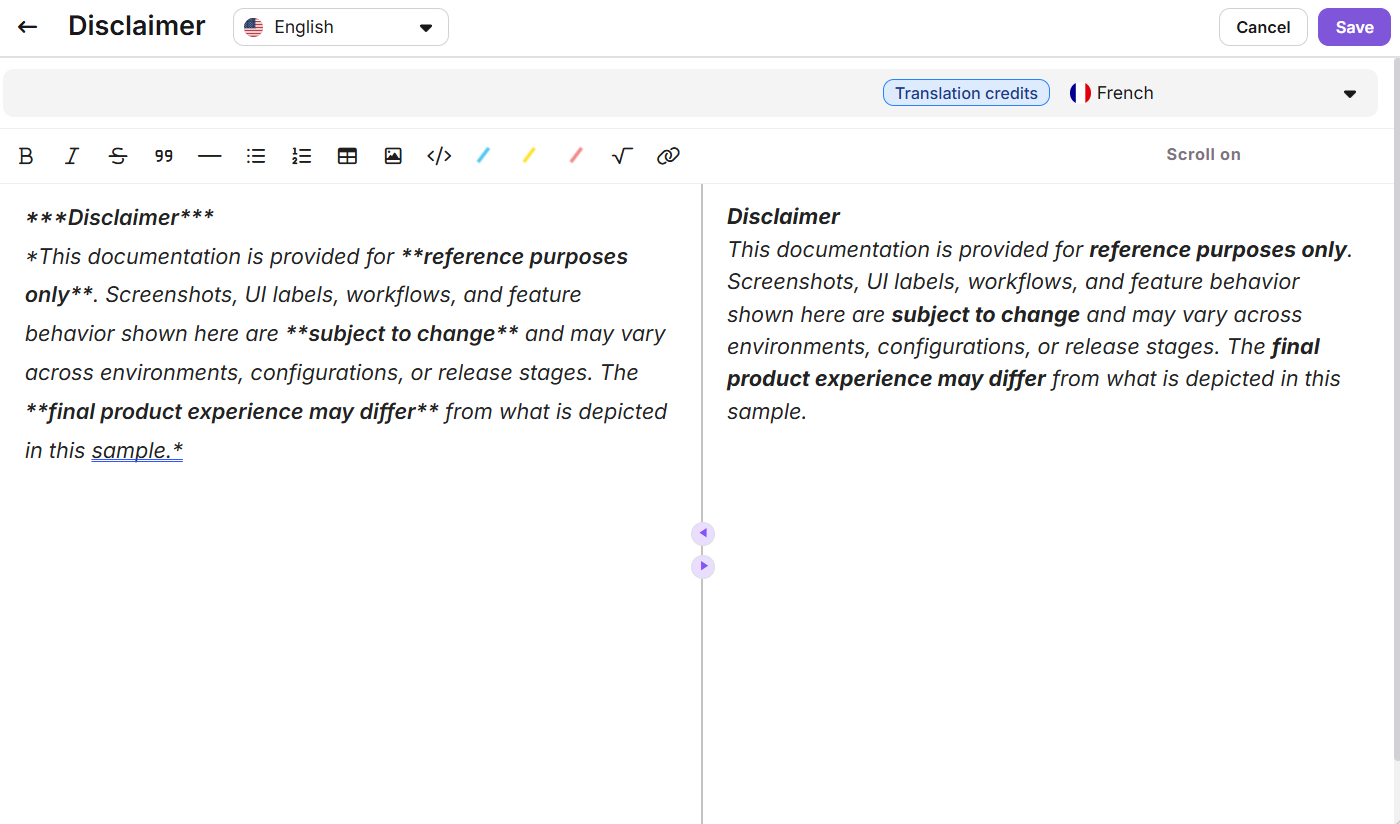
Geavanceerde WYSIWYG-editor: Gebruik de werkbalk of het snelinvoegmenu om je inhoud te formatteren.
Zodra je de Advanced WYSIWYG-editor hebt geselecteerd, kun je niet meer terug naar Markdown. Als je begint met Markdown, kun je voor vertaaldoeleinden omzetten naar Advanced WYSIWYG, omdat Markdown geen Translate with Eddy AI ondersteunt. Je kunt niet terugschakelen naar Markdown na het converteren.
- Om de taal van het fragment te wisselen, gebruik je de keuzemenu bovenaan de editor.
- Klik op opslaan of druk op
Ctrl + S.
Je kunt ook aangepaste HTML gebruiken in Codeweergave voor opmaak. Niet-ondersteunde tags worden automatisch gesaniteerd.
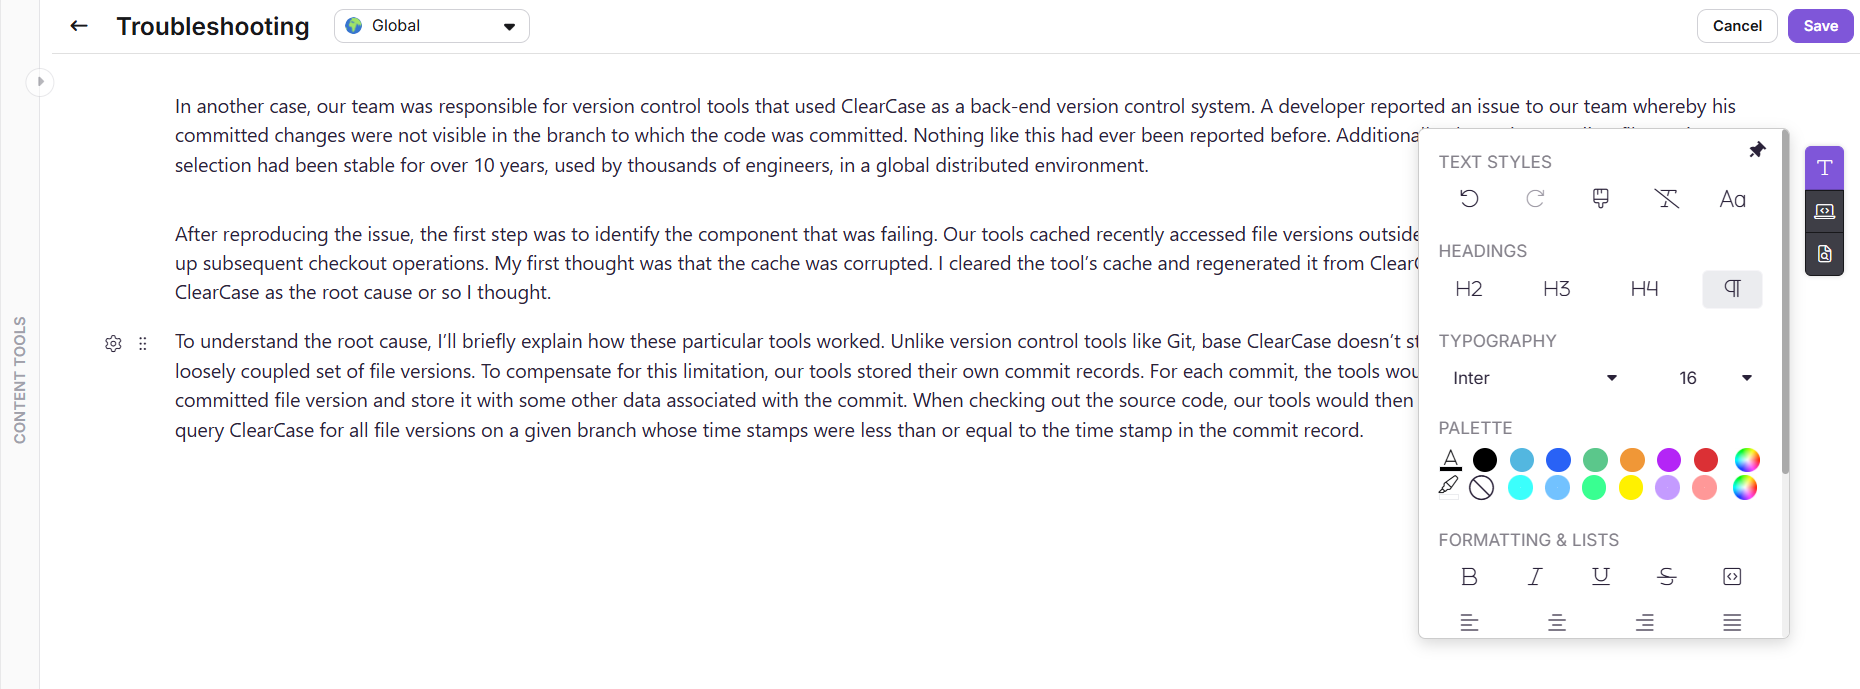
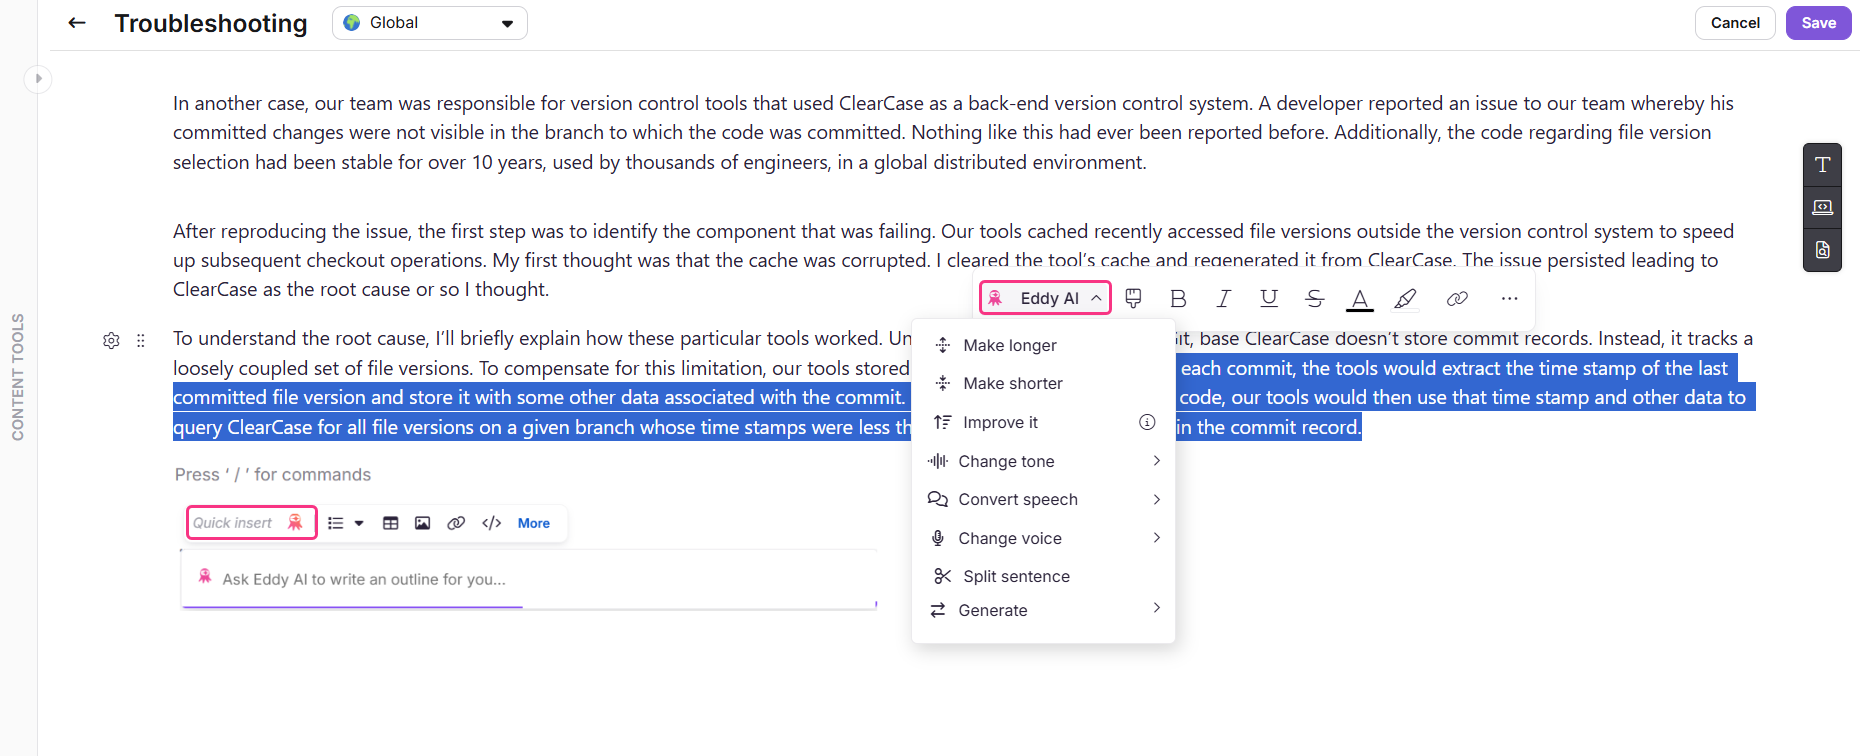
Gebruik Eddy AI in snippet-content
Terwijl je een fragment opstelt in de Advanced WYSIWYG-editor, beweeg je met de muis over de inhoud en gebruik je Eddy AI om de tekst langer of korter te maken, te verbeteren, toon te veranderen, spraak te converteren, de stem te veranderen, zinnen te splitsen of elementen zoals tabellen, taartdiagrammen en stroomdiagrammen te genereren.
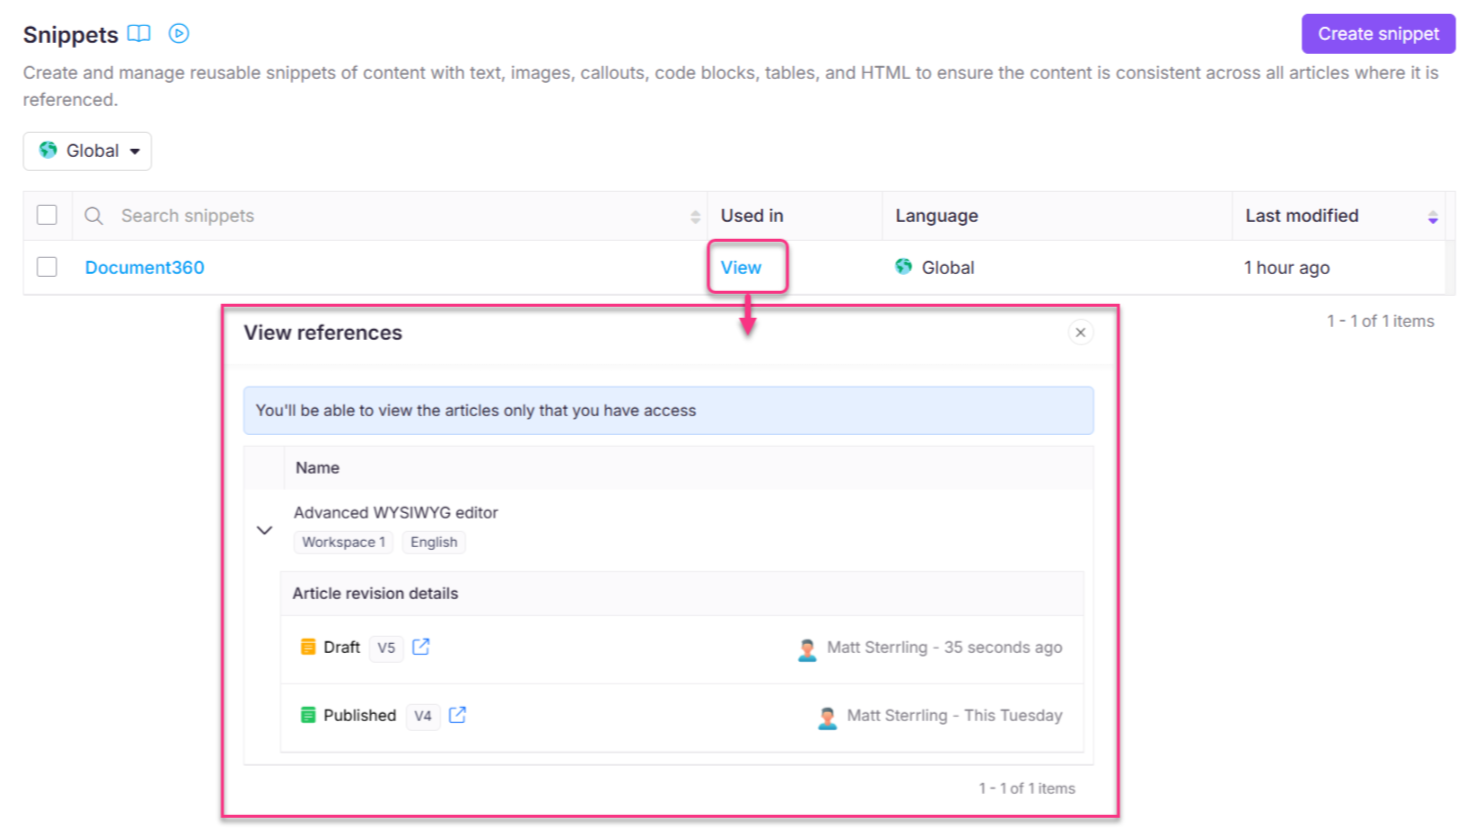
Gebruik van snippets bekijken
Voordat je een fragment bewerkt of verwijdert, kun je precies controleren welke artikelen en categoriepagina's het gebruiken.
- Op de pagina Fragmenten vind je het fragment in de kolom Gebruikt in .
- Klik op Bekijken. Het paneel Referenties bekijken opent. Voor elke referentie kun je de artikelversie, projectwerkruimte en taal, de naam van de gebruiker die het fragment toevoegde, de artikelstatus (Concept of Gepubliceerd) en de datum en tijd zien waarop het fragment is ingevoegd.
- Klik op het pictogram om die artikelversie in een nieuw tabblad te openen.
Een fragment bewerken
- Op de pagina Fragmenten beweeg je met de muis over het fragment en klik je op het pictogram Bewerken () ().
- Werk de inhoud bij indien nodig.
- Klik op Update.
Wanneer je een fragment bijwerkt, worden de wijzigingen automatisch weergegeven in alle artikelen en categoriepagina's waar het wordt gebruikt, inclusief gepubliceerde, zonder dat je ze opnieuw hoeft te publiceren.
Verwijder een fragment
- Op de pagina Snippets , ga met de muis over het fragment en klik op het pictogram Verwijderen () ().
- Klik op Ja in het bevestigingsmenu.
Om bulk te verwijderen, selecteer je de selectievakjes naast de snippets die je wilt verwijderen en klik je bovenaan de lijst op Verwijderen .
Wanneer je een fragment verwijdert, wordt het verwijderd uit alle artikelen waar het naar wordt verwezen. Het artikel behoudt zijn huidige versie. Op de kennisbanksite past de omliggende inhoud zich automatisch aan en blijft er geen lege ruimte over. In het portaal verschijnt er een laadsymbool in het contentblok waar het fragment is verwijderd. Selecteer dit blok om een nieuw fragment in te voegen of verwijder het handmatig.
Beperkingen
| Item | Detail |
|---|---|
| Lengte van de snippetnaam | Maximaal 50 tekens. |
| Snippetnaampersonages | Alleen letters, cijfers, koppeltekens en onderstrepen. |
| Snippetnaam | Kan niet worden veranderd na de creatie. |
| Editortype | Zodra het is overgeschakeld naar Advanced WYSIWYG, kan het niet worden teruggezet naar Markdown. |
| Globale fragmenten | Kan niet vertaald worden. |
| Snippet-aantal per project | Tot 200 fragmenten. Extra fragmenten zijn beschikbaar als add-on. |
| Variabelen binnen snippets | Niet ondersteund. Variabelen worden niet correct weergegeven in de editor-preview of PDF-exports. |
Best practices
- Kies je editor zorgvuldig bij het aanmaken. Overstappen van Markdown naar Advanced WYSIWYG is mogelijk, maar onomkeerbaar. Gebruik Advanced WYSIWYG als je van plan bent het fragment te vertalen of rich formatting te gebruiken.
- Noem fragmenten beschrijvend. Gebruik namen die het type en doel van de inhoud aangeven, bijvoorbeeld
Support_Contact_BlockofAPI_Disclaimer. Dit maakt het makkelijker om fragmenten te vinden en in te voegen zonder elk fragment te bekijken. - Gebruik standaard Global scope. Stel de taal in op Global , tenzij de snippet-inhoud echt per taal verschilt. Taalspecifieke snippets vereisen apart beheer per taal.
- Controleer afhankelijkheden voordat je verwijdert. Gebruik View in de kolom 'Gebruikt in ' om de impact tussen artikelen te bevestigen voordat je een fragment verwijdert dat mogelijk veel gebruikt wordt.
- Ik geef de voorkeur aan fragmenten boven kopiëren en plakken. Als hetzelfde blok inhoud in meer dan twee artikelen voorkomt, maak dan een fragment aan in plaats van het handmatig te dupliceren.