Plans supporting this feature: Enterprise
You can configure Document360's SAML Single Sign-On (SSO) with the Microsoft Entra as the Identity provider. Please note that only users with Owner or Admin as Project role can configure SSO in Document360.
PRO TIP
It is recommended to open Document360 and Entra in two separate tabs/browser windows, since configuring SSO in Document360 will require you to switch between Okta and Document360 multiple times.
Adding an application in the Azure portal
Sign in for Entra
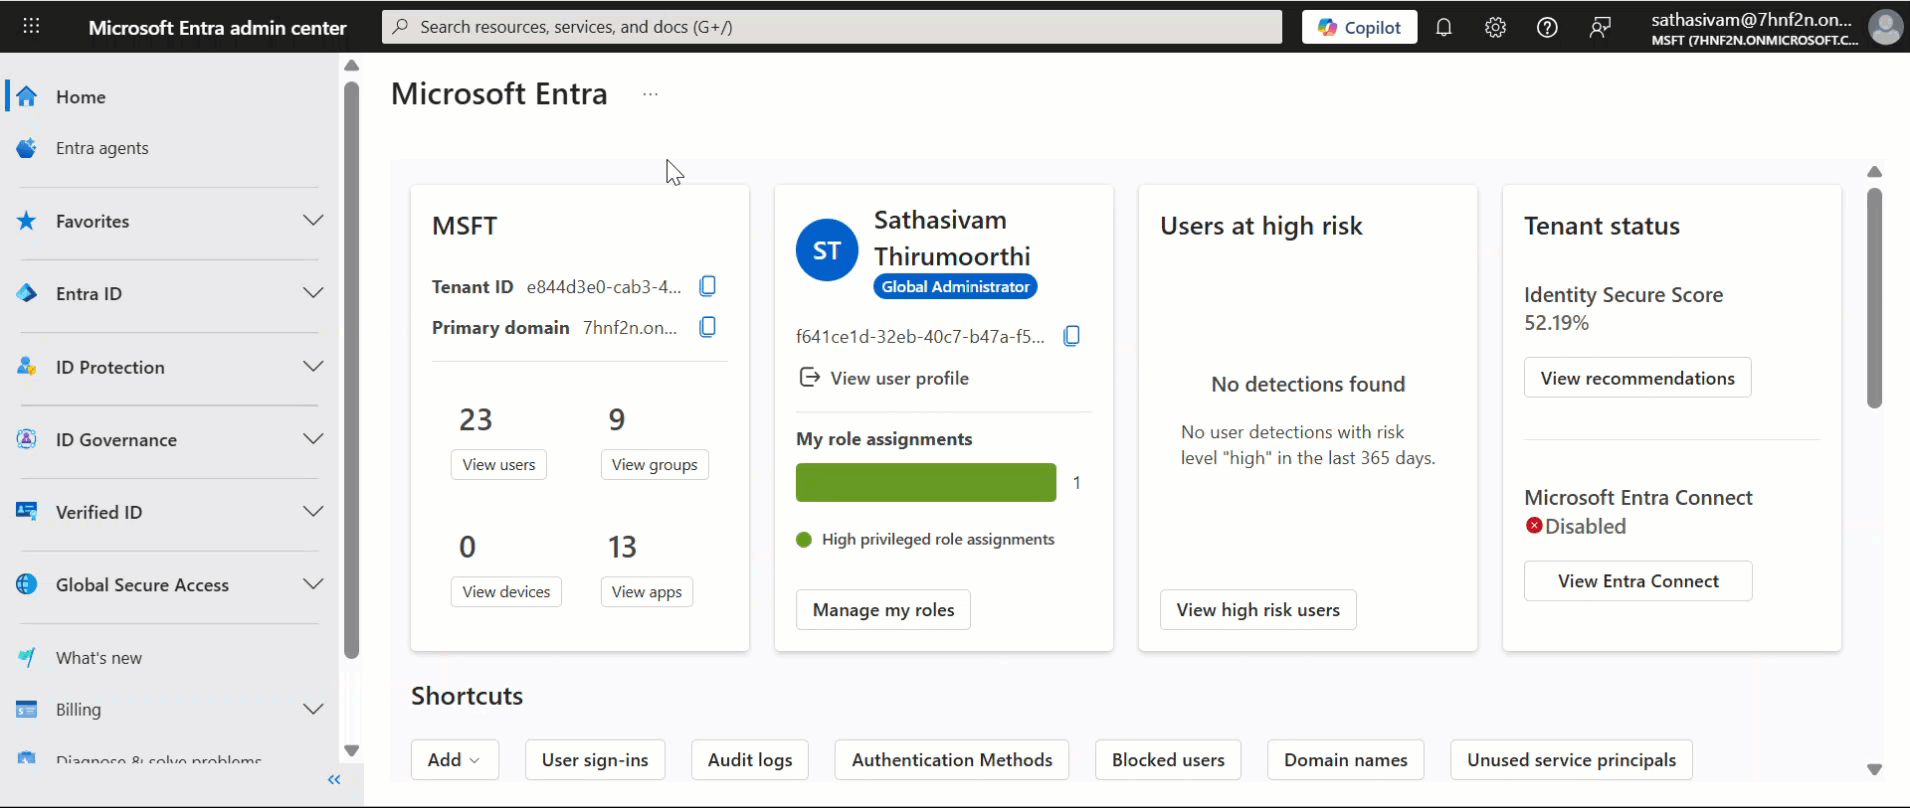
Log in to your Microsoft Azure account using your credentials (Link: https://entra.microsoft.com/#home).
Once logged in, you will be navigated to the Microsoft Entra admin center page.
Adding your application
To create an application in Entra to configure with Document360,
In the Microsoft Entra admin center page, select Entra ID from the left navigation bar and click Enterprise apps.
On the Enterprise applications page, click New application > Create your own application.
Enter a name of your app in the Input name field and click Create.
Application in Entra is successfully created.
Configure SAML in Entra with Document360
Open Document360 in a separate tab or panel.
Navigate to Settings > Users & permissions > SSO Configuration in Document360.
Click the Create SSO button.
.png)
Select Entra ID as your Identity Provider (IdP) to navigate to the Configure the Service Provider (SP) page automatically.
.png)
In the Configure the Service Provider (SP) page, you'll find the required parameters to configure your SAML integration in the Identity Provider.
.png)
Go to Microsoft Entra, and in the created application page open Single sign-on tab and select SAML method.
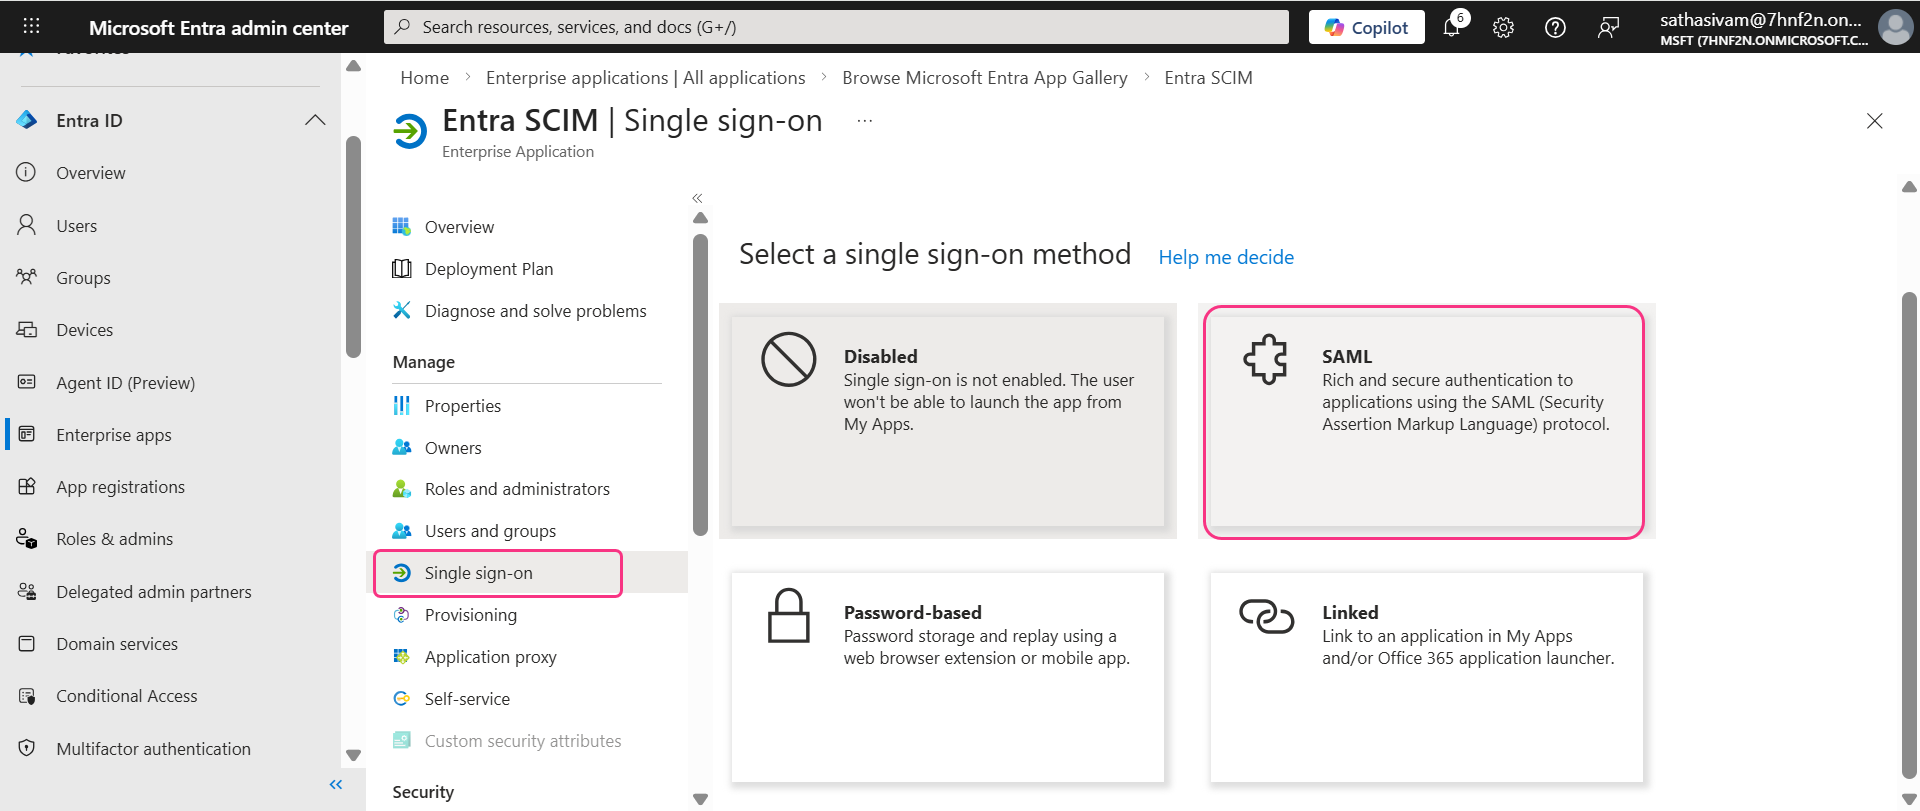
Then, click Edit on the Basic SAML Configuration section and enter the parameters from Document360 as shown below.
Entra | Document360 |
|---|---|
Reply URL (Assertion Consumer Service URL) | Callback path |
Sign on URL | Callback path |
Identifier (Entity ID) | Service provider entity id |
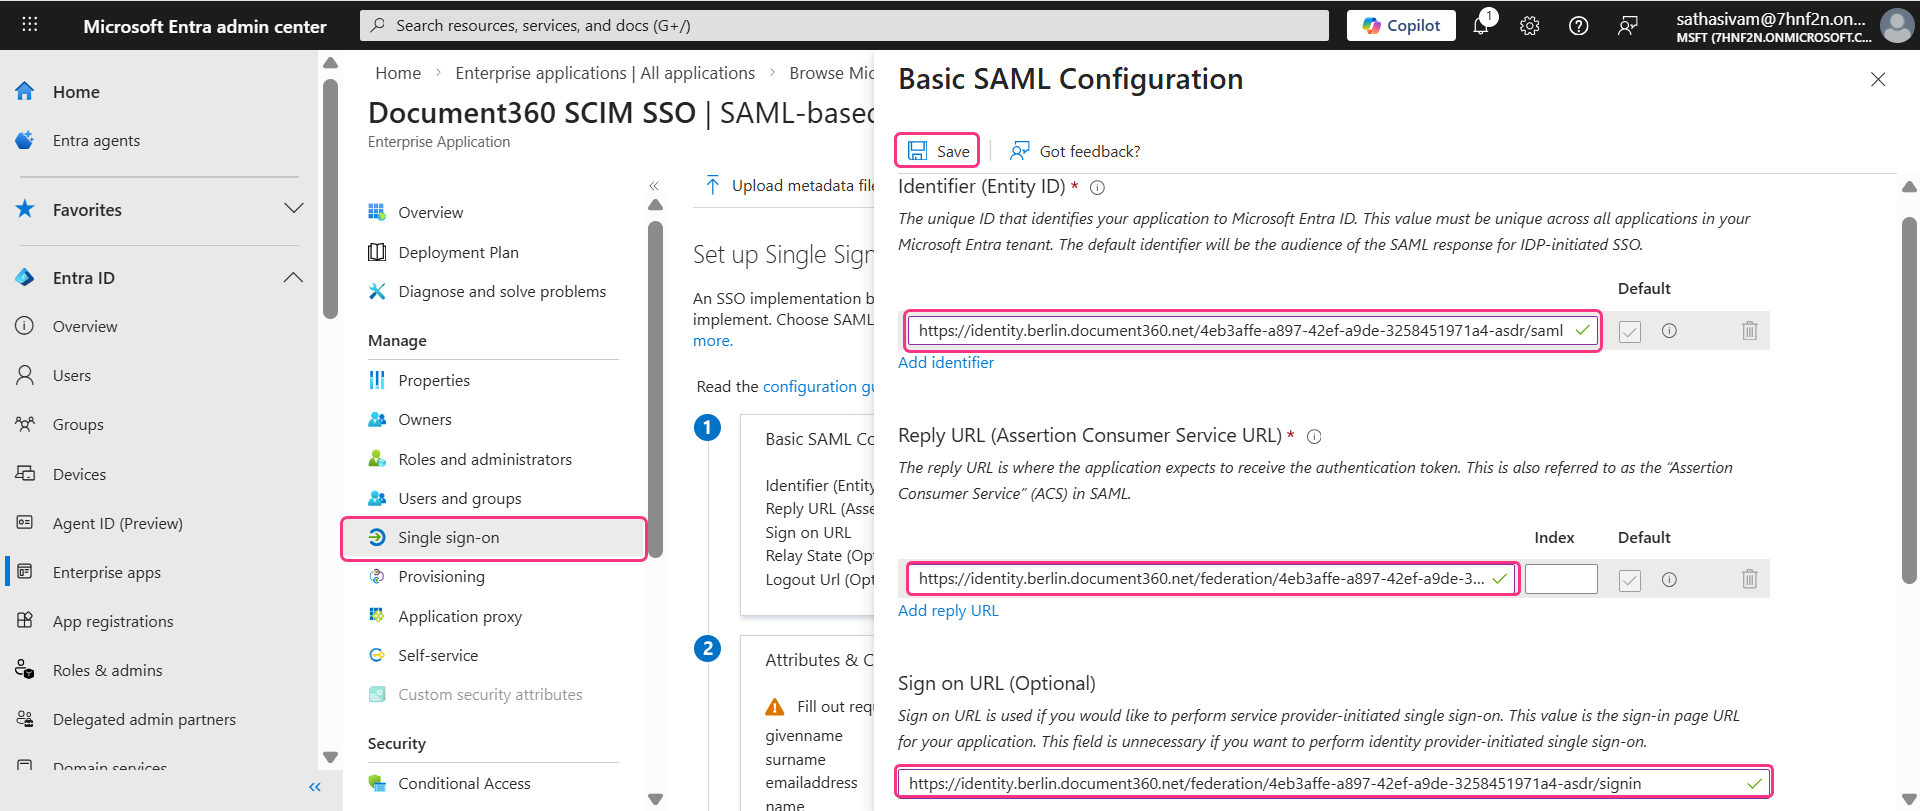
Click Save once you’ve entered the necessary fields.
Document360 SSO configuration
Finally, complete the SSO configuration in Document360:
Return to Document360 and click Next to navigate to the Configure the Identity Provider (IdP) page.
If you already have an existing SSO configuration, you can select it from the Configure an existing connection dropdown to inherit its settings. This eliminates redundant setup and saves time.
NOTE
For more information on Inheritance, go to Managing Users and Readers with SCIM in Entra.
.png)
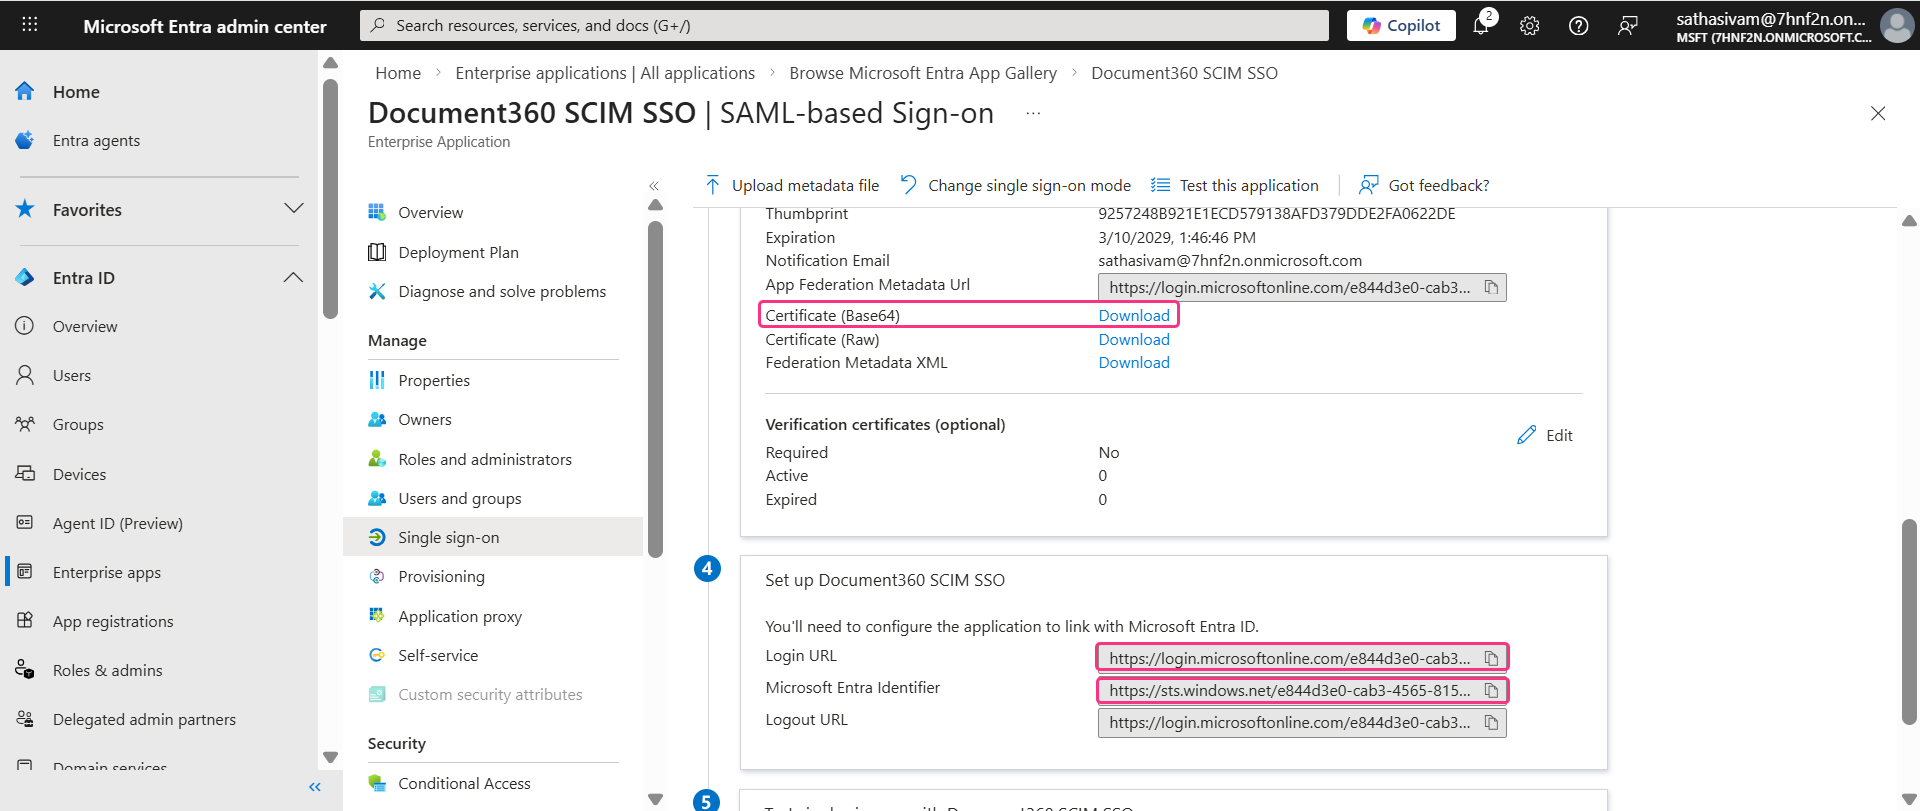
Fill in the required fields using the parameters found in the Set up Document360 SCIM SSO section of the Entra page, as shown below.
Entra | Document360 |
|---|---|
Login URL | Sign on URL |
Microsoft Entra Identifier | Entity id |
SAML certificate | Certificate (Base64) |
Download the Certificate (Base64) in the SAML Certificates section and attach it to the SAML certificate field in Document360.
Toggle on/off the Allow IdP initiated sign in option based on your project requirements.
Click Next to proceed to the SCIM provisioning page.
SCIM Provisioning
If needed, you can enable SCIM in Entra with Document360 by following the steps below.
In the SCIM provisioning page in Document360, turn on the Enable SCIM provisioning toggle.
A confirmation dialog will appear, read the terms and click Agree. A set of parameters will then be displayed.
.png)
Go to Entra, and select Provisioning tab in the left menu and then select New configuration at the top menu.
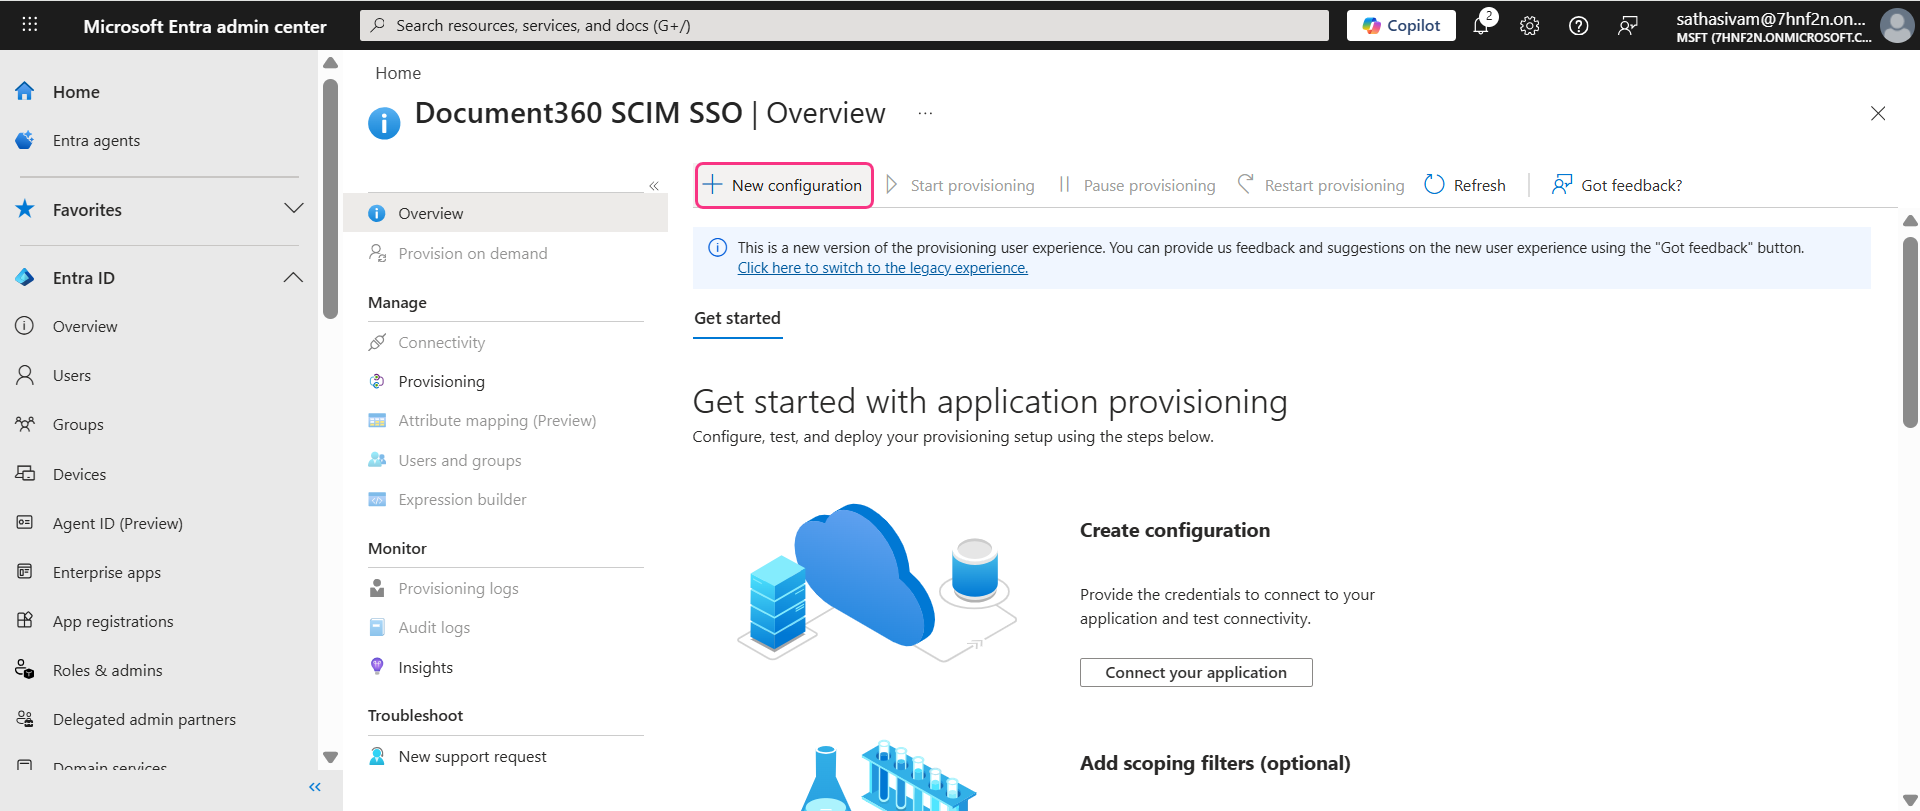
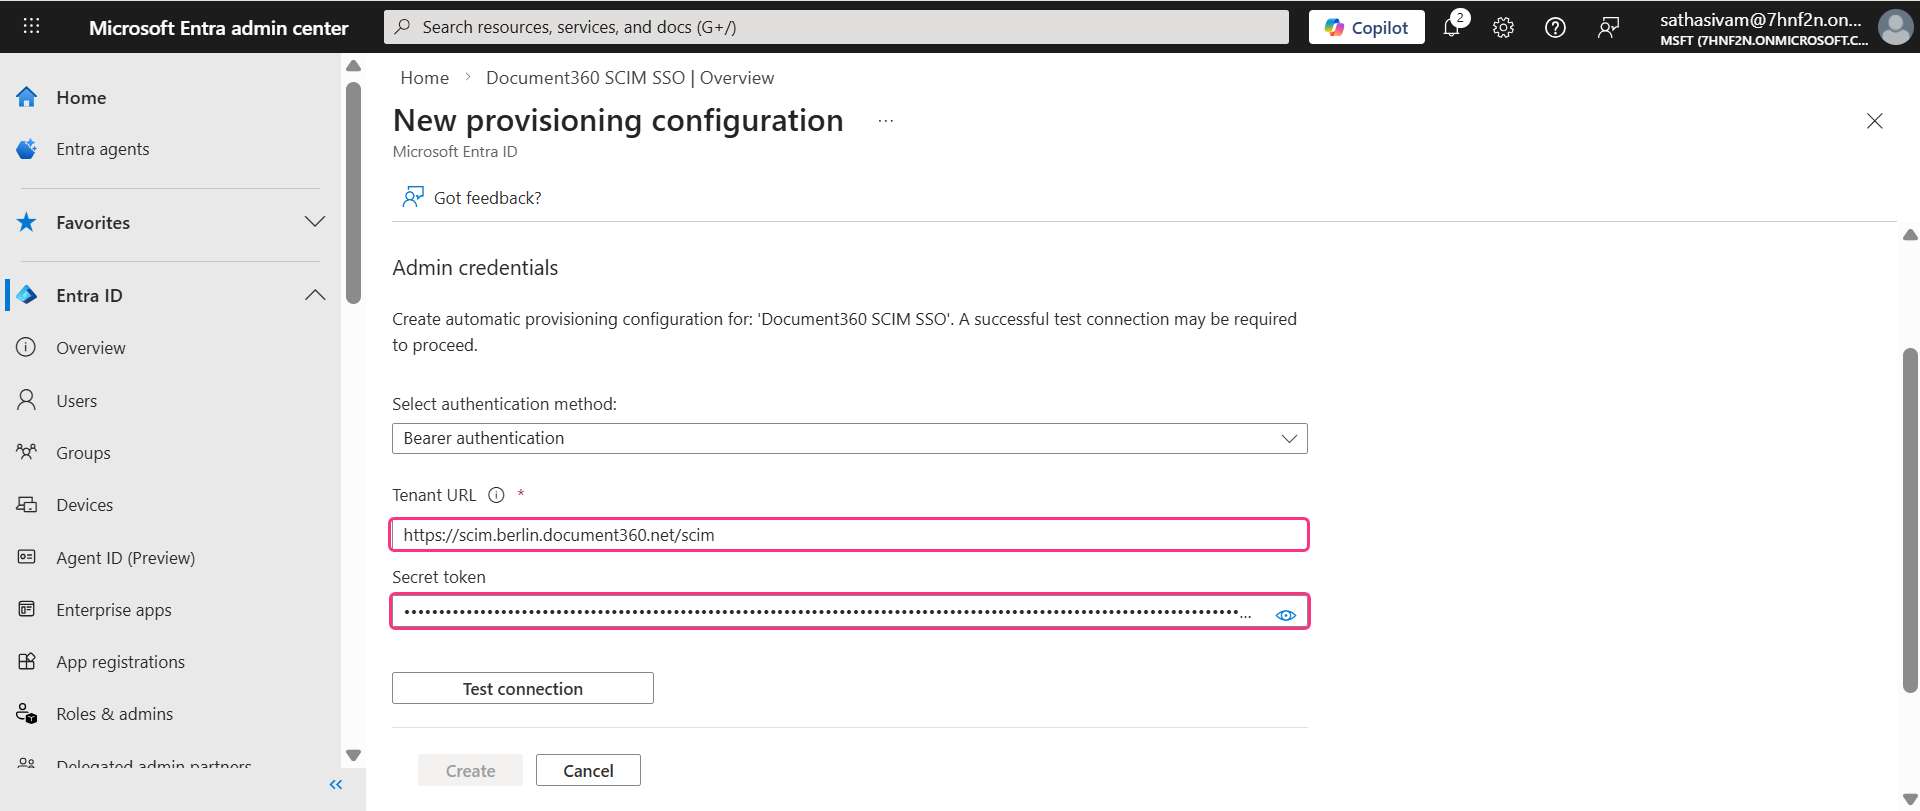
The New provisioning configuration page will be displayed where you need to fill in the fields in the Admin credentials section.
Navigate back to SCIM provisioning page in Document360 and enter these parameters to Entra as shown below.
Entra | Document360 |
|---|---|
Tenant URL | SCIM Base URL |
Secret token | Primary secret token |
NOTE
Do not click Test connection or Create at this stage. The SSO configuration in Document360 must be completed first before the SCIM provisioning connection can be established successfully.
Navigate back to Document360 and turn on the Enable group sync toggle. When enabled, users and reader groups are automatically assigned based on IdP group mappings.
In the Default role field, the role is set to Contributor by default. You can change this from the dropdown if needed.
In the User groups and Reader groups fields, select the groups you want to add. Multiple groups can be added, and they will inherit the default role you selected earlier.
Click Next to navigate to More settings page.
More Settings
In the More settings page, configure the following:
SSO name: Enter a name for the SSO configuration.
Customize login button: Enter the text for the login button displayed to users.
Auto assign reader group: This option is only available for existing SSO configurations. For newly created SSO configurations, the Auto assign reader group toggle will not be displayed as SCIM automatically provisions users and groups.
Sign out idle SSO user: Toggle on/off based on your requirements.
Choose whether to invite existing user and reader accounts to SSO.
.png)
Click Create to complete the SSO configuration.
SSO configuration in Document360 is created successfully.
Complete SCIM provisioning:
Navigate back to Entra, where the New provisioning configuration page is displayed.
Once all the required fields have been filled in, click Test connection to verify the configuration.
.png)
A confirmation message will appear once the SCIM provisioning connection between Entra and Document360 is successful.
Click Create to finalize the configuration.
The SCIM provisioning between Entra and Document360 has been successfully created.
NOTE
For more details on how to manage users, readers and groups in Entra. Go to Managing Users and Readers with SCIM in Entra.