Plans supporting this feature: Business Enterprise
Zapier is an online automation tool that helps to connect Document360 with other third-party tools and applications. Zapier acts as a buffer by creating automated workflows called Zaps, which work based on actions and triggers.
Prerequisites
You must have an active Zapier account to begin with or sign up for one.
An account in the third-party application you wish to connect with Document360 using Zapier (for example, Google Docs, Typeform, and more.)
Check out Zapier's getting started guide to learn how to connect to Document360 with other apps on Zapier, build workflows, and automate repetitive tasks
API key generation in Document360
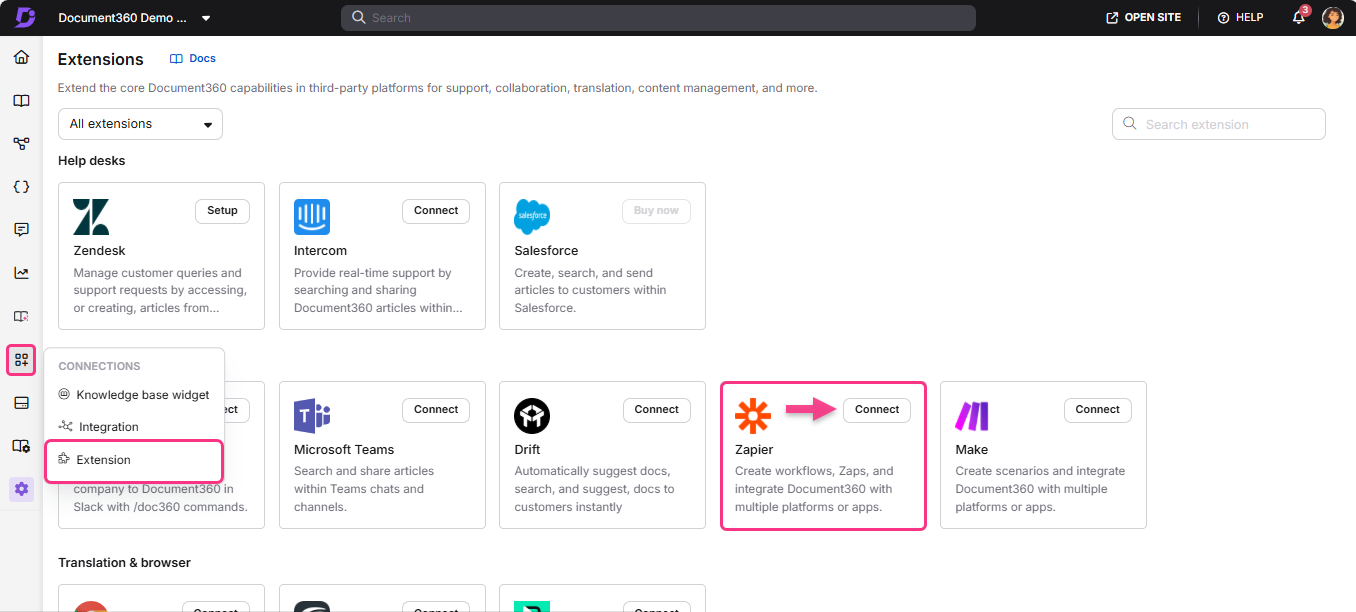
Navigate to Connections () > Extensions in the left navigation bar in the Knowledge base portal.
On the Zapier extension tile, click Connect.
A Zapier details popup appears with a generated Token.
Click the Copy () icon.
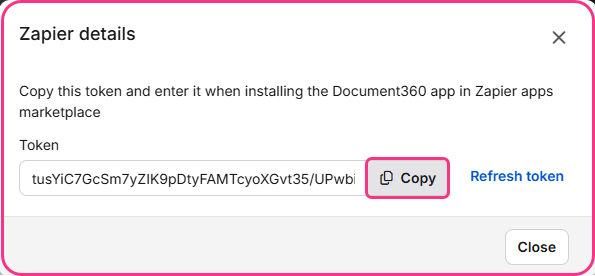
This API key will be used to connect the Document360 knowledge base with third-party applications on Zapier.
Zapier use cases for Document360
Below are some useful Zapier integrations that can enhance your experience with Document360 by connecting it to popular tools: