Many organizations around the world use Google Docs as a document management tool. Google, as a platform, offers a more integrated environment where managing multiple forms of documents and files is rather easy.
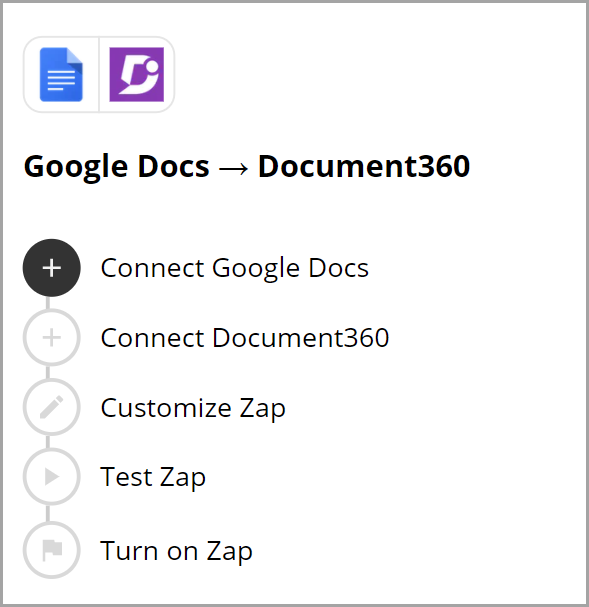
Integrating Google Docs with Document360
Using Document360 as your knowledge base platform, you can collaborate with multiple external vendors who contribute content through Google Docs. While Google Docs is a great platform for collaboration, manually transferring these articles to Document360 can be time-consuming and effort-intensive.
By connecting Google Docs and Document360 on Zapier, you can easily facilitate the content flow between these platforms. To establish a connection between Google Docs and Document360, follow the below steps:
Ensure that you have logged into your Zapier account.
From the left navigation menu, click Create and then click Zaps from the options available.
Zap will be created with Trigger and Action flow.

Connecting Google Docs and Document360 in Zapier
Step 1: Connecting Google Docs
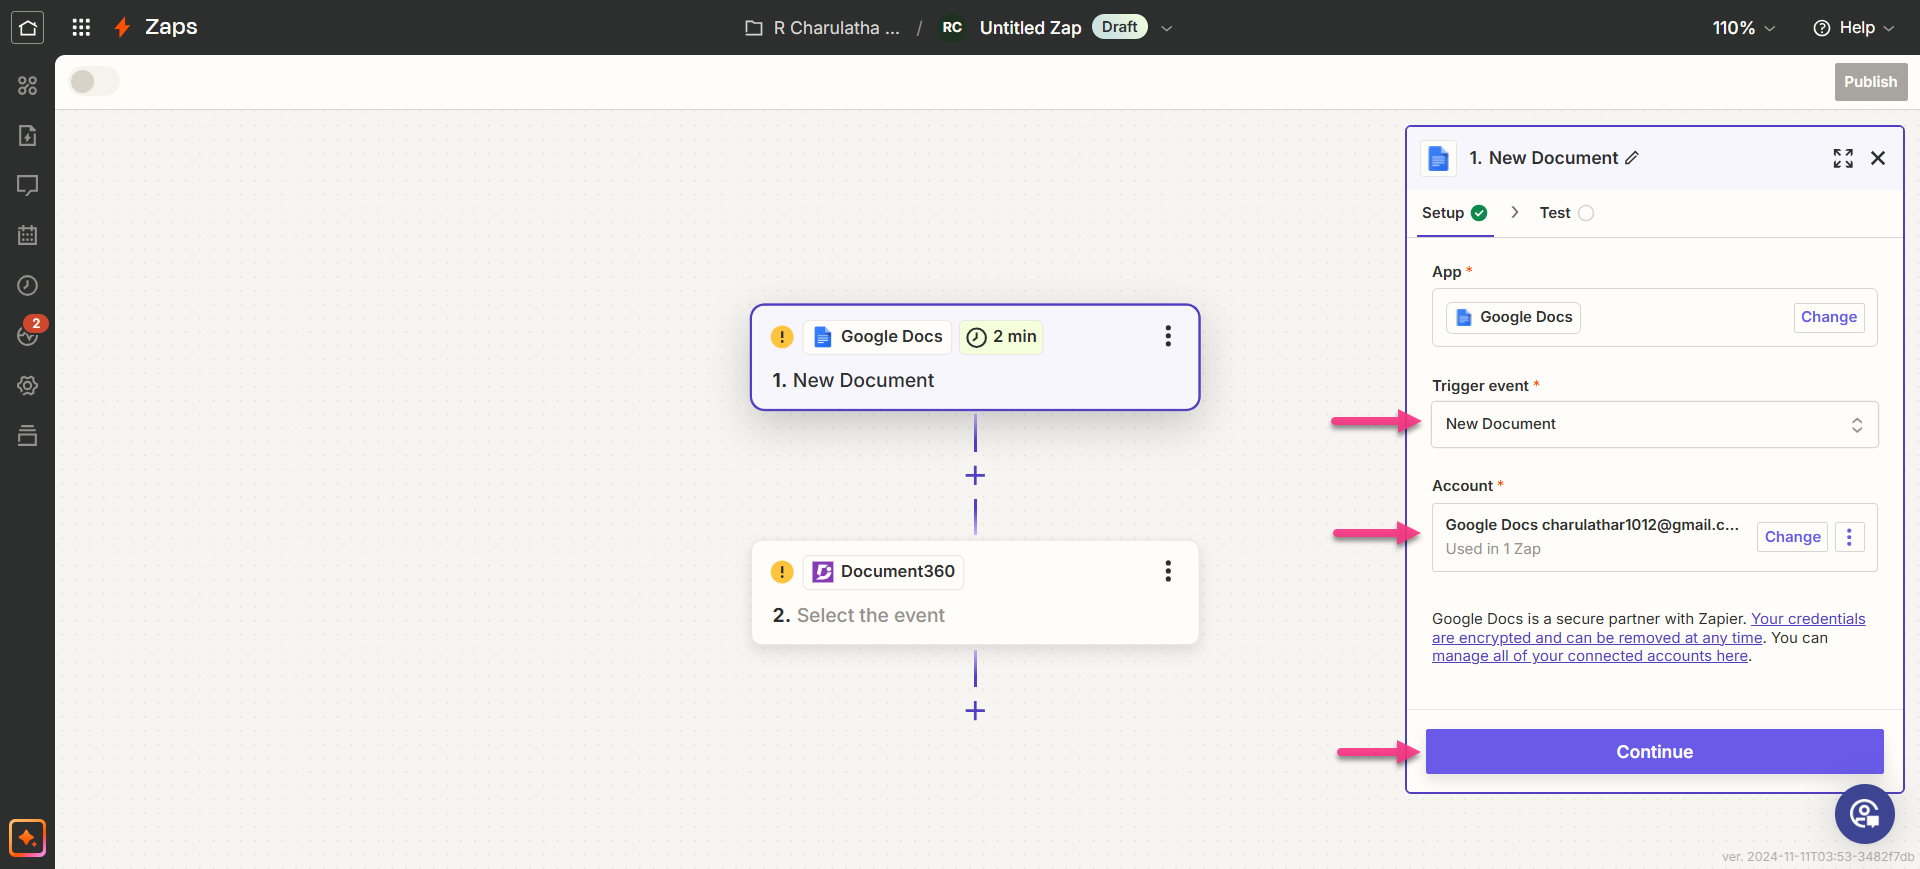
In the Trigger field, choose Google Docs.
In the Trigger event field, select the required Event to trigger in the Google Docs.
If you wish to configure a different app later, you can do that by clicking on Change.
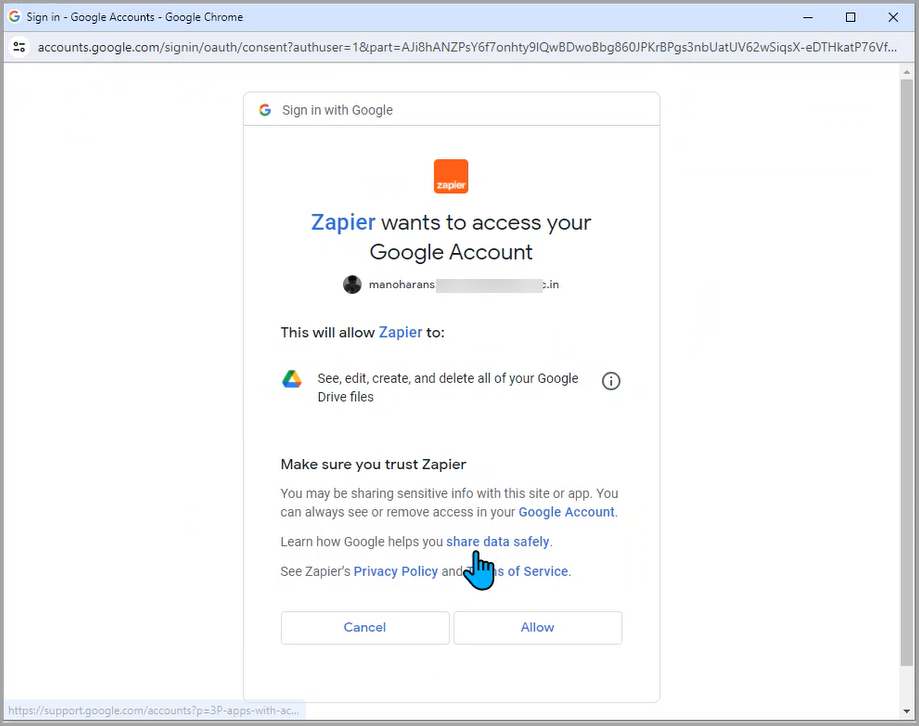
Click the Account field, and a Sign-in panel will appear.
Enter your sign-in credentials and click Allow.
Click Continue.
Find the list of folders retrieved from your connected Google Drive account.
Choose the desired folder and click Continue.
Zapier runs a test to make sure the trigger is correctly configured.
Create a Google Doc inside the selected folder and test the trigger.
Step 2: Connecting Document360
In the Action field, choose Document360.
On the Setup panel that appears on the right, select a desired event in the Event field.
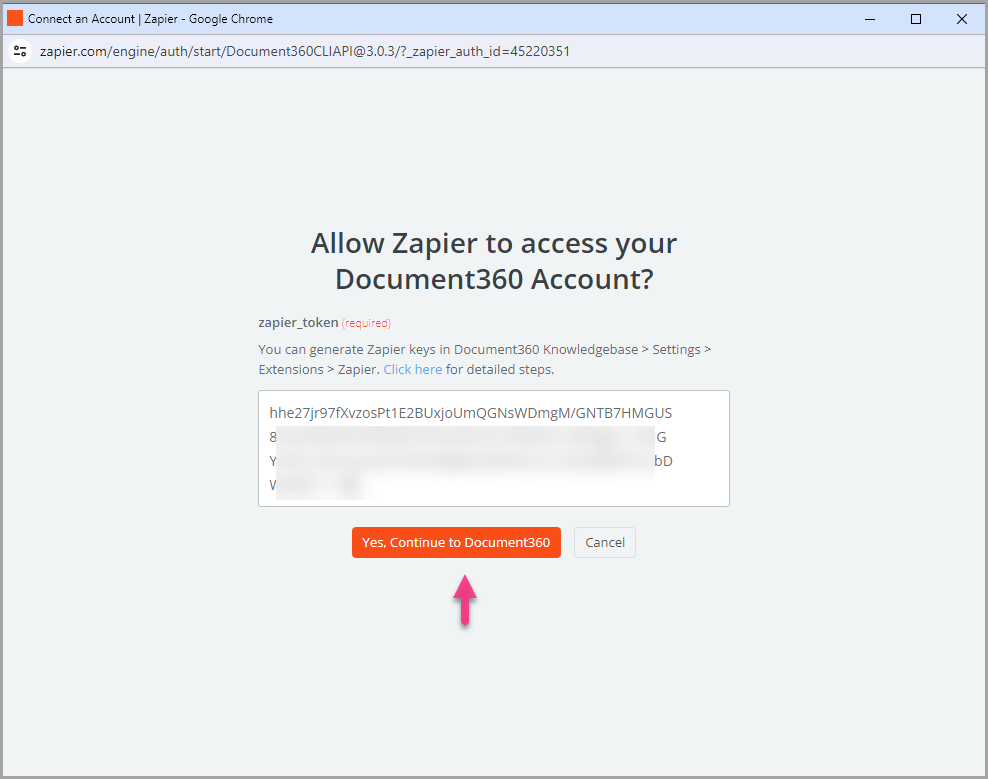
Click the Account field and a Sign-in panel appears.
Enter your sign-in credentials and click Allow.
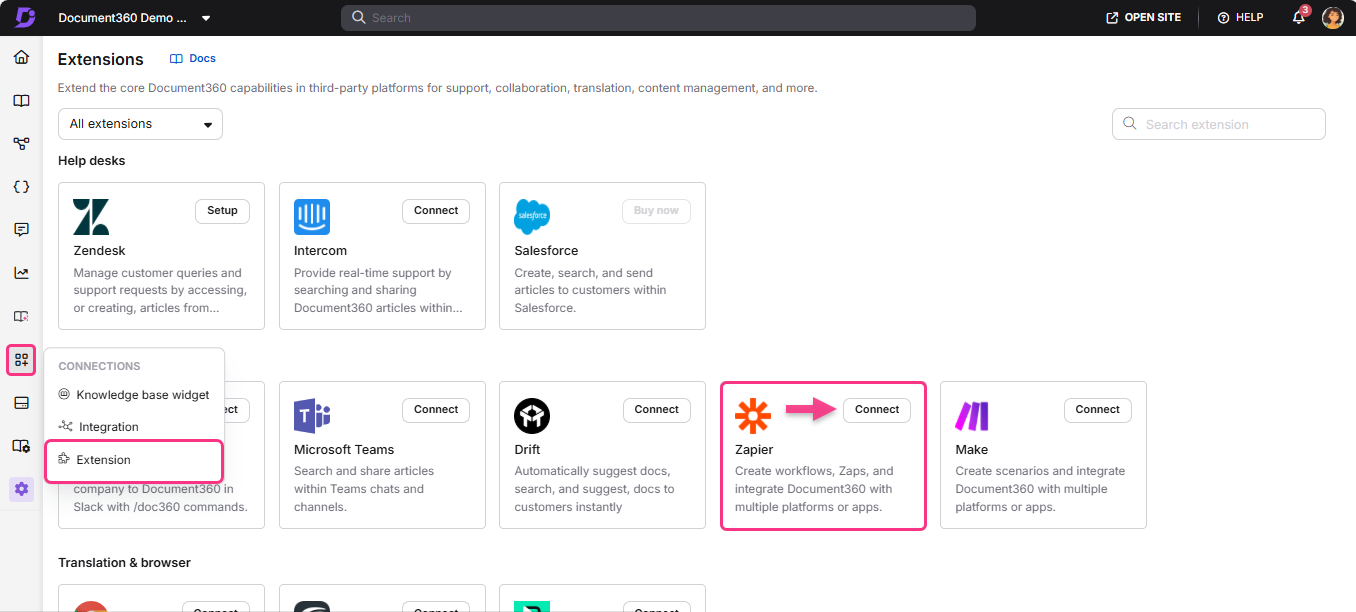
To generate the API token from the Document360 portal,
Navigate to Connections () > Extensions in the left navigation bar in the Knowledge base portal.
On the Zapier extension tile, click Connect.
Click the Copy () icon to copy the token.
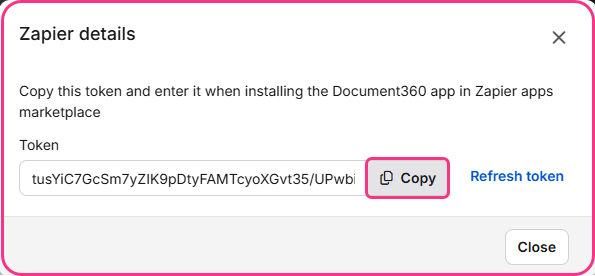
Head back to the Zapier panel and paste the API token in the field.
Click Yes, Continue to Document360.
You can find the connected Document360 project on the Connect Document360 account page.
If you wish to configure a different account later, you can do that by clicking on Change.
Click Continue.
Step 3: Customize Zap
Map the fields from Google Docs into Document360. Map all the required fields:
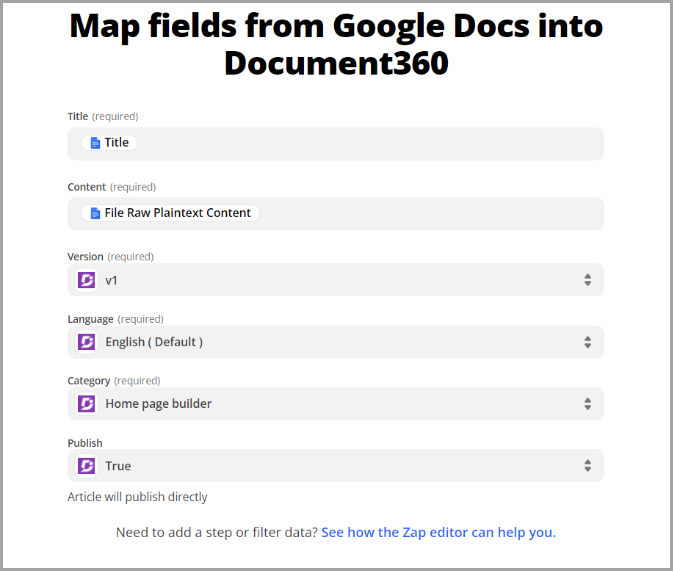
Title: By default, the title in Google Docs is selected here. However, you will have various options available depending on your business requirements.
Content: By default, content in Google Docs is selected here. However, you will have various options available depending on your business requirements.
Version: Choose the desired workspace in the knowledge base project where you wish to create the article.
Language: Choose the desired language in the selected workspace in which you wish to create the article.
Category: Choose the desired category in the selected language in which you want the article to be created.
Publish: Choose True for the article to be published. Choose False for the article to be in draft state.
Once done, click Continue.
NOTE
Only after you map all the required fields, the Continue button will be enabled.
Test Zap
In the test section, click Test step.
If it is successful, you will get the message ‘An Article was sent to Document360’.
In your Document360 Knowledge base portal, you'll find the article titled after the Google Docs file name, located in the folder you previously selected.
Head back to the Zapier setup panel.
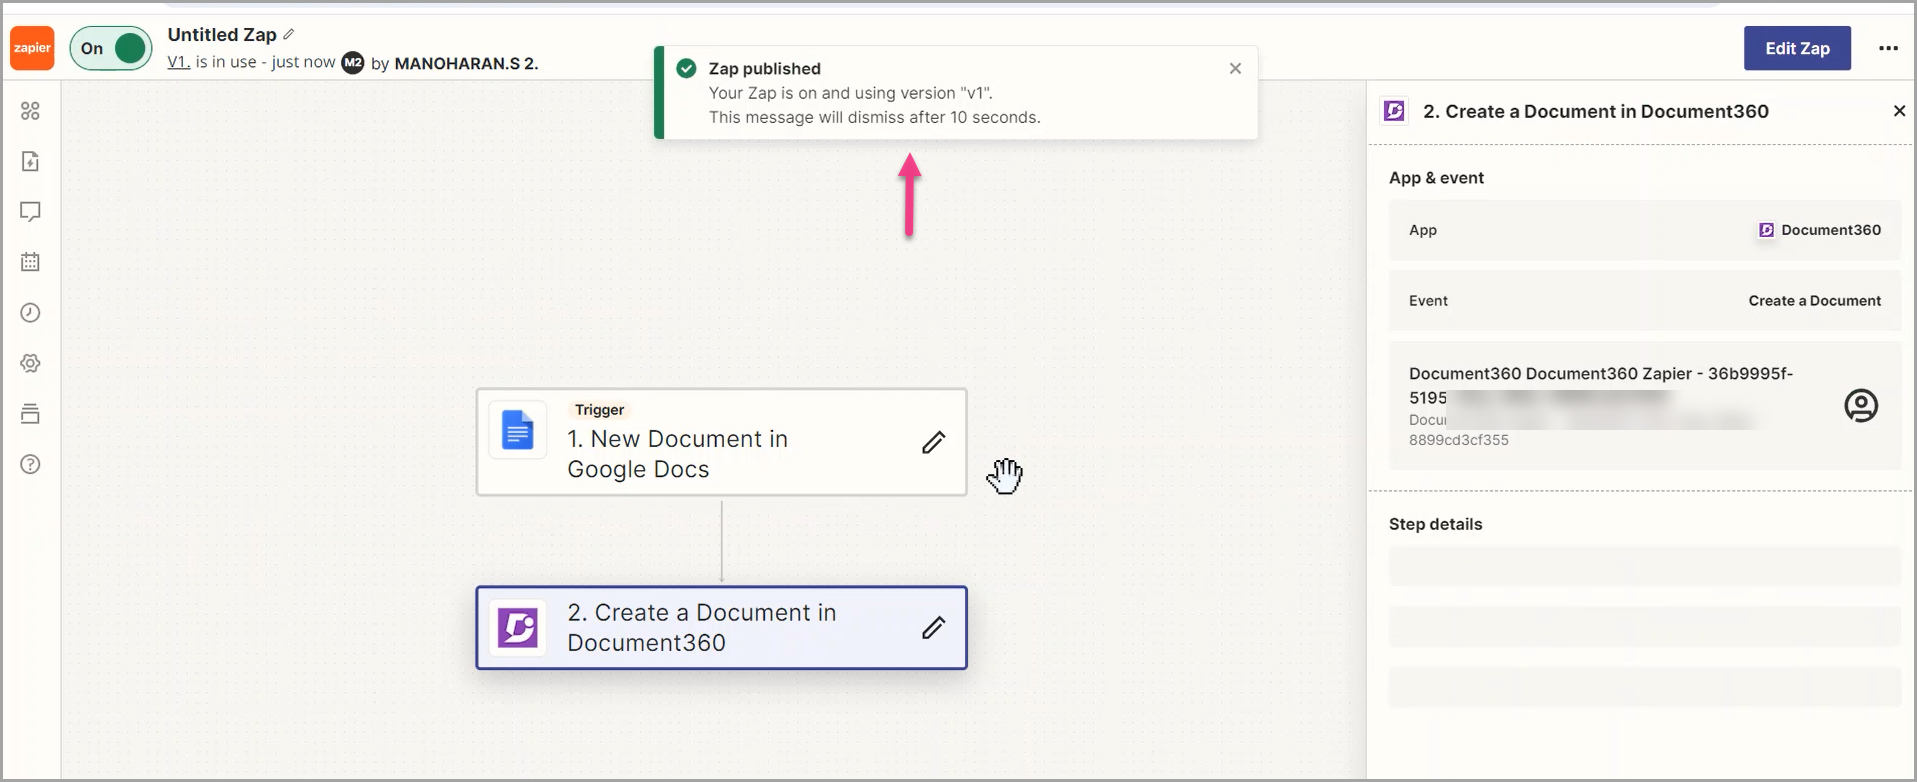
Turn on Zap
After testing the Zap, review or edit the settings before turning on the Zap.
You can edit the settings configured on the Google Docs trigger and the corresponding action of the new article in Document360.
You would get a success message stating Your Zap is on. You can click on the Manage your Zap button to go to your Google Docs+Document360 Zap overview page.
Zap overview
Create articles in Document360 from a new Google Docs file
You can view and edit the information about the Zaps created on the Zap overview page.

Deleting a Zap
Navigate to the Zapier dashboard. On the overview page, a list of all existing Zaps will be displayed.
Click the arrow (>) icon to the right of the desired Zaps and click Turn off and delete Zap.
The selected Zap will be deleted.