Abonnementen die deze functie ondersteunen: Business Enterprise
Intercom is een op gesprek gebaseerde zakelijke oplossing. Het is een SaaS-product dat effectieve klantcommunicatie mogelijk maakt via chatbots, live berichten, enzovoort.
Je kunt Intercom gebruiken met Document360 om realtime ondersteuning te bieden aan je websitegebruikers door artikelen (link of artikelinhoud) te zoeken en te delen vanuit je Document360 Knowledge Base binnen de Intercom .
Vereisten: Om de Intercom messenger-integratie in Document360 mogelijk te maken, heb je een Intercom en de Intercom workspace-ID nodig die aan dat account is gekoppeld.
OPMERKING
Dit artikel legt uit hoe je je Document360-kennisbank kunt verbinden met Intercom, zodat je supportmedewerkers direct in de Intercom Inbox kunnen zoeken, bekijken en artikelen delen. Deze integratie is bedoeld voor de productiviteit aan agentzijde en vult de chatbot-integratie aan zoals beschreven in het Intercom chat-integratieartikel .
Basisinstelgids
Om Intercom te integreren met je kennisbankportaal, volg je de onderstaande stappen:
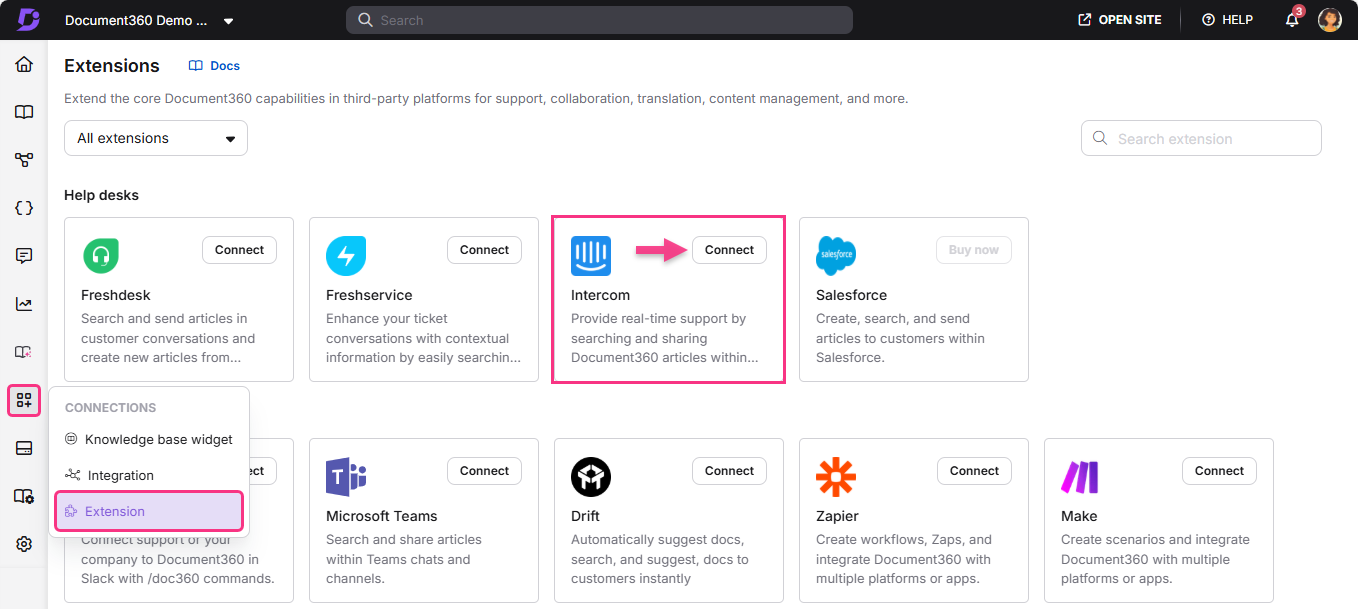
Navigeer naar Connections () > Extensions in de linker navigatiebalk in het kennisbankportaal.
Je kunt de Intercom vinden onder de Helpdesk-sectie.
Klik op Connect op de tegel om een API te genereren.
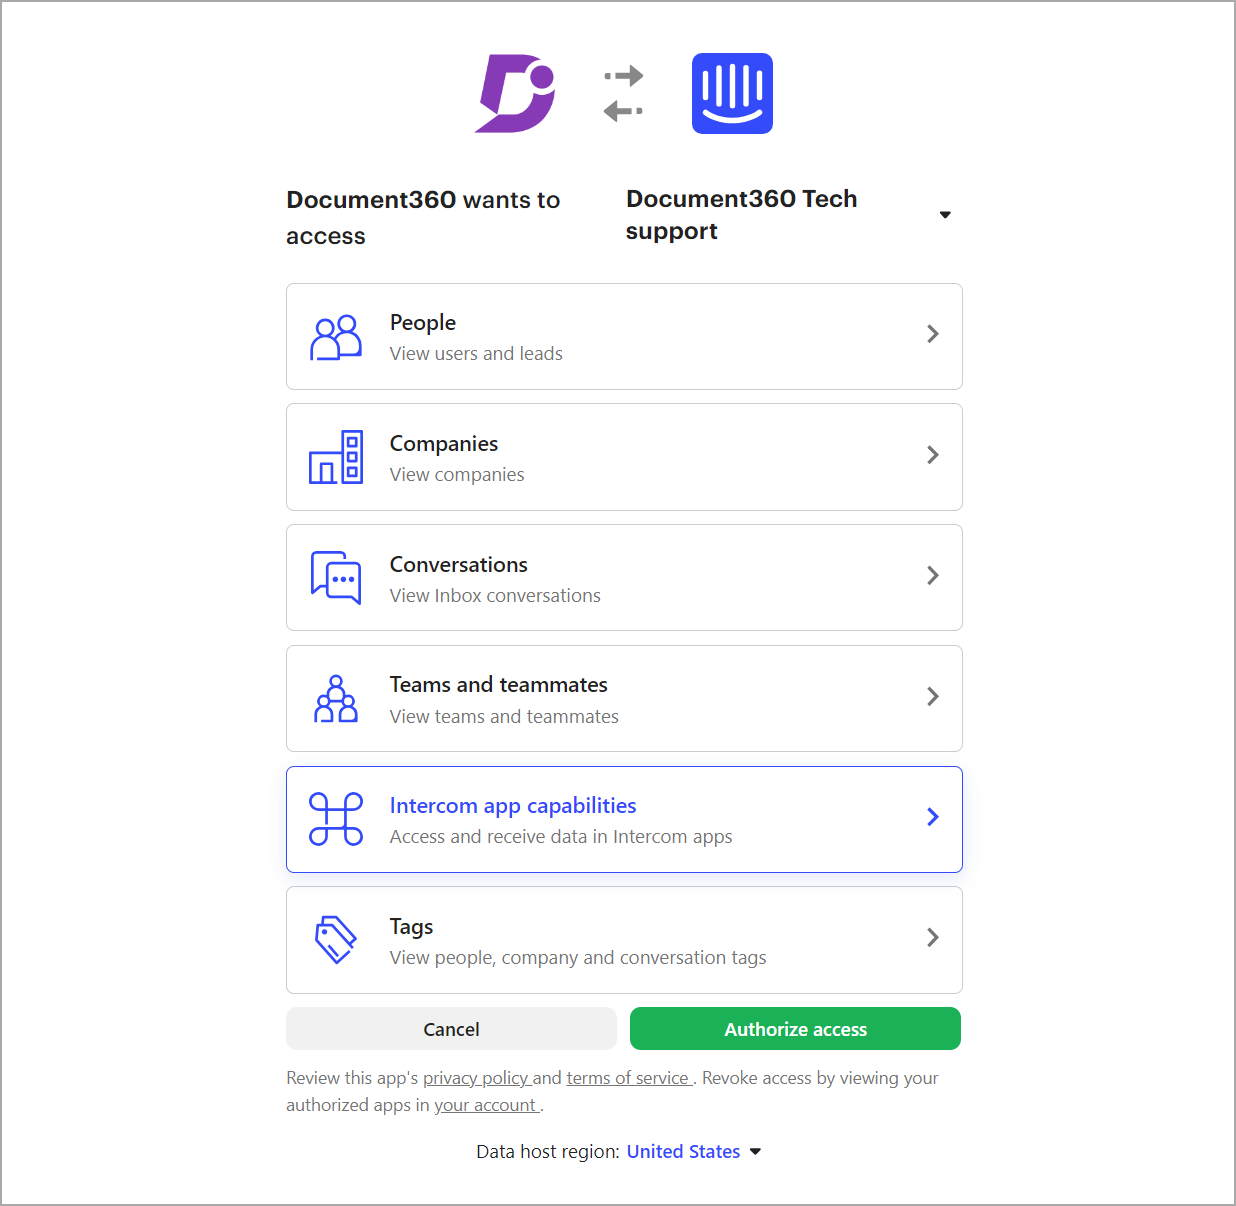
Je wordt doorgestuurd naar de Intercom .
Als je niet bent ingelogd, verschijnt de Intercom-inlogpagina.IntercomKlik op de autorisatiepagina op Toegang autoriseren.
Je wordt doorgestuurd naar de pagina Extensions op Document360.
Klik op het Bewerken ()-icoon in de Intercom .
Kies de werkruimte en taal uit het keuzemenu.
De geselecteerde werkruimte en taal worden toegevoegd aan de Document360-app op Intercom.
Als u de Intercom uit uw Document360-portaal wilt verwijderen, volg dan deze stappen:
Klik op de Intercom op Instellingen () in de linker navigatiebalk.
Klik op het dropdownmenu Integraties en selecteer App Store.
Klik onder de sectie Beheren op Uw geïnstalleerde apps.
Je kunt de Document360-app vinden.
Klik op de Document360-app-tegel en scroll naar beneden om de knop Deïnstalleren te vinden.
Klik op Verwijderen en de Intercom wordt verwijderd en is niet langer beschikbaar in je Document360-portaal.
Zoek naar en deel artikelen in chatrespons
Wanneer een klant of websitegebruiker probeert het chatondersteuningsgesprek te starten door op het Intercom messenger () icoon op je webpagina te klikken, krijg je een melding in de Intercom . Je supportmedewerker of jij kunt reageren op de gesprekken vanuit de Intercom .
Je kunt ook zoeken en een artikel met de gebruiker delen op het Intercom . Volg in dat geval de onderstaande stappen:
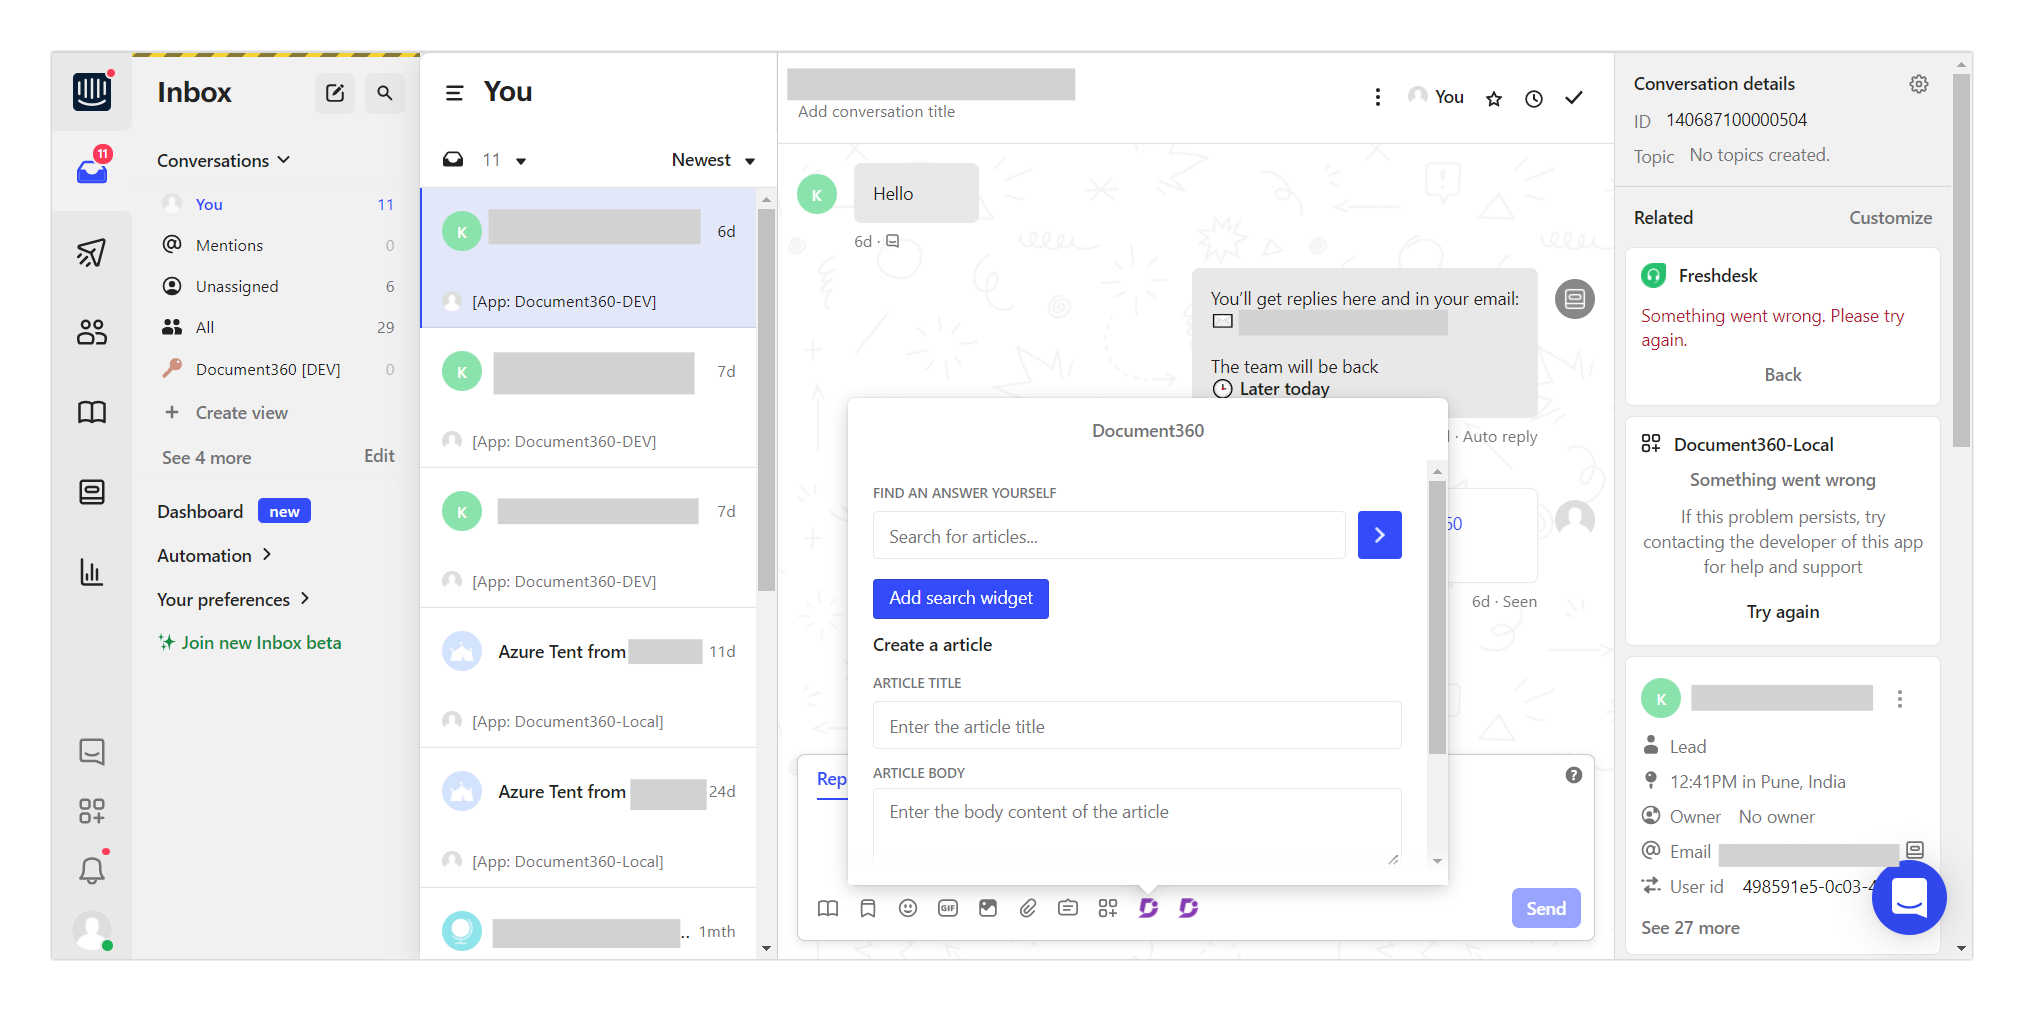
Klik op het Document360-icoon en er verschijnt een klein zoekpaneel.
Typ het trefwoord of de vraag in de zoekbalk en druk op Enter.
De drie belangrijkste relevante artikelen uit je kennisbank worden vermeld.

Als er meer relevante artikelen zijn, klik dan op de optie 'zie meer '.
Klik op het bedoelde artikel, en het wordt in je chatpaneel ingevoegd als assistent of als een fragment van een artikel.
Deze actie stelt je in staat om het artikel snel met de klant te delen in het lopende chatgesprek.
Klik op de knop Verzenden of Verzenden en Sluiten .
De klant ontvangt de artikelassistent of het gedeelde artikel in de chat.
Het artikel opent in een apart tabblad wanneer de klant op de assistent klikt.
Hiermee kun je reageren door een artikel uit de kennisbank te delen of een artikelzoek-app te sturen, zodat klanten zelf naar artikelen kunnen zoeken.
OPMERKING
Wanneer een artikellink wordt aangeklikt in de Intercom , opent deze zich in het chatvak.
Artikelzoek-app assistent
Naast het zoeken en delen van een artikel met de gebruikers, moet jij of je agent misschien ook een artikel uit de Intercom toevoegen aan je kennisbank.
Volg de onderstaande stappen om een Intercom te maken dat op uw Document360-portaal wordt weergegeven.
Klik op het Document360-icoon dat beschikbaar is in de chatresponsopties, in lijn met de verzendknop .
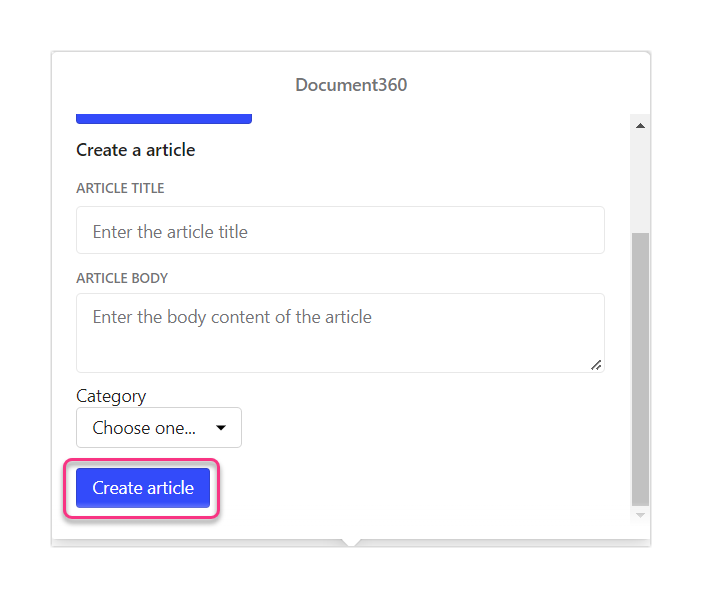
Een kleine Document360-app-assistent opent, waar je de optie ' Een artikel aanmaken' kunt vinden met de volgende velden,
Artikeltitel - geef een geschikte titel voor het artikel
Artikelinhoud - geef een geschikte inhoud voor het artikel
Categorie - kies een geschikte categorie uit het keuzemenu
Vul de vereiste velden in.
Klik op Artikel aanmaken.