Editing a user group in Document360 lets you update the group's name, description, project role, content role and access, and associated users. Changes to a group's roles apply immediately to all users associated with that group, so you can update permissions for an entire team in a single operation.
When to edit a user group
- A team's responsibilities have changed and their project role or content access needs to be updated.
- You need to add new team members to an existing group.
- The group's name or description no longer reflects its purpose.
- You need to adjust which workspaces, languages, or categories the group can access.
Before you begin
- You must have the Project Owner or Admin role in the knowledge base portal.
- Be aware that changes to a group's project role or content role apply immediately to all users associated with that group.
How to open the user group for editing
-
Navigate to Settings () > Users and security in the left navigation bar in the knowledge base portal.
-
In the left navigation pane, navigate to Users and groups.
By default, the User tab will be selected.
-
Navigate to the User groups tab.
A list of existing user groups will appear.
-
Hover over the desired user group and click the Edit () icon.
The user group page will appear.
NOTE
Click the preview () icon to view the portal role and content role.
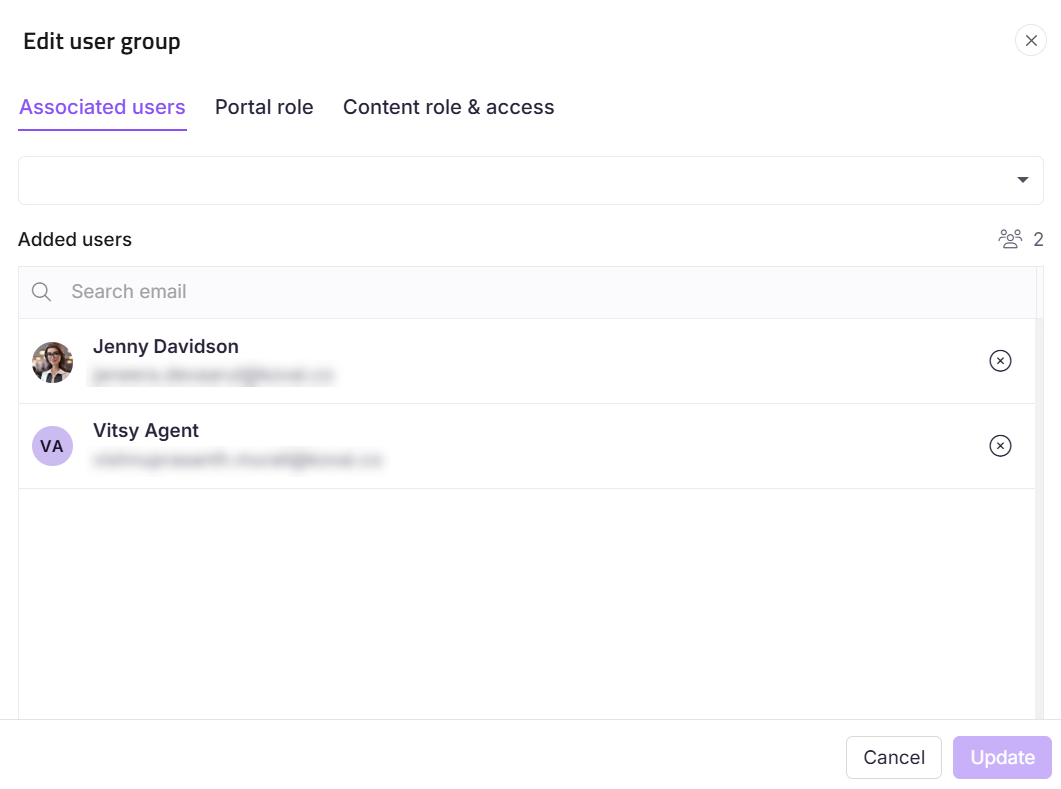
Add an associated user
- In the Associated users pane, click View all if needed to associate another user.
- In the Edit user group panel, the Associated users section will appear.
- In the User dropdown, search for the desired user and select the checkbox.
- Click Update.
Update the project role
- In the Project role section, assign the desired portal role for the group.
- Click Update.
Update the content role and access
- In the Content role & access section, assign the desired content role and content access for the group.
NOTE
In the content access section, if you have selected Workspace/Language or Category, specify which workspace/language or which category the group has access to.
- Click Update.
Rename a user group
- Navigate to Settings () > Users and security in the left navigation bar in the knowledge base portal.
- In the left navigation pane, navigate to Users and groups.
- In the User groups tab, hover over the desired user group and click the Edit () icon.
- Hover over the user group name and click the Edit () icon.
- Update the Name and Description fields.
- Click Update.
Limits and limitations
| Limit | Detail |
|---|---|
| Immediate effect | Changes to a group's project role or content role apply immediately to all associated users. |
| Workspace/Language and Category access | When using Workspace/Language or Category access, you must specify which workspace, language, or category applies. |
Best practices
- Review the full list of associated users before changing a group's project role or content role. The change applies to every user in the group immediately — verify that all members should receive the updated permissions.
- Use Add another content role if the group needs different access levels for different categories rather than restructuring into multiple groups.
- Keep group names and descriptions up to date. A group named "Q1 Writers" that is still active in Q3 will cause confusion during access audits.
- Make one type of change at a time (role, access, or membership) and confirm it before making the next. This makes it easier to identify if something does not look right after saving.