The Crop feature lets you define the visible area of a step or frame, removing unwanted portions of the screen and focusing the viewer's attention on the most relevant content. This is useful when a recorded step or frame captures more screen area than needed, or when the content needs to fit a specific display context.
Crop a step image, video or interactive demo
- Navigate to the Edit section in the right pane.
- Click Crop.
- Choose an Aspect ratio from the dropdown.
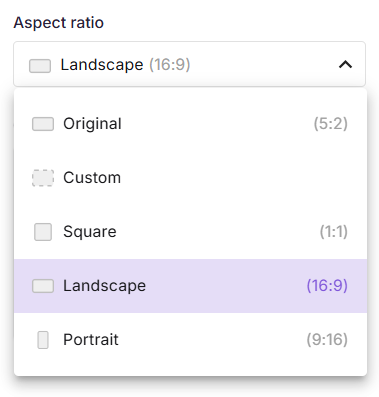
- For Custom, drag the crop boundary handles directly on the step image to define the crop area. The Crop output section displays the resulting width, height, and aspect ratio in real time as you adjust.
- Click Apply to save the crop.
Best practices
- Use Custom crop for precise control - Isolate a specific UI region, such as a modal, form, or panel, that occupies only a portion of the recorded screen.
- Check the Crop output dimensions - Verify the resulting size meets any specific dimension requirements before applying.
- Apply Landscape (16:9) for web embeds - This ratio aligns with the most common web content display widths, making it ideal for standard knowledge base articles or documentation pages.
- Crop before adding other elements - Cropping after adding elements such as Text, Highlight, or Blur may shift their positions relative to the visible step area.
- Preview after applying - Confirm that all essential on-screen content falls within the cropped region and nothing critical has been inadvertently excluded.