Document360's built-in interactive demo recorder lets you capture your screen directly from the Editor. Readers can then click through the recorded demo in a guided, hands-on environment instead of reading static instructions.
Before you begin
The interactive demo recorder requires the Document360 AI Capture extension. The extension only needs to be installed once and is supported on Google Chrome, Microsoft Edge, and Brave.
Setting up the recorder
To access the Interactive demo,
- Navigate to the desired article in the Advanced WYSIWYG editor.
- Type the Slash command
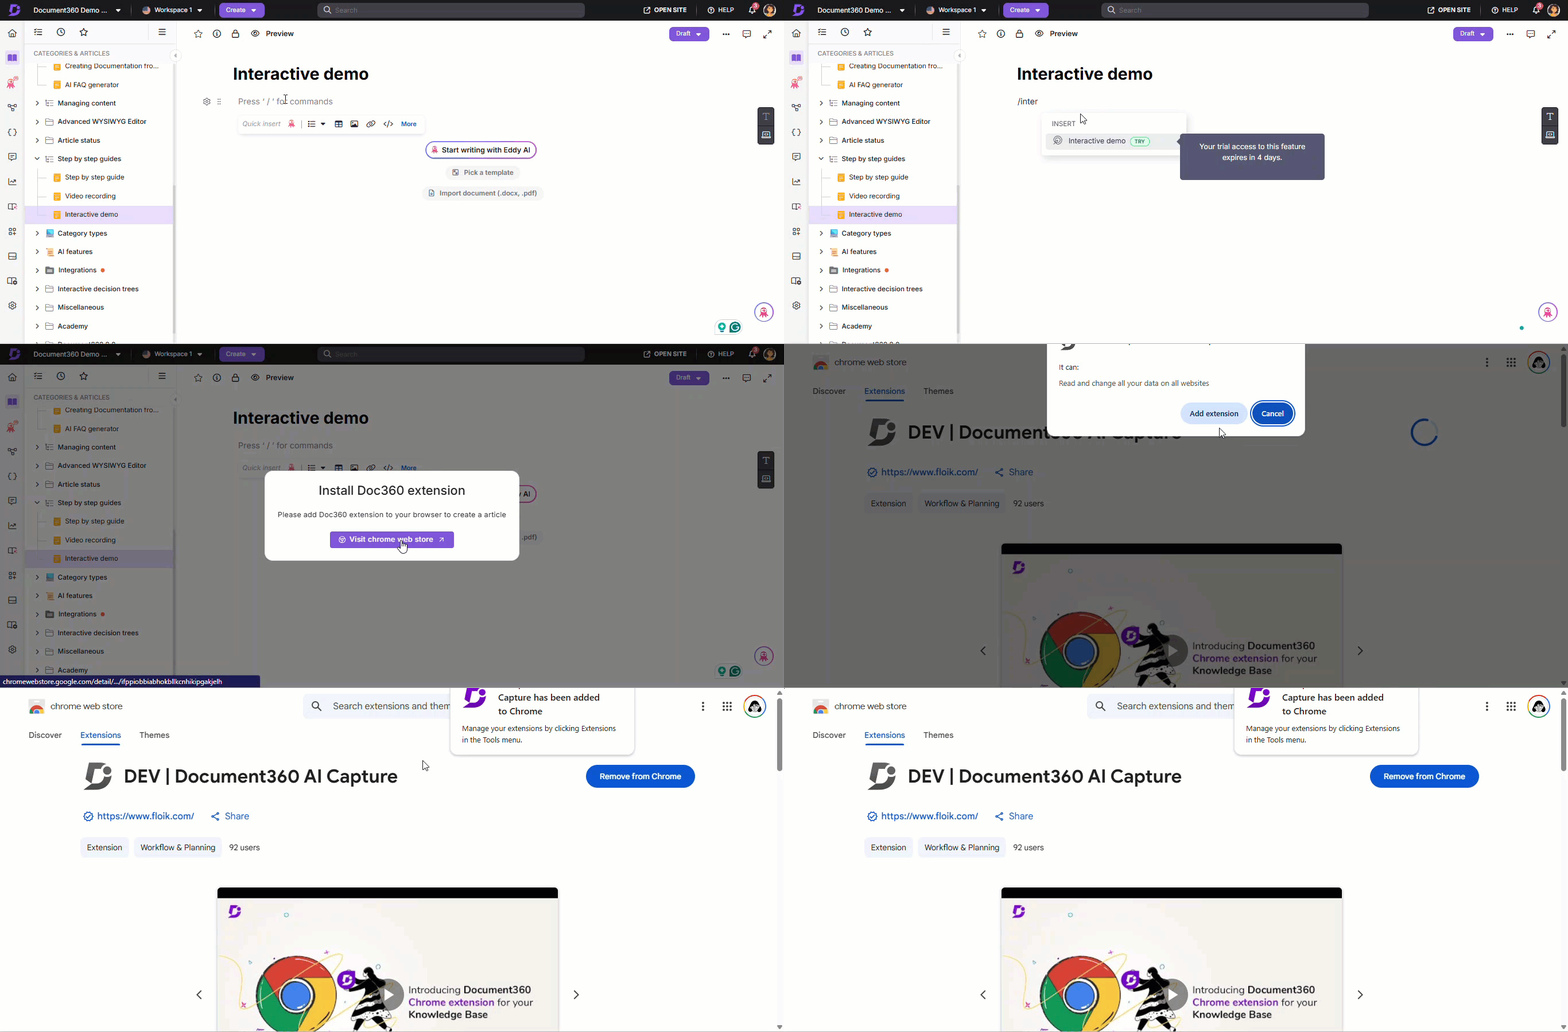
/Interactive demoand press Enter. - If you haven't installed the Document360 AI Capture extension, click Install.
Follow the on-screen steps in your browser to complete the installation.
For browser-specific installation steps, see Installing the Document360 AI Capture extension.
- Once installed, return to the Knowledge base portal
Recording the screen
Once you return to the Knowledge base portal, the Interactive demo dialog will appear.
- From the audio dropdown, select the desired option or select No audio to record without sound.
- Click Next.
- Select the screen to capture:
- Browser tab: Records only the selected browser tab.
- Window: Records only the selected application window.
- Click Share.
The selected screen will appear along with the Screen recording panel. - Choose the recommended resolution (16:9 or 4:3).
- Optionally, before starting:
- Click Add in the Blur selected section to hide sensitive areas of the screen.
- Enable Show recording controls on screen if needed — a Document360 logo appears at the bottom left; clicking it pauses the recording. This logo will also be visible in the recorded interactive demo.
- Click Start capturing to begin recording.
- Click Discard to cancel and return to the previous screen.
- Click Pause to pause the recording and Record to resume.
- To stop recording, click Stop sharing in the floating panel or Stop recording in the Screen recording panel.
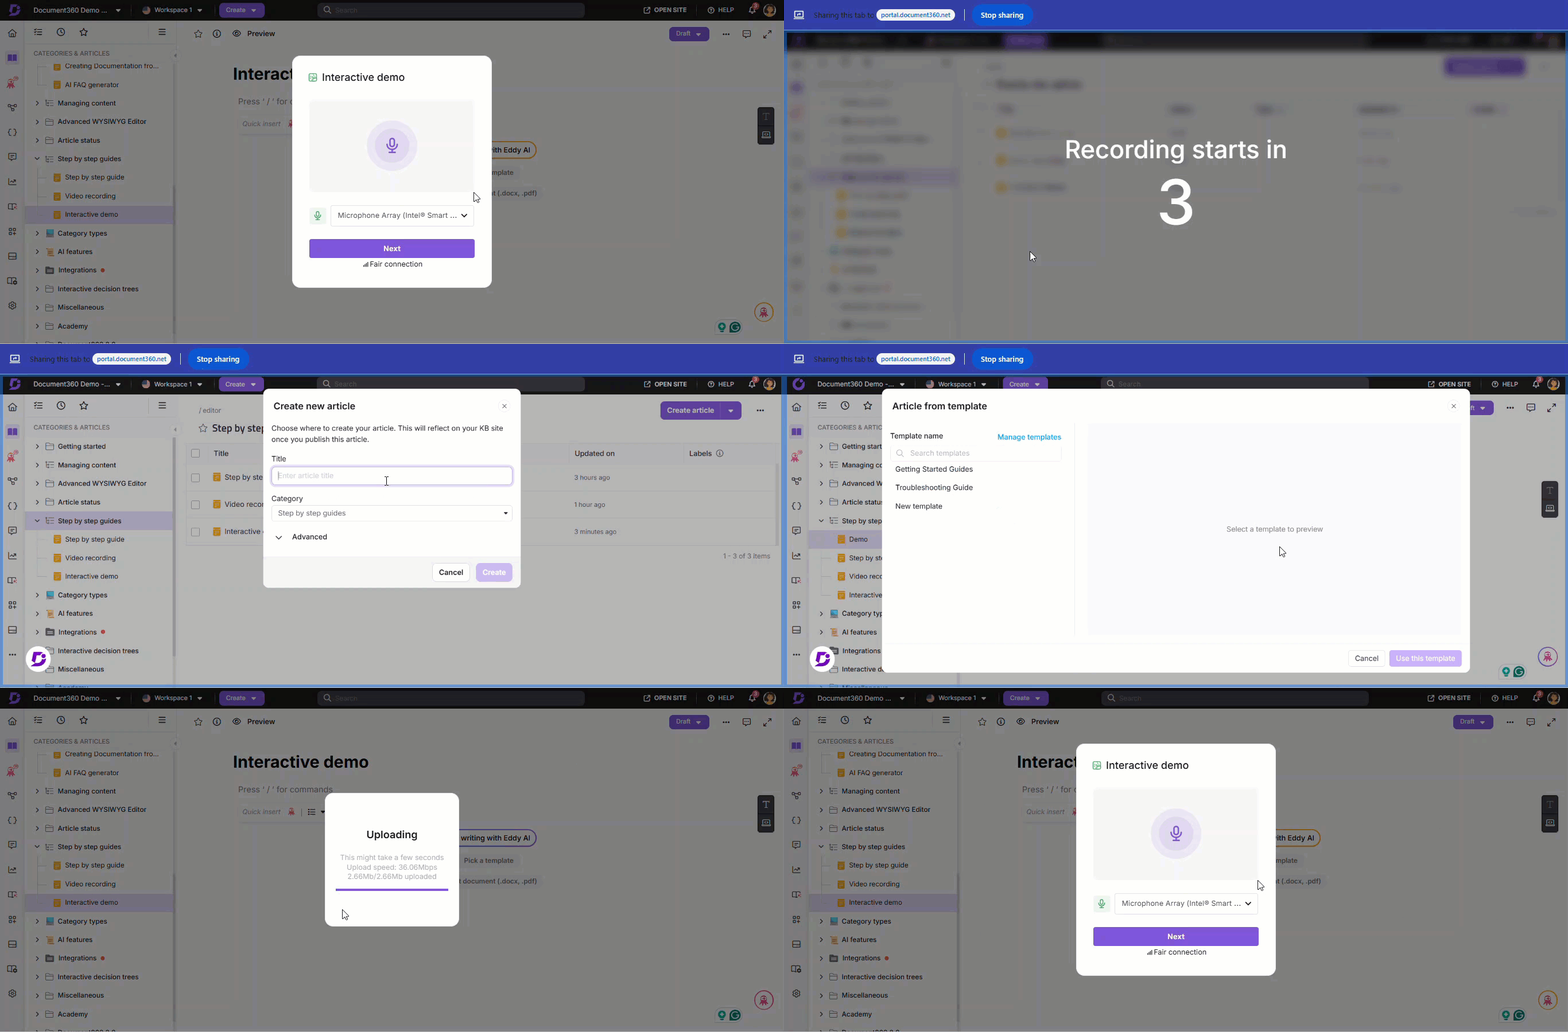
Mouse clicks and interactions will be captured, and click indicators will be displayed for easier guide editing.
After recording, the system will import the interactive demo into the article. This may take a few moments. Once ready, it opens automatically in the Interactive demo editor.
Best practices
- Plan the flow before recording - map out each click and screen beforehand to avoid retakes.
- Use blur before recording for known sensitive areas. It's faster than adding it in the editor later.
- Keep demos focused - a short, task-specific demo is easier to follow than a long walkthrough.
- Record in a quiet environment if using audio, background noise carries through to the demo.
- Choose 16:9 resolution for articles viewed primarily on desktop.
What's next
Once your demo is recorded, you can enhance it before publishing - see Editing an interactive demo to add hotspots, blur, text overlays, and voiceovers.