Try It! is Document360's interactive API console, embedded directly in your published API reference. It lets developers send real requests to your API endpoints and see live responses without leaving the documentation or writing any code.
This article explains how the Try It! console works in your published API reference — how to open it, build and send a request, read the response, and what the console does and does not support. For details on configuring each authentication method, see Authorizing requests in the Try It console.
What Try It! does
From any endpoint page in your published API reference, developers can:
- Open an interactive console inline on the endpoint, without leaving the page
- Fill in path and query parameters, headers, and (for write methods) a request body
- Supply authentication credentials for the endpoint's security scheme
- Send a live request and view the real response — status, timing, headers, and body
Try It! is not available for webhooks. Webhook pages show the payload schema and an example but cannot send test requests.
Opening the Try It console
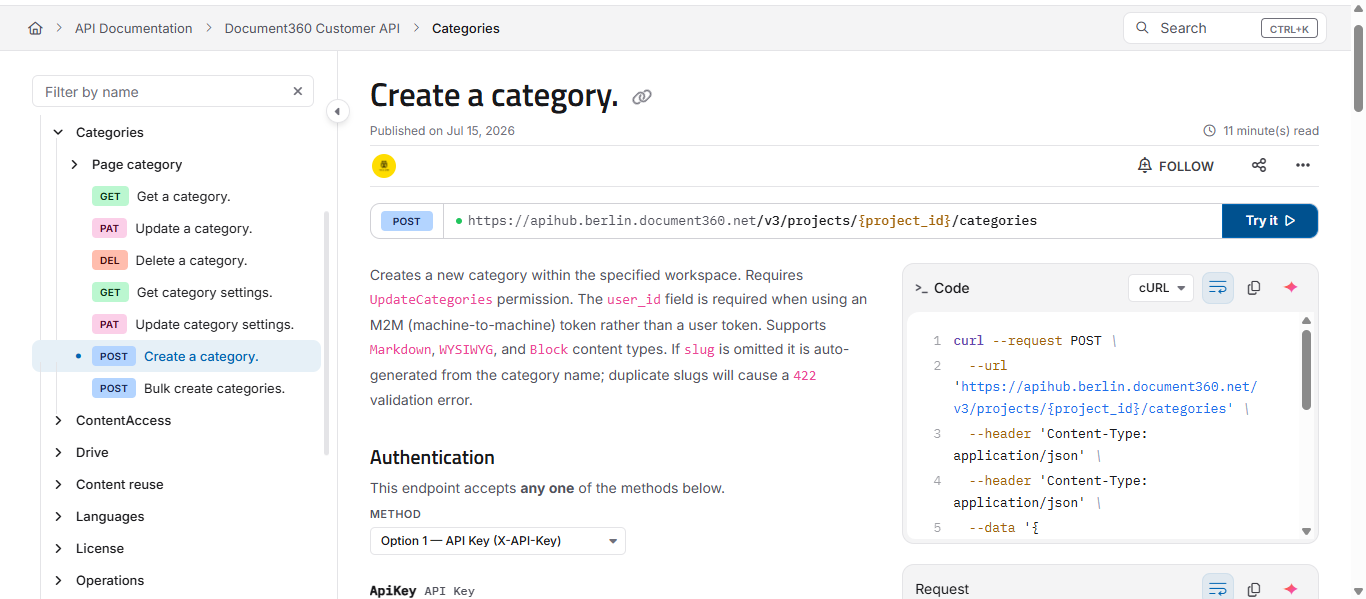
On any endpoint page, the endpoint's method and URL appear at the top, with an Try It button beside them.
- Click Try It. The interactive console opens inline, directly below the endpoint URL.
- Build your request using the tabs described below, then click Send.
- When you are finished, click the close Try it icon (X) to collapse the console and return to reading the documentation.
The console opens in place - you stay on the same endpoint page the whole time, with the documentation still visible above it.
Building a request
The request builder is organised into tabs. Which tabs appear depends on the endpoint's HTTP method:
- Params — path and query parameters defined for the endpoint. Required parameters are marked, and each shows its description from your spec.
- Authorization — the authentication method and credential fields for the endpoint's security scheme. See Authorizing requests in the Try It console.
- Headers — request headers.
- Body — the request payload. This tab appears only for methods that take a body, such as POST, PUT, and PATCH. It is not shown for GET requests.
As you fill in the tabs, the console builds the request in the background. You can preview the assembled request at any time in the Request panel on the right, and see the equivalent code sample in the Code panel.
Working with the request body
For endpoints that accept a body, the Body tab gives you a full editor with tools to build and validate your payload.
- none / raw — choose whether to send no body (
none) or a raw payload (raw). - Media type — select the content type for the body, such as
application/json. - Example — insert a ready-made example payload for the endpoint, generated from your spec.
- Fill from schema — populate the editor with a sample body built from the endpoint's request schema. This overwrites the current contents of the editor.
- Beautify — reformat the body with proper indentation, making a minified or messy payload readable.
- Restore a recently-sent body — bring back a body you sent earlier in this session. This restores bodies you have actually sent, so you can quickly return to a previous working payload without retyping it.
- Toggle word wrap — wrap long lines within the editor so you can read them without scrolling horizontally.
Fill from schema replaces whatever is currently in the editor with a fresh sample generated from the schema. If you have edited the body, copy anything you want to keep before using it.
Validation against the schema
The body editor validates your payload against the endpoint's schema as you type — not just for valid JSON, but for whether the payload actually matches what the endpoint expects.
This catches two different kinds of problems:
- Syntax errors — the payload is not well-formed, for example a missing comma or colon. These appear as messages such as "Colon expected" or "Expected comma".
- Schema errors — the payload is valid JSON but does not match the schema. For example, if a field expects an integer and you supply a string, the editor flags "Incorrect type. Expected...". Supplying a field the schema does not allow is flagged as "Property is not allowed."
When problems are found, a Body validation problems area appears below the editor, showing a count of the issues. Use Jump to next problem to move directly to each one in the editor, and expand the list to see every problem at once.
This means a payload can be perfectly valid JSON and still be flagged — because Try It! checks it against your API's actual schema, catching mismatches before you send the request rather than after the server rejects it.
Sending the request and reading the response
Once your request is ready, click Send request. The console sends a live request to your API and shows the result in the response area on the right.
The response includes:
- Status — the HTTP status code returned, such as
200,401, or404. - Time — how long the request took, in milliseconds.
- Size — the size of the response body.
- Body and Header tabs — switch between the response payload and the full set of response headers returned by the server.
You can resize the request and response panels by dragging the separator between them, giving more room to whichever side you are working in.
Your work is saved
While you are working in the console, Try It! preserves your input so you do not lose it as you move around:
- Parameters, headers, the request body, the selected media type, and the active tab are kept as you switch endpoints and even if you close and reopen the console during the same session.
- Credentials and the last response are kept only for the active session and are not persisted. Credentials are also masked in the request preview for security.
Authentication
Developers supply credentials in the Authorization tab, using whichever scheme your API defines — API key, HTTP Basic, HTTP Bearer, OAuth 2.0, or OpenID Connect. Try It! reads the schemes from your OpenAPI specification and shows the correct fields for each.
For full details on every method — including how to define each one in your spec and how OAuth 2.0 sign-in works in the console — see Authorizing requests in the Try It console.
Try It! supports multiple security schemes, so developers can test endpoints that require more than one authentication method.
Using variables
Variables let developers store a value once and reuse it across endpoints with a {{placeholder}} — useful for values like an ID or token that recur across many requests. You can insert a variable into any field, and the Request preview shows it resolved to its actual value.
For how to create, manage, and reuse variables, see Using variables in the Try It console.
Requirements for Try It! to appear
Try It! only appears on an endpoint page when your API specification file correctly defines the following:
- A server URL - the
serverssection of your spec must contain at least one valid base URL. - A server variable (optional) - if used, the variable must be defined alongside the URL.
If the server URL is missing, the Try It! button will not be visible on the Knowledge base site.
Correct server URL format
servers:
  - url: https://api.yourdomain.com
    description: Production
For APIs with multiple regions, define multiple entries:
servers:
  - url: https://api.yourdomain.com
    description: Global

  - url: https://api.us.yourdomain.com
    description: US region
The URLs above are examples. Use the actual base URL for your API.
What Try It! does not support
- Webhooks - Try It! is not available for webhook definitions. Webhook pages show the payload schema and an example but cannot send test requests.
FAQ
Why is the request routed via api/apidocs/tryit-proxy?
This is expected behavior. Requests are routed through the api/apidocs/tryit-proxy endpoint to avoid CORS (Cross-Origin Resource Sharing) errors. It does not affect functionality - requests still return the correct results from your API.
Why is there no Body tab on some endpoints?
The Body tab appears only for methods that take a request payload, such as POST, PUT, and PATCH. GET requests do not take a body, so the tab is not shown for them.
My request body is valid JSON but the editor still flags a problem. Why?
Try It! validates the body against the endpoint's schema, not just for well-formed JSON. A payload can be valid JSON but still not match the schema — for example, sending a string where an integer is expected, or including a field the schema does not allow. The validation area shows what needs to change.
Are the credentials I enter in Try It! saved?
No. Credentials and the last response are kept only for the active session and are not persisted. Parameters, headers, the request body, the selected media type, and the active tab are preserved as you work, but credentials are session-only and are masked in the request preview.
Can I test endpoints that require more than one authentication method?
Yes. Try It! supports multiple security schemes, but not simultaneously. You can configure and send credentials for one scheme at a time. See Authorizing requests in the Try It console for details.
Can an AI agent switch between MCP and the standard API within the same workflow?
Yes. A single workflow can use MCP for the reasoning and acting steps — searching, reading, writing, and call the standard API directly for operations outside MCP's scope. The two interfaces are not mutually exclusive; they access the same underlying knowledge base.