Document360's screen capture feature lets you capture screens directly from Drive and store them for reuse across articles — without switching tools. You can capture an entire tab or a specific window, add tags and alt text, and upload directly to your preferred Drive location.
Before you begin
The screen capture feature requires the Document360 AI Capture extension. The extension only needs to be installed once and is supported on Google Chrome, Microsoft Edge, and Brave.
Screen capturing from the Drive
To capture a screen from Drive,
- Navigate to the desired location in Drive within the Knowledge base portal.
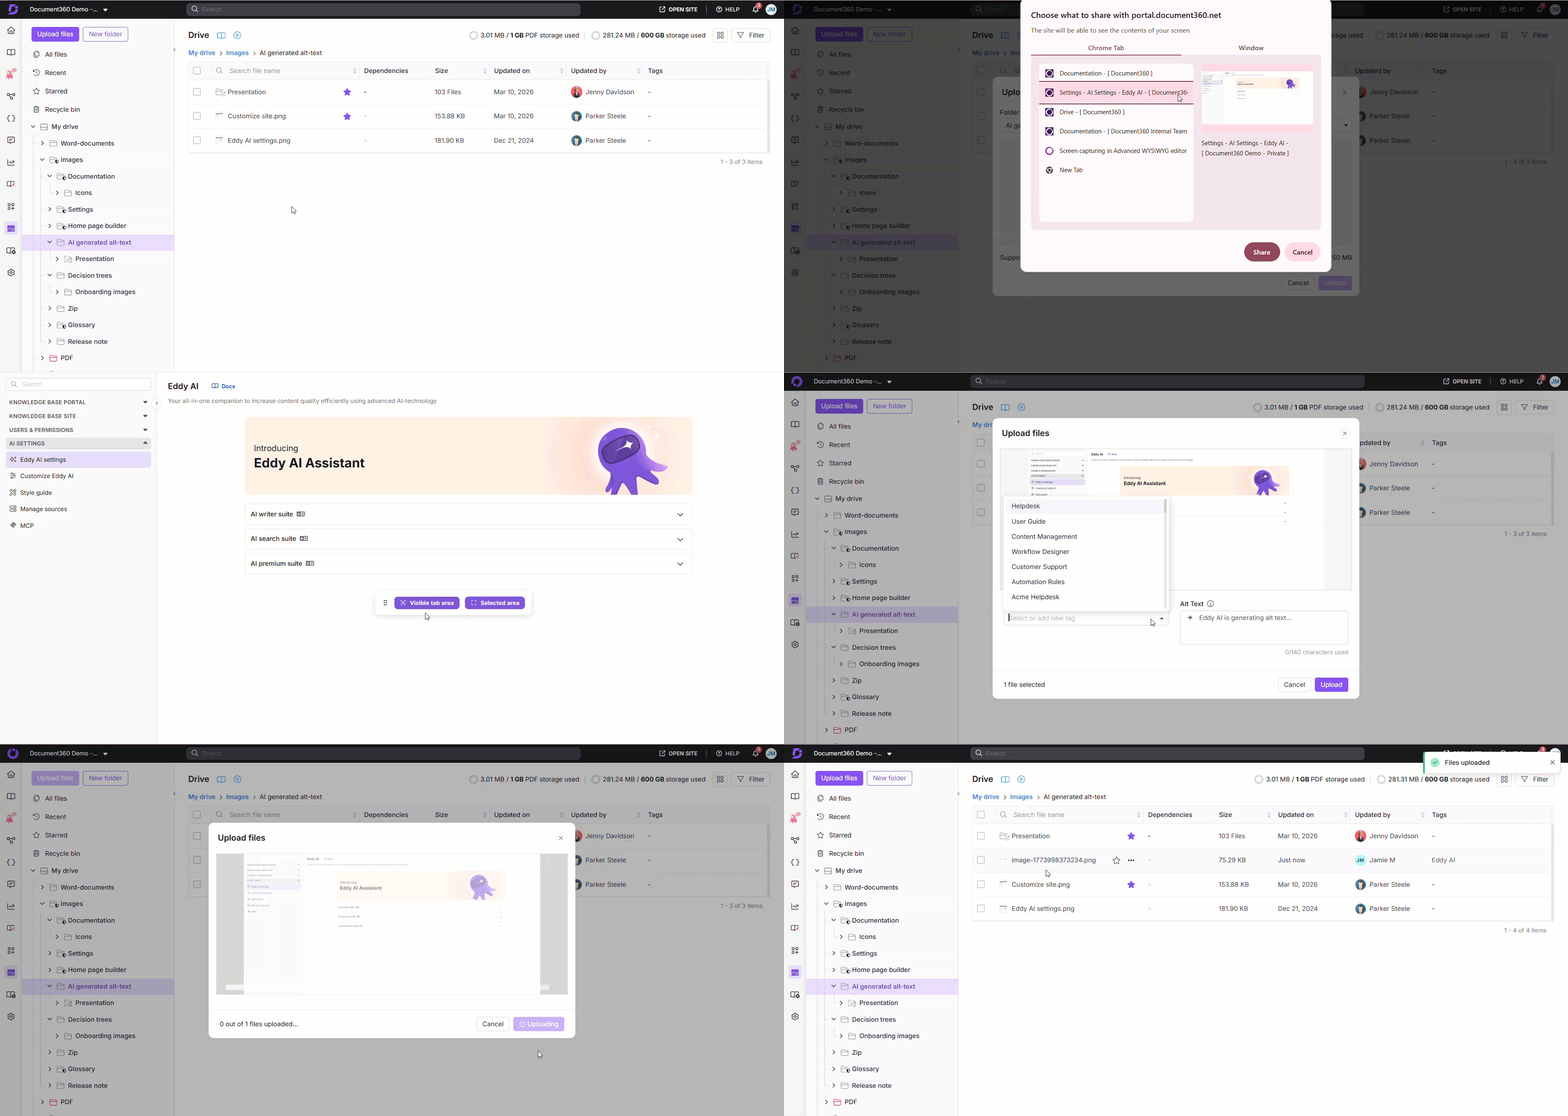
- Click Upload files, and the Upload files panel will appear.
- Click Screen capture.
- If you haven't installed the Document360 AI Capture extension, click Install and follow the on-screen steps to complete the installation.
For browser-specific installation steps, see Installing the Document360 AI Capture extension.
- Once installed, return to the Knowledge base portal.
- Select the desired screen to capture:
- Browser tab: Captures only the selected browser tab.
- Window: Captures only the selected window.
- Click Share to proceed.
If a Browser tab is selected:
Once you return to the Knowledge base portal,
- The selected browser tab will display a message confirming that the tab is being shared with the Knowledge base portal.
- Click Stop sharing to cancel the process.
- A floating panel appears with the following capture options:
- Visible tab area: Captures the entire tab.
- Selected area: Captures a specific area of the tab.
- Use the Drag and drop () icon to reposition the floating panel.
- Click Visible tab area to capture the full tab.
- Click Selected area and drag to select the desired capture area. You can extend the selection if needed. Once finalized, click Capture.
If a Window is selected:
- The selected window is captured automatically.
- After capturing, you are redirected to the Knowledge base portal.
The captured image appears in the Upload files panel. - You can add tags and alt text for the captured image.
- Click Upload, and the image is stored in the selected Drive location.
If PNG is configured as a restricted format in Drive settings, captured images cannot be uploaded. To remove the restriction, navigate to Settings () > General > Drive settings, remove the PNG restriction, and click Save.
FAQ
Can I organize captured images into different folders?
Yes. After uploading, you can move images to any folder in Drive for better organization.
Can I reuse a previously captured image in future articles?
Yes. All images uploaded to Drive are available for reuse across any article in your knowledge base.