The Blur element allows you to obscure sensitive or confidential information within interactive demos, guides, and videos. By applying a blur overlay to a defined region of the screen for a specified time range, you can redact personal data, proprietary UI elements, credentials, or any content that should not be visible to your audience, without re-recording.
Blur for real-world scenarios
| Scenario | Shape | Intensity |
|---|---|---|
| Hiding a password or API key visible in a screen recording | Rectangle | High |
| Redacting a user's name or email address | Rectangle | Medium–High |
| Obscuring a profile photo or avatar | Circle | High |
| Covering proprietary internal UI elements during a product demo | Rectangle | Medium–High |
Adding the Blur element
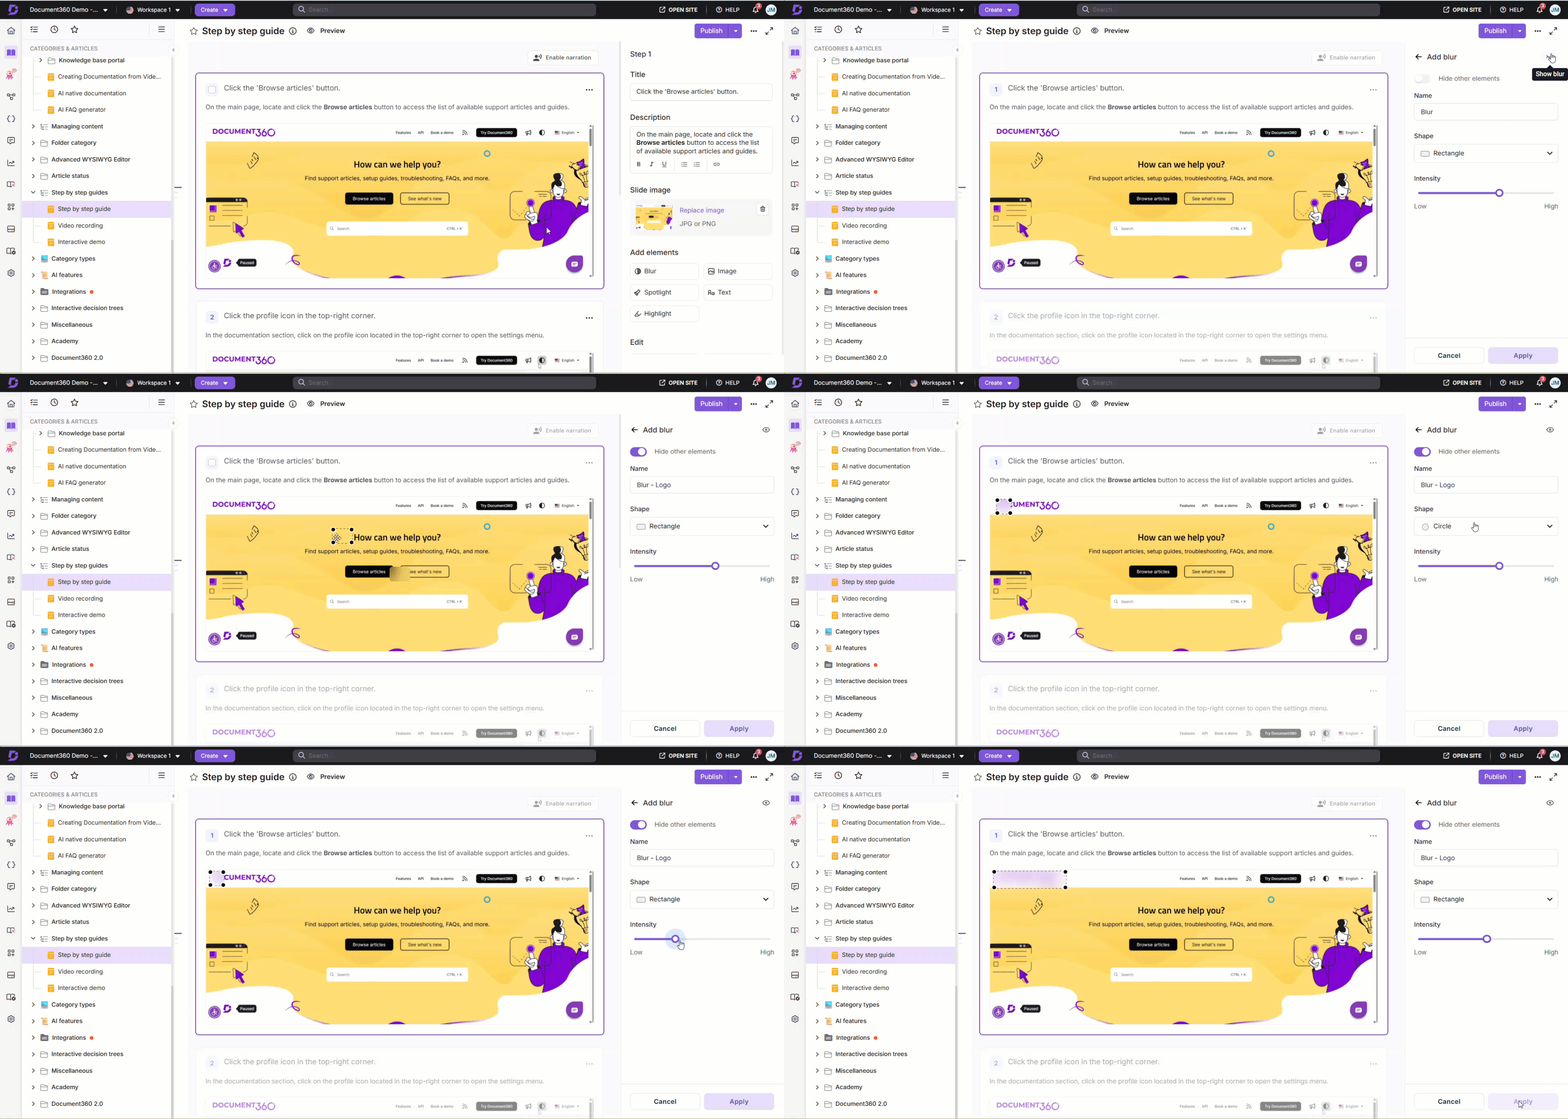
Adding blur to a Step by step guide
- Navigate to Add elements in the right pane.
- Click Blur. If a blur already exists, click Add new.
- Use the eye icon in the top-right to show or hide the blur. Hidden blurs won't appear to readers but aren't deleted.
- Enable Hide other elements to hide every other element while you configure the blur.
- In the Name field, enter a descriptive label (e.g.,
Blur - API Key,Blur - User Email). - Under Shape, select the desired blur shape:
- Rectangle - for UI elements, text fields, and horizontal data.
- Circle - for profile pictures, icons, or circular UI components.
- Use the Intensity slider to adjust the opacity of the blur effect, ranging from Low to High.
- Drag the edges of the blur region to resize it.
- Click Apply to save.
Adding blur to a Video / Interactive demo
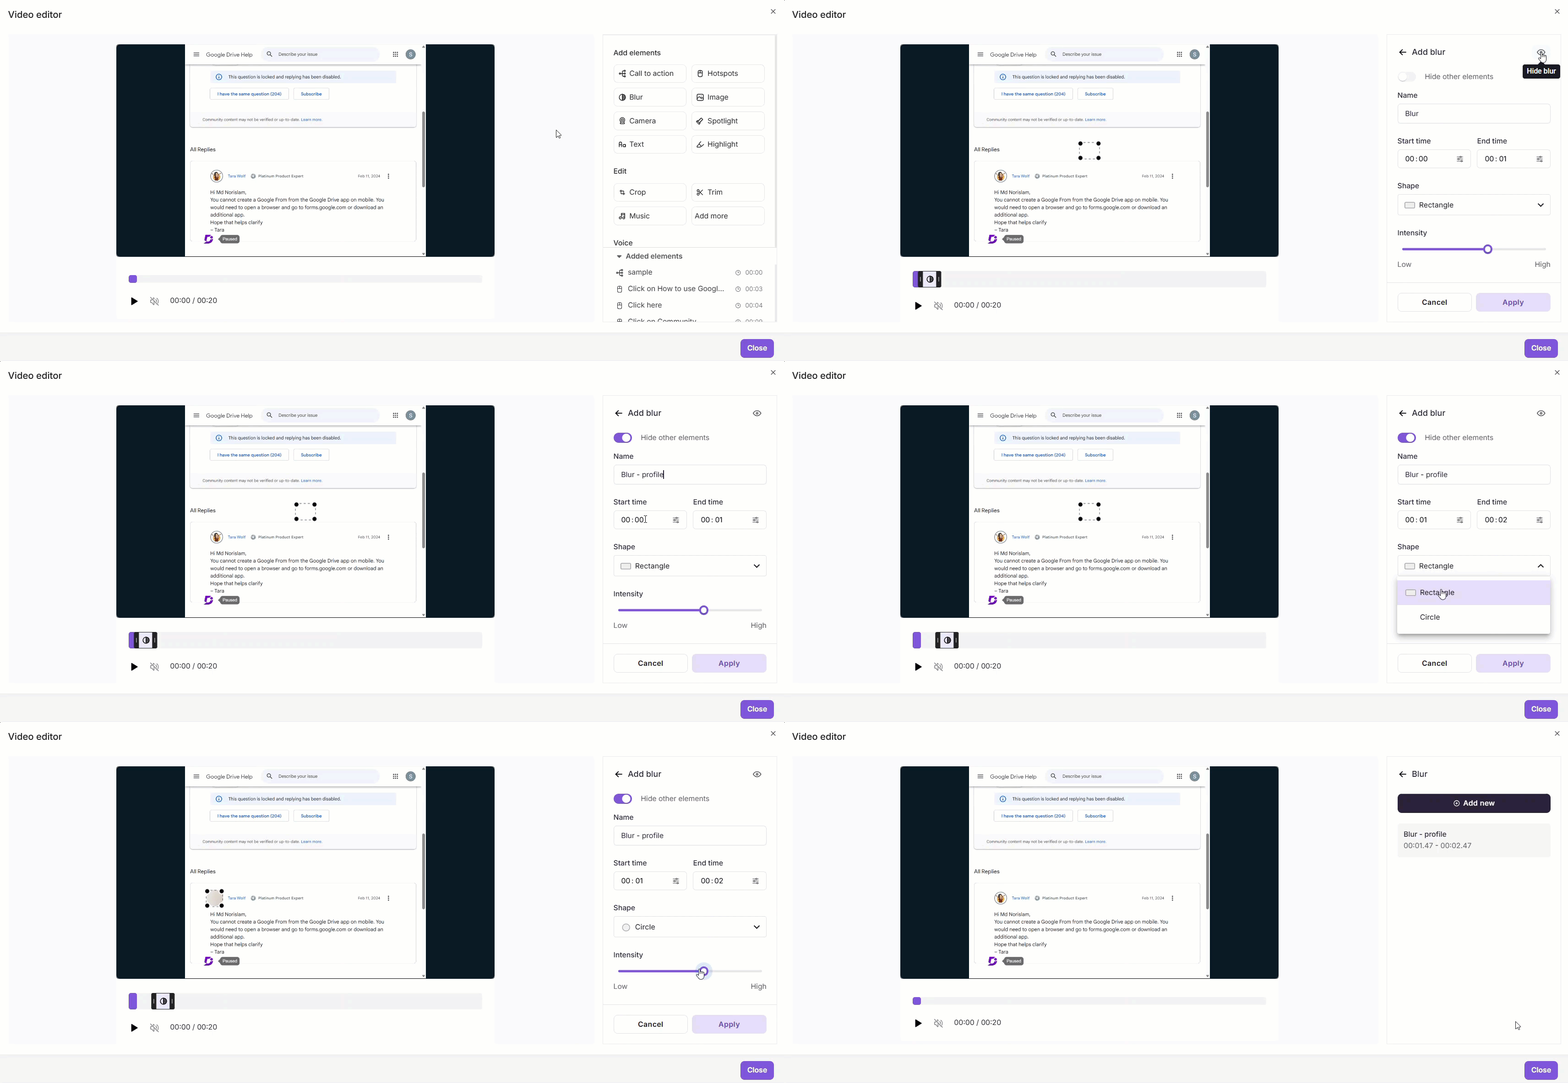
- Navigate to Add elements in the right pane.
- Click Blur. If a blur already exists, click Add new.
- Use the eye icon in the top-right to show or hide the blur. Hidden blurs won't appear to readers but aren't deleted.
- Enable Hide other elements to hide every other element while you configure the blur.
- In the Name field, enter a descriptive label (e.g.,
Blur - API Key,Blur - User Email). - Set the Start time and End time to define when the blur appears:
- Use Select exact frame for frame-precise control.
- Or drag the video slider on the timeline to set the times directly.
- Under Shape, select the desired blur shape:
- Rectangle - for UI elements, text fields, and horizontal data.
- Circle - for profile pictures, icons, or circular UI components.
- Use the Intensity slider to adjust the opacity of the blur effect, ranging from Low to High.
- Drag the edges of the blur region to resize it.
- Click Apply to save.
Managing Existing Blur Elements
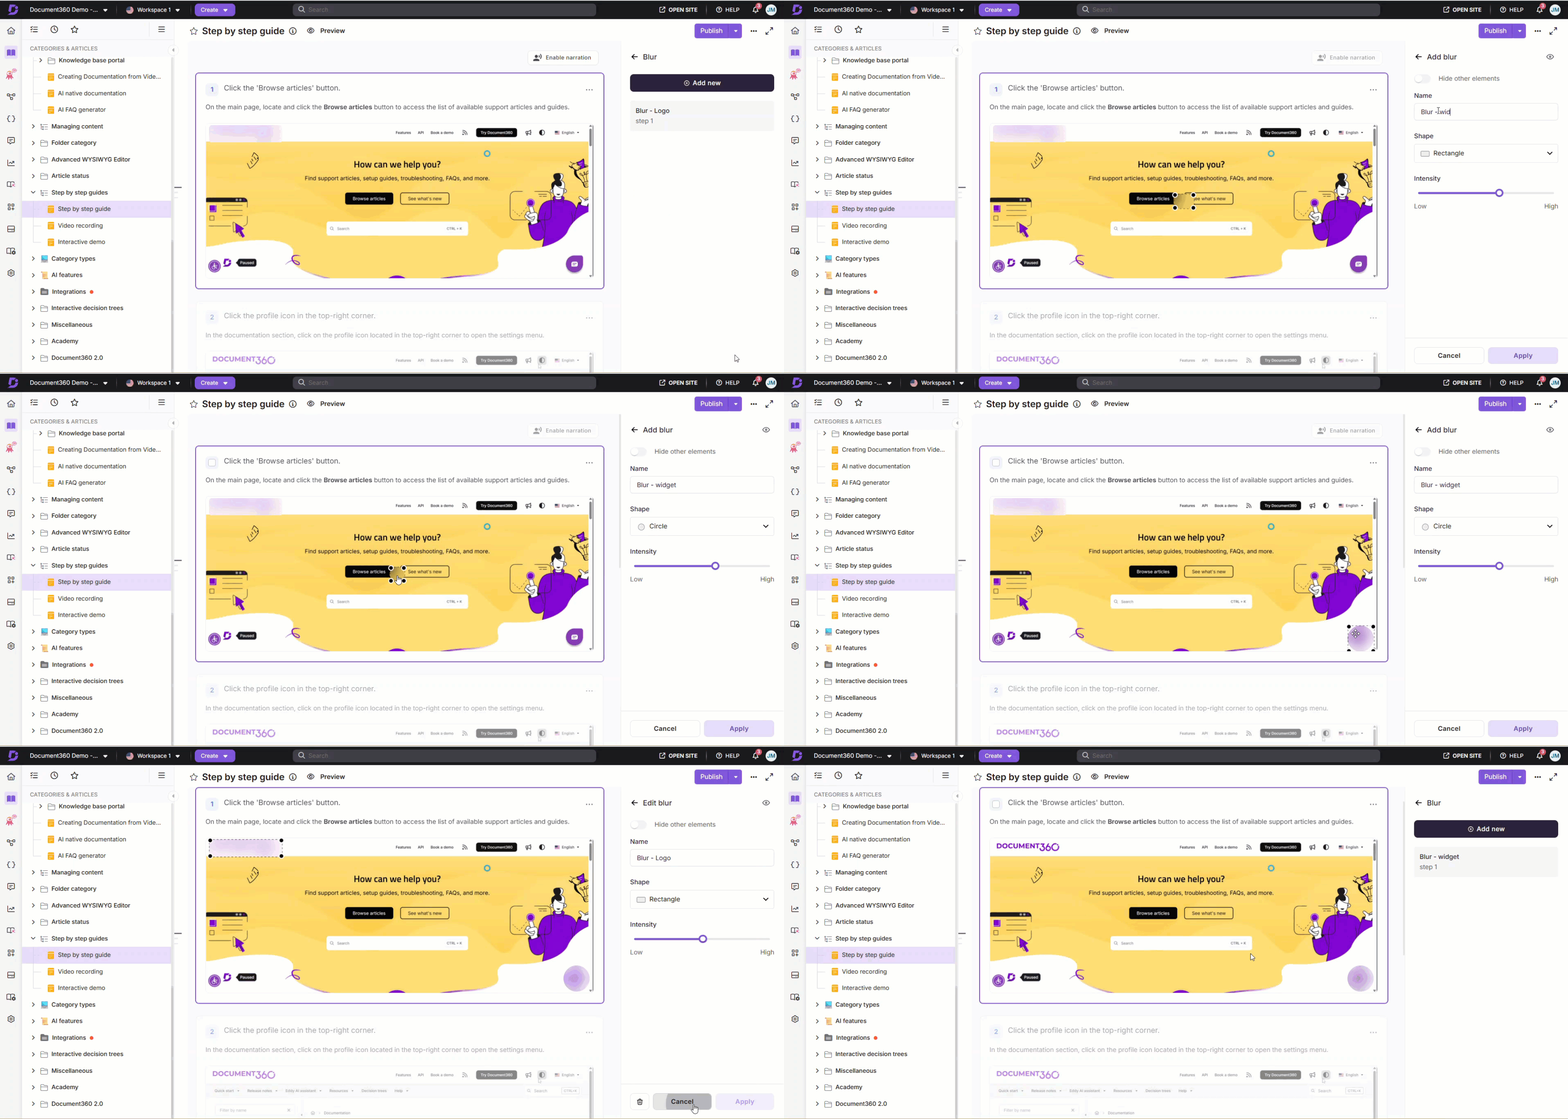
Once added, blurs appear in the Blur panel, each showing the blur's name and its configured time range or step number.
- Add another blur - Click Add new at the top of the Blur pane.
- Edit a blur - Click any blur in the list to edit it. Modify as needed, then click Apply to save or Cancel to go back. Use the Delete icon to remove it.
- Delete a blur - Hover over a blur, click the three-dot menu, and select Delete.
Applying blurs effectively
- Use descriptive names - Label each blur clearly (e.g.,
Blur - API Key,Blur - User Email). This makes it easier to identify and manage them when multiple blurs are in use. - Use the eye icon to manage visibility - Toggle a blur's visibility without deleting it. Hidden blurs won't appear to readers but remain saved for future use.
- Use Hide other elements while configuring - Especially useful when there are overlapping elements. Only the active blur stays visible, reducing clutter and helping you verify positioning accurately.
- Set precise time boundaries - Use Select exact frame when sensitive content appears briefly to avoid blurring surrounding content unnecessarily.
- Apply high intensity for sensitive data - Use the highest intensity setting for passwords, PII, or financial information to ensure the content is fully illegible.
- Preview after applying - Confirm the blur fully covers the target content throughout the defined time range, especially when the content moves or changes.