Before you begin
Step-by-step guides are created and recorded using the Document360 AI Capture extension, which runs exclusively in Chrome. You'll be prompted to install it during setup, it's a one-time step.
Create a Step by step guide
Document360 offers multiple ways to create Step by step guides, depending on where you are in the portal.
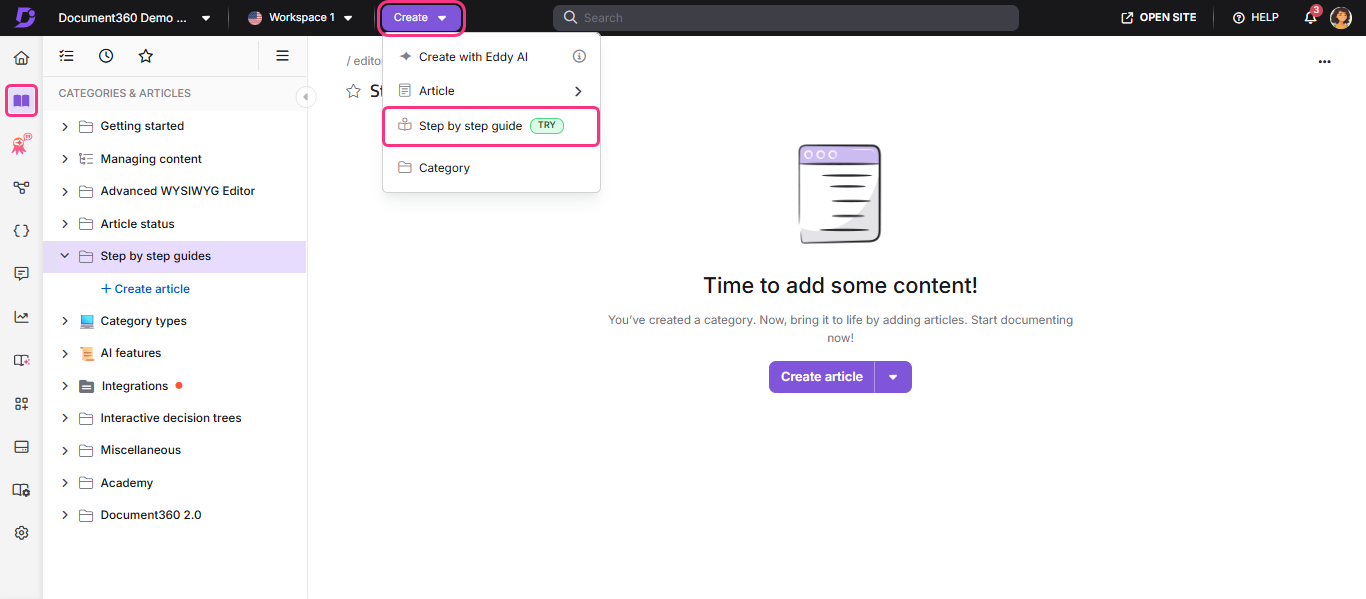
The most common way to create a Step by step guide is from the Create dropdown on the top bar:
- Navigate to Documentation () in the Knowledge base portal.
- Click the Create dropdown on the top bar and select Step by step guide.
Other ways to create a Step by step guide
All paths lead to the same Create Step by step guide dialogue. You can also reach it from:
- Categories & Articles pane - click the More () icon next to a category > Create Step by step guide
- Between two articles or categories - hover between two articles or categories in the Categories & Articles pane > click the Flywheel () icon > Step by step guide
- Page category editor - click the More () icon next to the Publish button > Create Step by step guide
- Empty index category - click the More () icon on an index type category > Step by step guide
Name and set up the Step by step guide
After selecting Step by step guide through any of the above ways, the Create Step by step guide dialogue will appear.
- In the Title field, enter your desired guide name with a maximum of 300 characters. Special characters and reserved words are not allowed.
- Choose a desired category in the Category dropdown.
- Click Create.
Install the extension
If this is your first time creating a step by step guide, you'll see a prompt to install the Document360 AI Capture Chrome extension.
- Click Install.
This will redirect you to the Chrome web store or the appropriate browser store page. - Click Add extension in the Chrome web store page.
- Once installed, return to the Knowledge base portal and click Start capturing.
- Select the desired screen to record:
- Chrome tab: Records only the selected Chrome tab.
- Window: Records only the selected window.
- Choose Chrome tab when the entire workflow lives within the browser, such as demonstrating a web app or walking through a portal.
- Choose Window when the workflow involves a desktop application or requires switching between a browser and another tool on your screen.
Record your steps
- Once the desired screen is selected, click Share.
The Step by step guide recording panel will appear. - Configure the following in the recording panel.
- Choose your preferred resolution, either 16:9 or 4:3.
- The Total clicks section tracks the clicks made during the recording.
- Click Add in the Blur selected section to mask any sensitive information on screen before recording begins.
- Turn on the Show recording controls on the screen toggle if needed.
- Click Discard to cancel and return to the previous screen.
- Click Start capturing to begin recording.
Once recording begins, navigate through the screens and perform the necessary actions. All on-screen interactions, including mouse clicks and typing, will be recorded. A recording status icon will appear to show that the recording is active.
- If the Show recording controls on the screen toggle is turned on, a Document360 logo will appear in the bottom left corner of the recording screen. Clicking the logo will pause the recording. This logo will also be visible in screenshots.
- Mouse clicks and interactions will be recorded, with click indicators displayed for easier guide editing.
Pause and resume recording
- To pause at any point, switch back to the Document360 tab.
- In the recording panel, click Pause capturing.
- When you're ready to continue, click Resume.
- To stop the recording entirely, click Done in the recording panel or Stop sharing in the floating panel.
After recording, the steps are automatically uploaded to the guide editor in the Knowledge base portal. Each step will display the recorded screens with content.

Best practices for a clean recording
A little preparation before you start recording saves significant editing time afterward.
- Close unnecessary tabs and notifications - Browser notifications, email pop-ups, and unrelated tabs can appear in the recording. Silence them before you start.
- Use a clean browser profile - Bookmarks bars, extensions, and saved form data can appear on screen. Consider recording in a clean Chrome profile or incognito window.
- Pre-blur sensitive areas - If your workflow involves credentials, customer data, or internal URLs, use the Blur selected section before recording rather than blurring frame-by-frame in the editor.
- Go slow and deliberate - Hover briefly over each element before clicking. This gives readers time to orient themselves and produces cleaner click indicators in the recorded steps.
- Stick to one task per guide - A guide covering "set up your account AND configure your first report" will be hard to navigate. Record separate guides for each distinct task and link them.
Next steps
Once your guide is recorded and uploaded, you can edit and enhance each step - adding blur, spotlight, text overlays, highlights, image replacements, zoom effects, and animated clicks. See Editing a step by step guide for the full editing reference.
FAQ
Does Eddy AI use content from Step by step guides?
Yes. Eddy AI fetches the title, description, and body text from published guides when responding to searches. Responses include a citation linking directly to the source guide.
How do I schedule a guide for later publication?
Click the dropdown arrow next to Publish > Publish later > set the date, time, and time zone > optionally add a comment > click Schedule.
Why is a guide locked, and how do I unlock it?
A guide locks when someone is editing it. It unlocks automatically after 15 minutes of inactivity, when the editor clicks the Lock icon and selects Unlock, or when they navigate away.
How many steps can I create in a guide?
Up to 200 steps per guide.
How do I track activity events for step by step guides?
To monitor activity events in the Step by step guide:
- Navigate to Settings () > Knowledge base portal > Team auditing in the Knowledge base portal.
- In the Team auditing tab, you'll find updates on visibility changes, title updates, and contributor modifications for each guide. For more information, read the article on Team auditing.