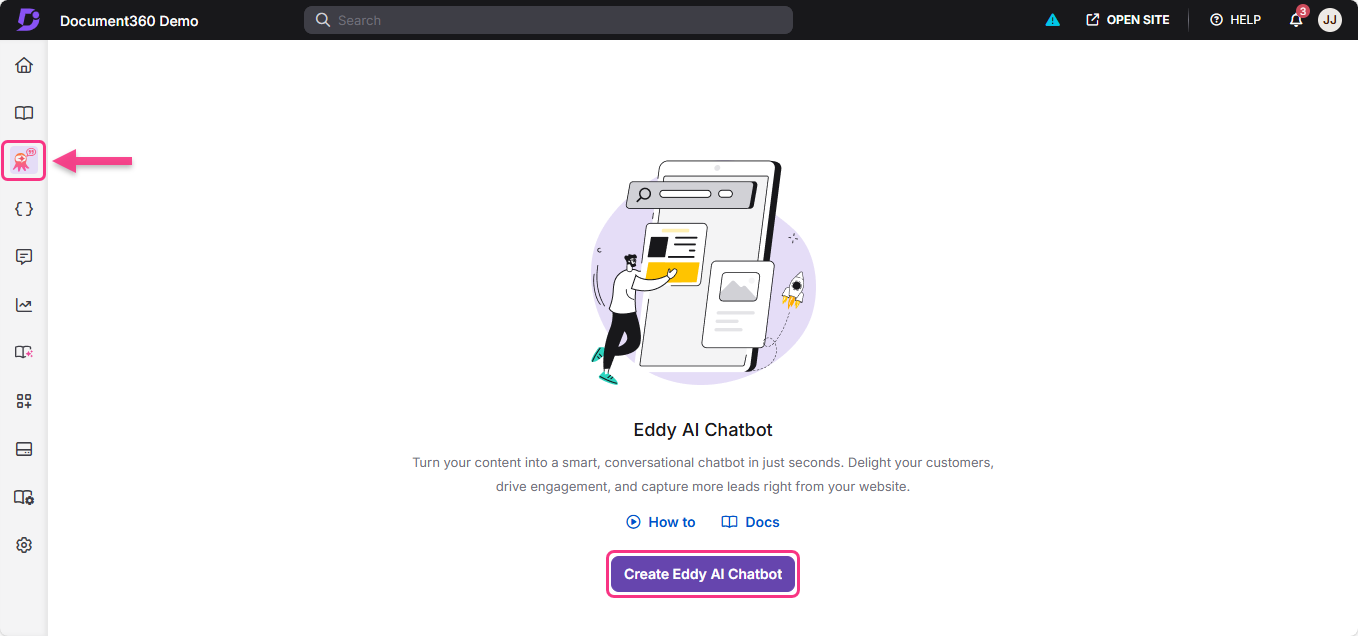
Creating an Eddy AI Chatbot lets you set up an AI-powered assistant trained on your content, ready to answer user questions on your website or knowledge base. The creation process involves selecting content sources (the material the chatbot uses to generate answers) and then configuring how the chatbot looks and behaves. You can create a chatbot from the AI Chatbot( ) section in the Knowledge Base portal, or during the Document360 onboarding flow when setting up a new project.
When to create an Eddy AI Chatbot
- Use this when you are deploying a chatbot for the first time on your website or knowledge base.
- Use this when you need a separate chatbot for a different brand, product, or website.
- Use this during Document360 onboarding if you select Eddy AI Chatbot as your use case.
Before you begin
- Identify which content sources you want to use (knowledge base, website, files, FAQs, text, Zendesk, or Freshdesk).
- If you plan to connect Zendesk or Freshdesk, have your API token and subdomain URL ready.
- Review the AI Chatbot to understand storage limits and supported sources.
Create the Eddy AI Chatbot
Create a chatbot from the portal
- Navigate to AI Chatbot () in the left navigation bar of the Knowledge Base portal.
- Click Create Eddy AI Chatbot.
The portal prompts you to add sources for your chatbot.
- Select one or more source types and follow the steps for each source. See Adding sources to your chatbot below.
- Click Create chatbot to complete setup.
The chatbot is created and you are taken to the chatbot configuration area.
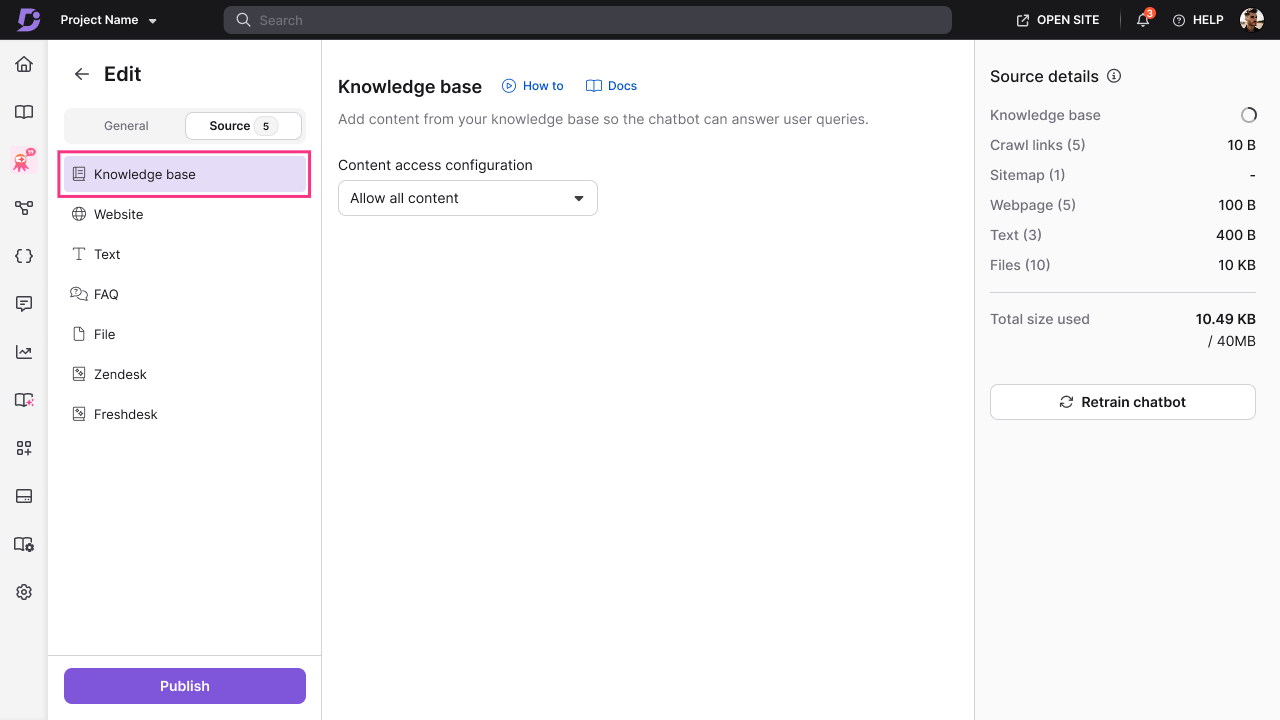
Adding sources to your chatbot
Knowledge base
- Click Knowledge base (
 ) from the list of available sources.
 - Choose a content access option:
- Allow all content — includes all articles from all workspaces and categories. The chatbot learns from your entire documentation, including any new content added later.
- Allow selected content — restricts the chatbot to specific parts of your knowledge base. Choose from:
- Selected workspaces and languages — includes content from the workspaces and languages you select. New languages added to those workspaces later are included automatically.
- Selected categories — includes only the specific categories you select. New categories added later are not included automatically and must be selected manually.
When you select an entire workspace, any new languages added to that workspace later are included automatically. When you select specific categories, new articles added to those categories later are not included by default.
- Click Create chatbot to add the Knowledge Base source.
Website
You can add website content in three ways: Crawl Links, Sitemap, or individual Webpages.
Crawl Links
Crawl Links let you provide a starting URL. The system automatically crawls linked pages within the same domain up to 3 levels deep.
- Click Website () from the list of sources.
- Select the Crawl Links tab.
- Click + Add new.
- Enter the following details:
- Source name — a descriptive name for this crawl link source.
- URL — the URL to start crawling from.
- Include only paths (optional) — path patterns to limit crawling to specific sections. Example:
blog/,docs/. - Exclude paths (optional) — path patterns to skip. Example:
admin/,privacy/.
- Click Add crawl link.
The system begins crawling the URL and shows a progress indicator. Once added, you can edit or delete the crawl link.
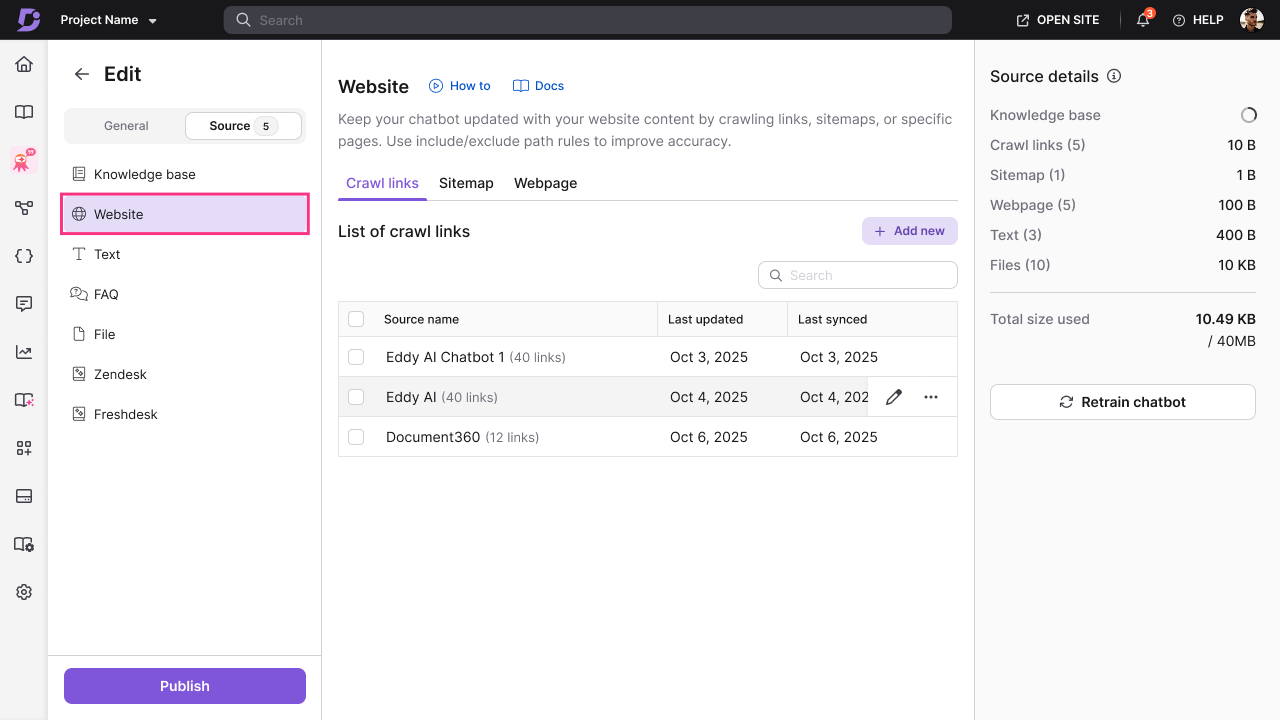
A maximum of 200 links can be crawled per site. Individual crawl links can be recrawled up to 2 times per day.
Additional considerations for Crawl Links:
- Crawling is limited to the same domain as the starting URL. External domains are ignored.
- The crawler follows links up to a maximum depth of 3 levels from the starting page.
- Up to 1,000 URLs can be crawled per crawl session.
- From any single page, a maximum of 200 discovered links are considered.
- The crawler respects
robots.txtrules and skips disallowed paths automatically. - Certain non-informational pages (such as social media, privacy policies, admin pages, and job listings) are excluded by default.
Sitemap
Sitemap lets you provide a sitemap URL. The system extracts content from all pages listed in the sitemap.
- Click Website () from the list of sources.
- Select the Sitemap tab.
- Click + Add new.
- Enter the following details:
- Source name — a descriptive name for this sitemap source.
- URL — the sitemap URL.
- Include only paths (optional) — path patterns to include from the sitemap. Example:
blog/,help/. - Exclude paths (optional) — path patterns to exclude. Example:
archive/,test/.
- Click Add sitemap.
The system fetches all URLs from the sitemap and begins extracting content. Once added, you can edit or delete the sitemap.
Additional considerations for Sitemaps:
- Only single-level sitemaps are supported. Nested or index sitemaps referencing other sitemap files are not processed.
- Sitemap file size must be under 1 MB.
- Up to 1,000 URLs can be extracted from a sitemap.
- Include and exclude path rules are applied before ingestion.
Webpage
Webpage lets you add individual page URLs manually for precise control over which pages to include.
- Click Website () from the list of sources.
- Select the Webpage tab.
- Click + Add new.
- Enter the following details:
- Source name — a descriptive name for this webpage.
- URL — the exact page URL.
- Click Add webpage.
Repeat for each additional page you want to include.
Website content is ingested only if it matches the languages enabled for the project. Pages in unsupported languages are skipped automatically across all website sources.
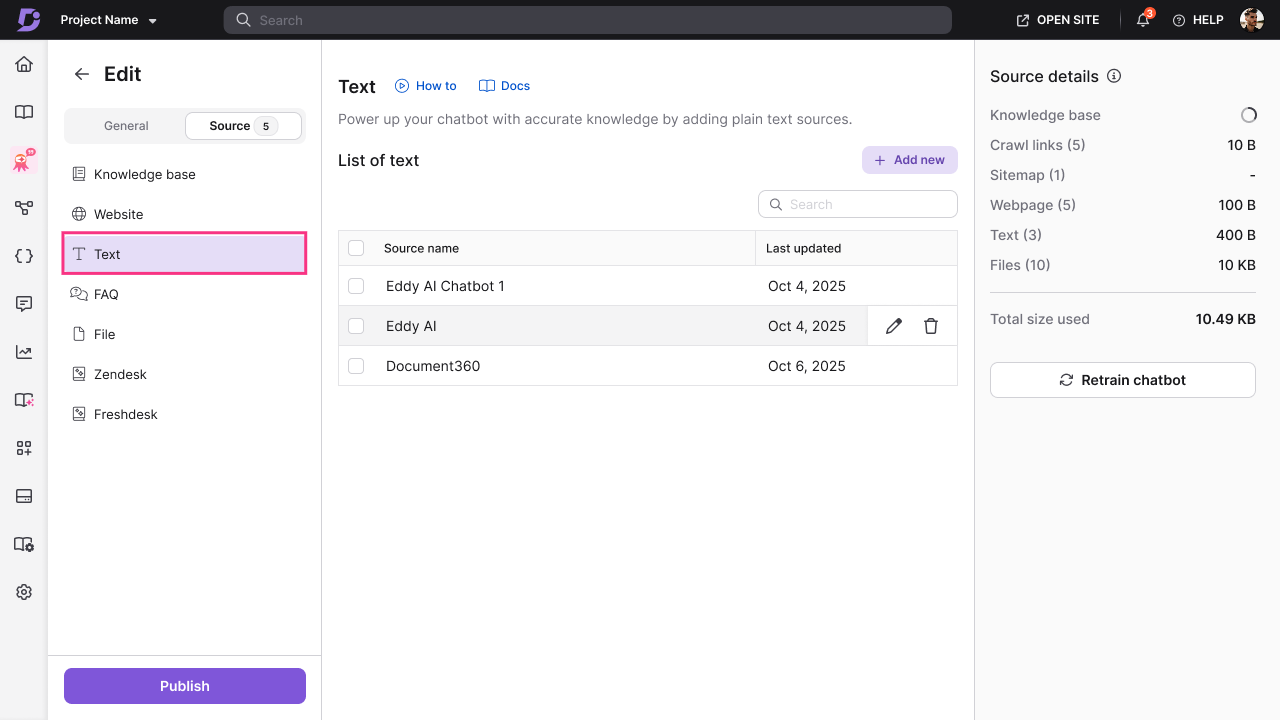
Text
- Click Text () from the list of sources.
- Click + Add new.
- Enter the following details:
- Source name — a descriptive title for this text entry.
- Content — enter or paste your text content.
- Format your text using the available toolbar options: Bold, Italic, Underline, Font color, Highlight, Hyperlink.
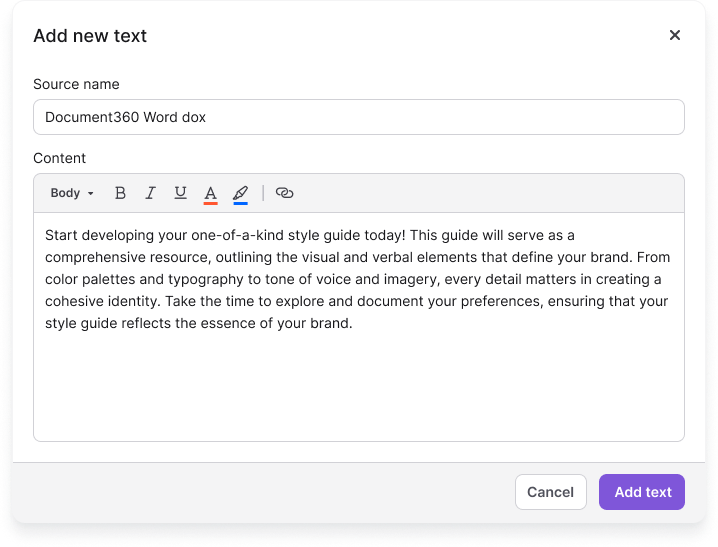
- Click Add text.
Repeat for each additional text entry you want to include.
FAQ
- Click FAQ () from the list of sources.
- Click + Add new.
- Enter the following details:
- Question — the question users might ask.
- Answer — the complete answer to the question.
- Format your answer using the available toolbar options: Bold, Italic, Underline, Font color, Highlight, Hyperlink.
- Click Add FAQ.
Repeat for each additional FAQ entry you want to include.

File
- Click File () from the list of sources.
- Click + Add new.
- Choose one of the following upload methods:
- Upload from my device — browse and select files from your computer.
- Choose from Drive — select files from your Document360 Drive.
- Drag and drop — drag files directly into the upload area.
- Select one or multiple files to upload. Supported formats: DOC, DOCX, PDF, MD (Markdown), TXT.
- Click Add files to complete the upload.
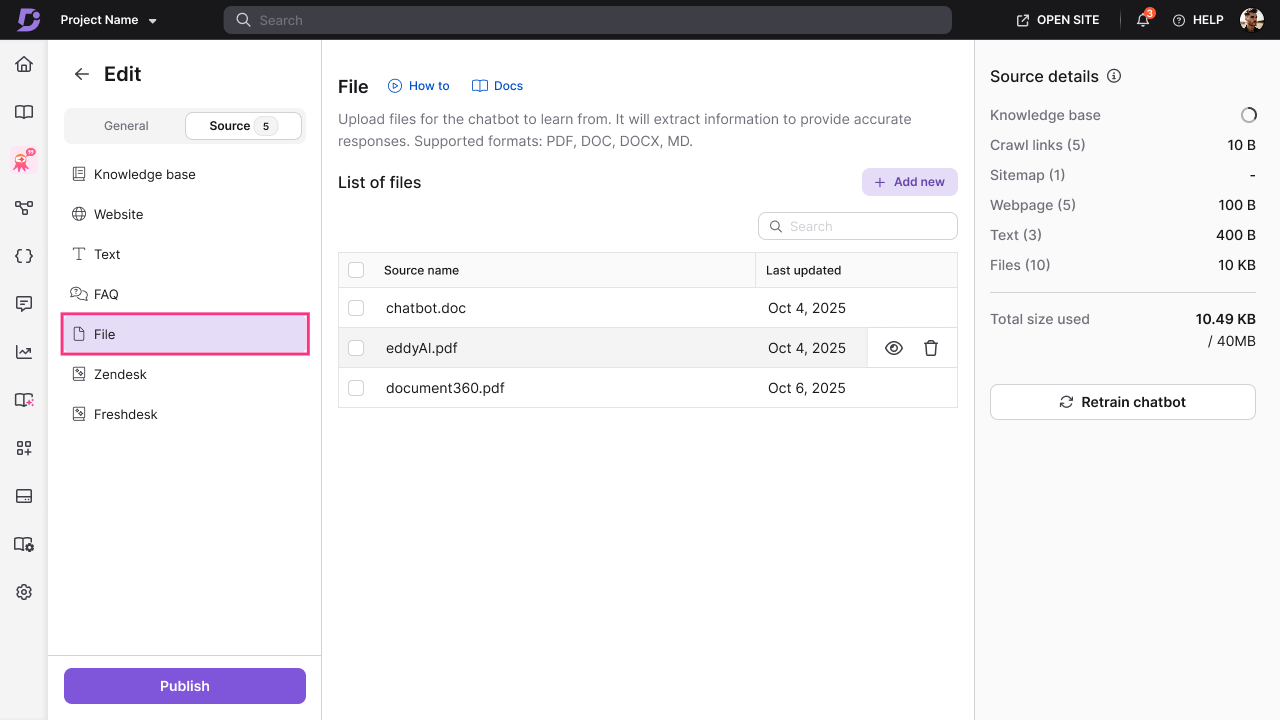
There is no individual file size limit, but the total size of all sources must not exceed your chatbot's storage limit (40 MB by default). Only text content is extracted from files — images and other media are not stored. If a file upload fails, an error message appears. Fix the issue and try uploading again.
Zendesk
- Click Zendesk () from the list of sources.
- Click Connect.

- Enter your Zendesk connection details:
- API Token — your Zendesk API token for authentication.
- Administrator Email ID — the email address associated with your Zendesk account.
- Subdomain URL — your Zendesk subdomain.
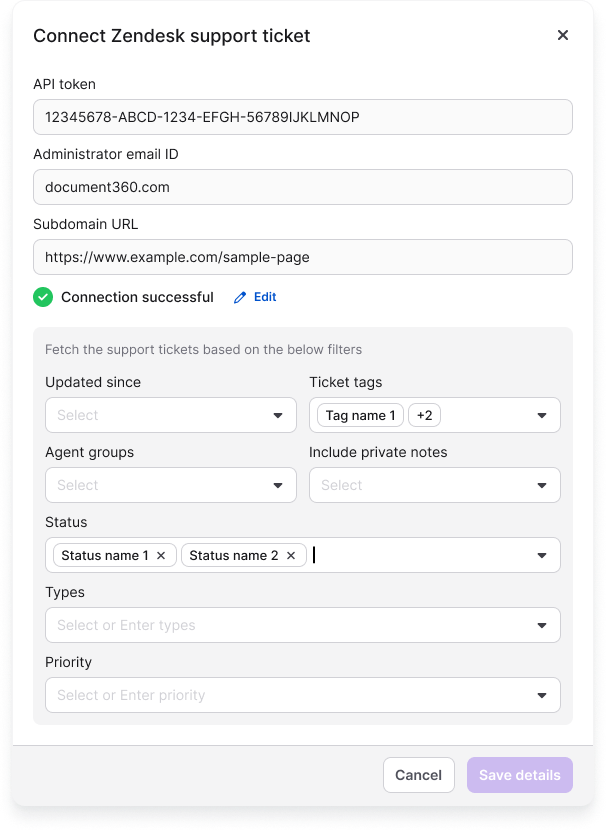
- Once validated, configure your ticket filters:
- Tickets updated since — select a date to fetch only tickets modified after this date.
- Ticket tags — filter tickets by specific tags.
- Agent groups — filter tickets assigned to specific agent groups.
- Include private notes — choose whether to include internal notes from agents.
- Status — filter by ticket status: Open, Pending, Solved, or Closed.
- Types — filter by ticket type: Question, Problem, Incident, or Task.
- Priority — filter by priority level: Low, Normal, High, or Urgent.
- Click Save details to connect Zendesk and begin syncing ticket data.
Once connected, you can view the last synced date and the number of tickets fetched.
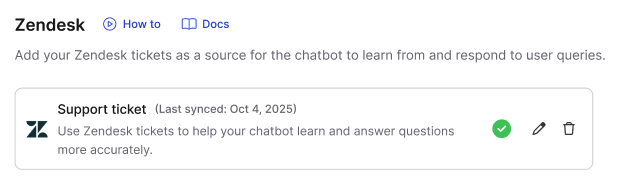
Ticket data is fetched from newest to oldest based on your date filter.
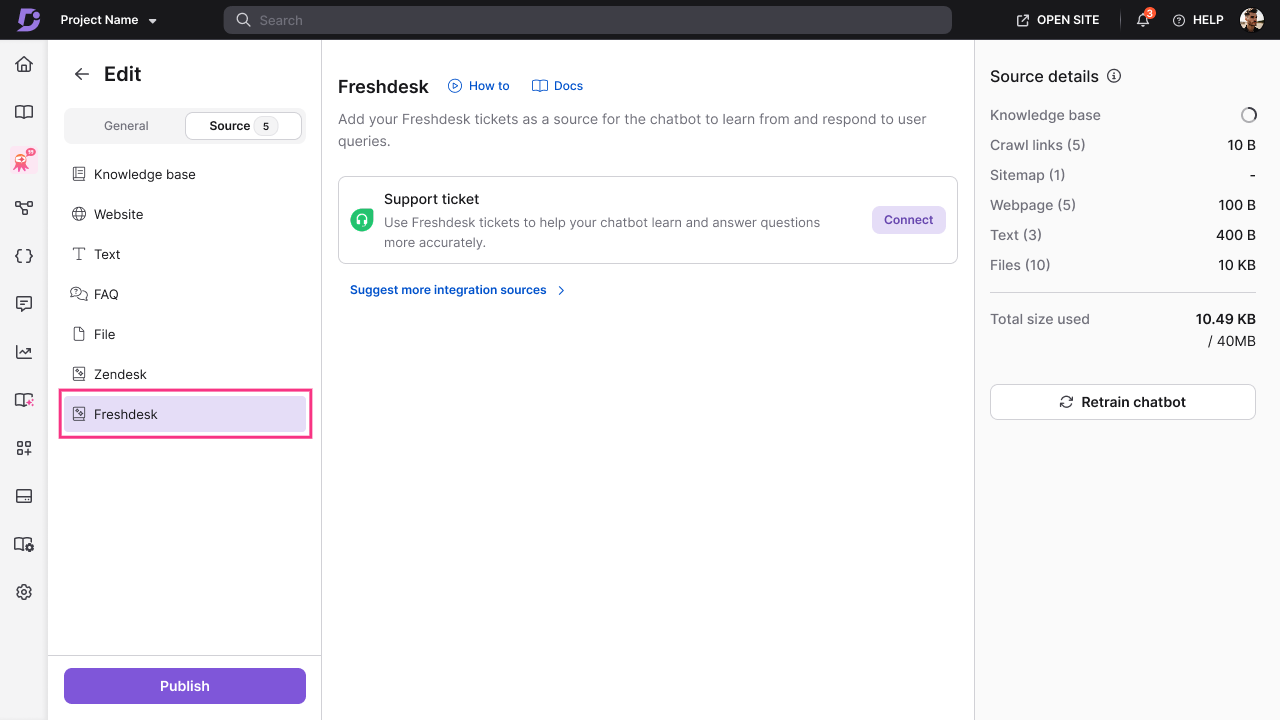
Freshdesk
- Click Freshdesk () from the list of sources.
- Click Connect.
- Enter your Freshdesk connection details:
- API Token — your Freshdesk API token for authentication.
- Subdomain URL — your Freshdesk subdomain.
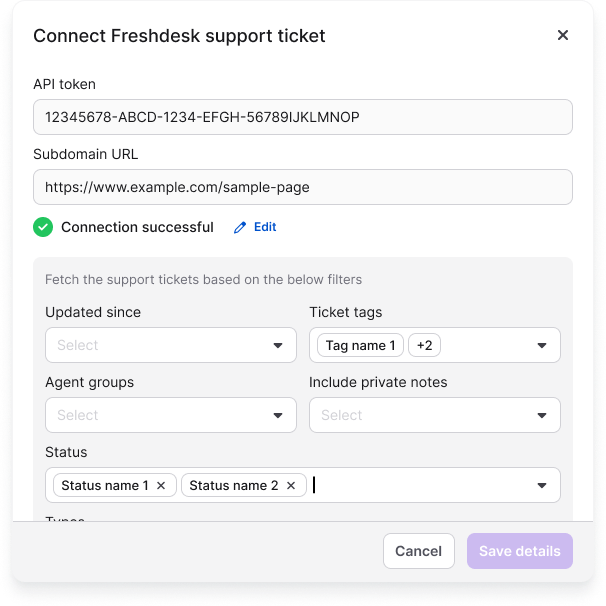
- Once validated, configure your ticket filters:
- Tickets updated since — select a date to fetch only tickets modified after this date.
- Ticket tags — filter tickets by specific tags.
- Agent groups — filter tickets assigned to specific agent groups.
- Include private notes — choose whether to include internal notes from agents.
- Status — filter by ticket status: Open, Pending, Resolved, or Closed.
- Types — filter by ticket type: Question, Problem, Incident, Feature Request, or Refund.
- Priority — filter by priority level: Low, Medium, High, or Urgent.
- Click Save details to connect Freshdesk and begin syncing ticket data.
Once connected, you can view the last synced date and the number of tickets fetched.
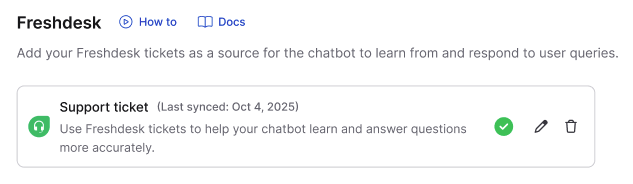
Ticket data is fetched from newest to oldest based on your date filter.
Set up Eddy AI Chatbot during onboarding
New users can set up a chatbot directly during the Document360 onboarding process.
- When creating a new project, select Eddy AI Chatbot as your use case.
- Follow the simplified onboarding flow:
- Step 1: Add up to 2 sources. You can add more sources later from the portal.
- Step 2: Configure appearance settings.
- Once complete, you land in your project with the chatbot ready to use.
AI Chatbot specifications
| Limit | Value | Notes |
|---|---|---|
| Default storage per chatbot | 40 MB | Applies across all connected sources combined |
| Crawl depth (Crawl Links) | 3 levels | From the starting page |
| Max URLs per crawl session | 1,000 | Per crawl link source |
| Max discovered links per page | 200 | During a crawl session |
| Max URLs per sitemap | 1,000 | Per sitemap source |
| Max sitemap file size | 1 MB | — |
| Sitemap type supported | Single-level only | Nested or index sitemaps are not processed |
| File formats supported | DOC, DOCX, PDF, MD, TXT | Images and media inside files are not ingested |
| Crawl link recrawl limit | 2 times per day | Per individual crawl link |
| Sources added during onboarding | Up to 2 | Additional sources can be added after onboarding |
Best practices
- Add the knowledge base source first — if you already have documentation, it gives the chatbot the strongest, most verified starting content.
- Use "Allow selected content" for large knowledge bases — targeting specific workspaces or categories avoids training the chatbot on content that is irrelevant to your users.
- Apply ticket filters when connecting Zendesk or Freshdesk — filter by status, date, or tag to ensure only high-quality, resolved tickets are ingested. Be mindful of PII in ticket content.
- Use path filters for website sources — use Include only paths and Exclude paths to prevent the chatbot from ingesting admin pages, legal pages, or other non-informational content.
- Test with the Playground after adding sources — before publishing, use the Playground to verify the chatbot answers questions correctly based on the sources you have added.