The Camera feature lets you record a video directly from your camera and overlay it on your video or interactive demo. You can also upload a pre-recorded video instead. Use this to add a personal touch, such as a face-cam narration or a presenter view, to your demo.
Add a camera recording
-
Click Camera in the editor.
- The Recording pane appears with a list of previously recorded videos (if any).
- If videos already exist, click Add new.
-
Enable Hide other elements to hide every other element added in the timestamp.
-
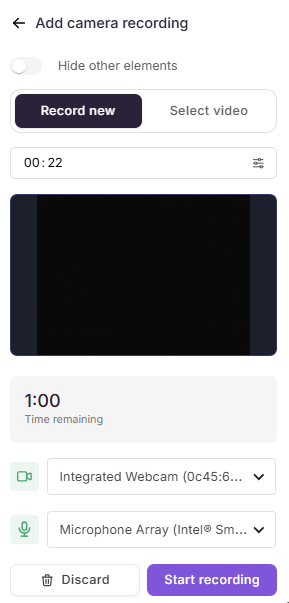
In the Add camera recording pane, choose one of the following:
Option Description Record new Record a video directly using your camera Select video Upload an already recorded video from your library -
In the Time field, enter the timestamp where the recording should appear. Use the Fine-tune milliseconds option for precise placement.
-
Select the desired camera and microphone from the dropdowns.
-
Click Start recording.
A 3-second countdown begins before recording starts.
-
During recording:
- Click Pause and Resume as needed.
- Click the Retake icon to start over.
- Click Discard to delete the current recording.
- Click Stop to end the recording.
-
After stopping, click Save and continue. The system processes and adds the video to the demo.
-
If needed, click Record again to capture another recording.
Configuring the camera recording
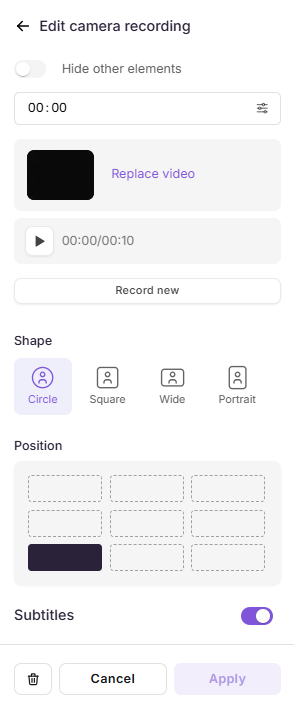
Once saved, the recorded video overlays on the interactive demo. Use the right panel to configure it:
- Enable the Hide other elements toggle for a distraction free editing.
- In the Time field, enter the time at which the recorded video is placed.
- Click Replace video to swap the current recording with another.
- Click the Play icon to preview the recording.
- Click Record new to capture a fresh video.
Shape:
Choose a display shape for the video overlay.
- Circle
- Square
- Wide
- Portrait.
Position:
Select where the video appears on the demo screen.
Subtitles:
Turn on the Subtitles toggle to auto-generate subtitles if speech is detected in the recording.
Click Apply to save all changes.
Managing recorded videos
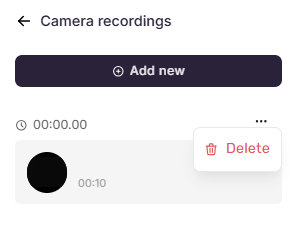
All recorded videos are listed in the Camera recordings pane.
- Click any recorded videos to modify it.
- To delete a recording, hover over it, click the More icon, and select Delete.
You cannot create two recordings at the same timestamp.
Best practices
- Use a stable camera angle. Ensure your camera is steady and well-lit before starting the recording.
- Test your microphone first. Check that the correct microphone is selected to avoid silent or low-quality audio.
- Use the Fine-tune option for accuracy. When placing a recording at a specific moment, use millisecond precision to sync it with the demo action.
- Enable subtitles for clarity. If your recording contains speech, turn on subtitles to improve accessibility.
- Preview before applying. Always use the Play icon to review the recording in context before clicking Apply.