After recording a video in the Editor, the Video editor opens automatically so you can enhance it before inserting it into your article. You can also reopen the editor anytime by selecting the video in the article and clicking Edit ( ).
What you can do in the Video editor
Each tool is covered in detail in its own article, see the links below.
- Call to action - Add buttons that link to URLs or display messages during playback
- Blur - Mask credentials, PII, or sensitive UI elements at specific timestamps
- Spotlight - Draw attention to key areas of the screen during playback
- Highlight - Emphasize specific areas of the screen during playback
- Crop - Resize and reframe the video to fit your article layout
- Trim - Cut unwanted sections from the start, middle, or end
- Image - Insert images into the video at specific timestamps
- Text - Add text overlays to annotate or label parts of the recording
- Camera - Include a camera feed overlay within the recorded video
- Music - Add background music to the video
- Voice - Add AI voiceover in multiple languages or enable auto-generated subtitles
- Annotation - Add contextual notes, insights, announcements, or alerts at specific timestamps
- Zoom - Magnify a selected area of the screen at specific timestamps to focus attention on fine detail
Managing added elements
In the Added elements dropdown, you can view all elements applied to the video:
- Click Edit ( ) to modify an element
- Click Delete ( ) to remove it
- Click Eye ( ) to hide mouse clicks across the video
Click Close to save all changes.
Formatting the video in the article
Once inserted, select the video to access formatting options:
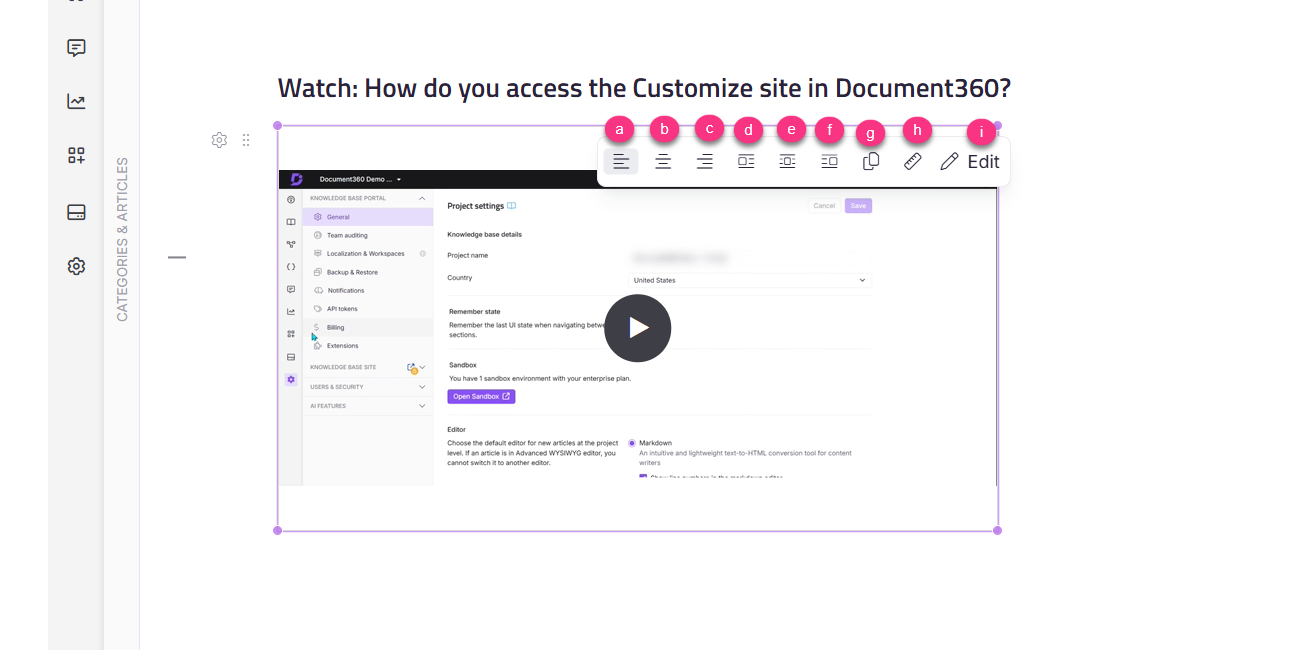
| Option | Description |
|---|---|
| Align left / Center / Align right | Controls horizontal alignment |
| Inline left / Inline block / Inline right | Places the video inline within the text |
| Resize | Adjusts the video dimensions |
| Copy | Copies the video for reuse in another article within the same project |
| Edit | Reopens the Video editor |