Use this article to start an article, add and format content, write alongside your team, and edit the markup when you need more control. Some steps depend on the editor your project uses, so each section names the editor it applies to.
NOTE
The unified Editor is rolled out in phases and is currently available in projects created after November 16, 2026. Projects created earlier continue to use the Advanced WYSIWYG editor and the Markdown editor. We're working to make it available to all projects soon.
Check which editor your project uses
Your project uses either the unified Editor, or the Advanced WYSIWYG editor and the Markdown editor. In projects with the Advanced WYSIWYG and Markdown editors, you choose between the two for each article, or set a project default.
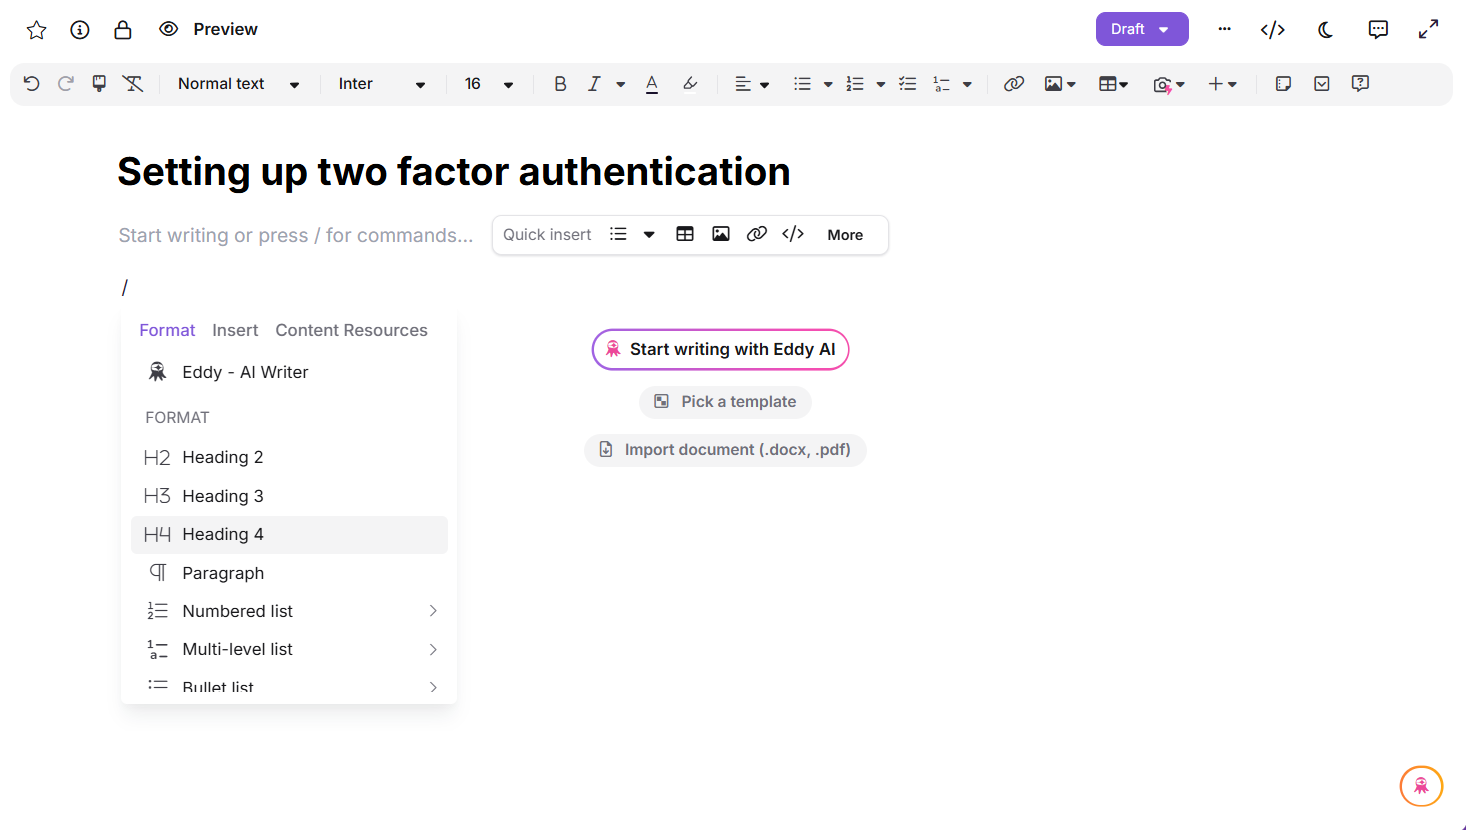
To check, open any article. If the toolbar sits above the content and Markdown view (</>) is in the article header, your project uses the unified Editor. To learn how it works, read Unified Editor.
If you've seen it called the new editor or the Block editor, this is the unified Editor. Block view is one of its two views, not a separate editor. There is no setting to switch an existing project or article to the unified Editor.
The three editors differ in how you format text, edit the markup, and choose an editor type:
| Task | Unified Editor | Advanced WYSIWYG editor | Markdown editor |
|---|---|---|---|
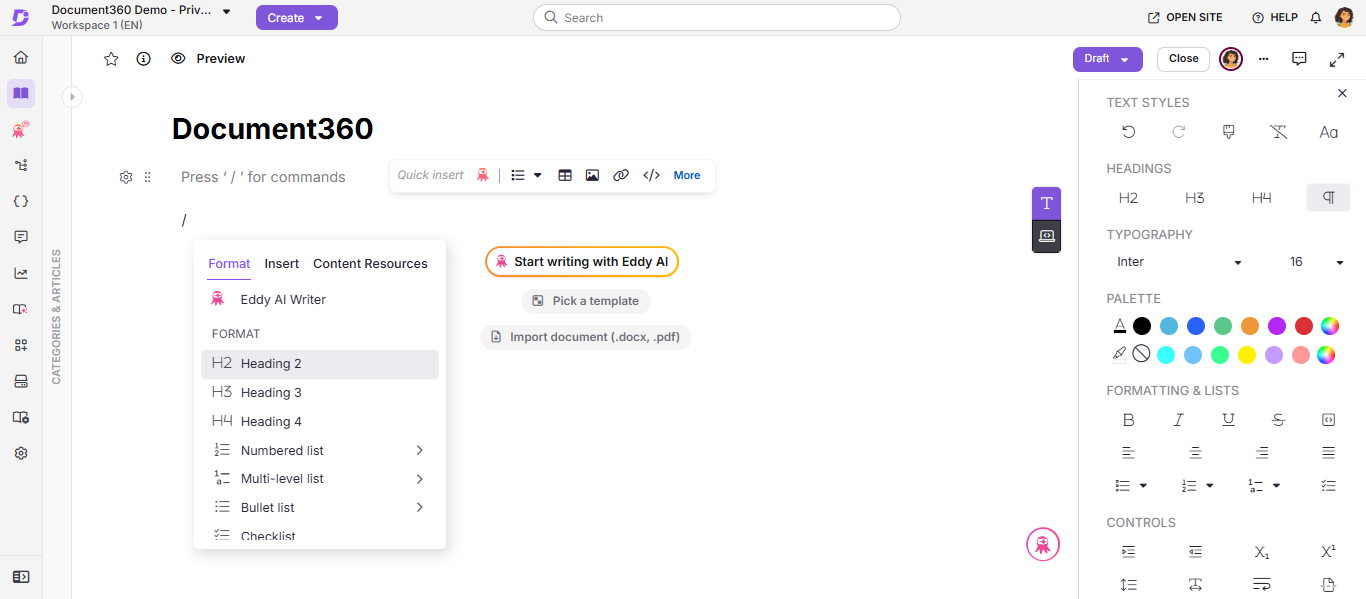
| Format text | Use the toolbar above the content, or the bubble menu that appears when you select text | Select text to show the toolbar, or select T at the right-hand side of the editor to open the formatting panel | Use the Markdown syntax toolbar above the editor |
| Edit the markup | Select Markdown view (</>) in the article header | Open Code view to edit the HTML | You always write the source; the right pane shows a live preview |
| Choose an editor type | Nothing to choose | Set for each article, or as a project default | Set for each article, or as a project default |
In projects that use the Advanced WYSIWYG and Markdown editors, the editor type selected for an individual article is separate from your project’s default editor. Features that require the Advanced WYSIWYG editor, such as PDF import and Word import, check your project’s default editor setting under Settings > Knowledge base portal > General > Editor, not the editor type of the article you are viewing. If PDF or Word import is not appearing as an option, confirm that Advanced WYSIWYG is set as your project’s default editor, not just the editor type of the article you have open.
Start an article
Choose the starting point that fits the content you have:
- Start from scratch: Open a blank article and write. To learn more, read Create an article.
- Use a template: Start from a prebuilt structure for common content types, such as how-to guides, release notes, and troubleshooting articles. To learn more, read Create template.
- Let Eddy AI write a first draft: Generate a draft from a prompt, create an outline, or turn an audio or video file into an article. To learn more, read Create with Eddy AI.
- Import a file: Convert a Word or PDF file into an editable article. To learn more, read Import from Word or Import PDF.
Add content to your article
In the unified Editor and the Advanced WYSIWYG editor, you can add text, code, tables, images, videos, callouts, tabs, accordions, and FAQs to any article. Choose the method that suits how you work:
- Type
/to open the slash command menu and insert any element without leaving the keyboard. - Use the Quick insert menu that appears in an empty block to add an Eddy AI draft, a list, a table, an image, a link, or a code block. Select More to open the full slash command menu.
- Type Markdown shortcuts as you write. For example, type
##followed by a space to create a Heading 2.
The Quick insert menu appears only in an empty block. It disappears when you start typing and reappears if you clear the block.
In the Markdown editor, select an element in the toolbar or type its Markdown syntax. The slash command menu and the Quick insert menu are not available in the Markdown editor.
For every element you can add and how to configure it, read Editor elements.
Unified Editor
Advanced WYSIWYG editor
Format your content
Use the formatting controls to change text styles, headings, fonts, colors, lists, and spacing.
In the unified Editor, the toolbar sits above the content. Select text to open the bubble menu, which holds quick formatting such as Bold, Italic, Text color, Highlight, and Link.
In the Advanced WYSIWYG editor:
- Select the text you want to format. The toolbar appears.
- To open the full formatting panel, select the T icon.
In the Advanced WYSIWYG editor, to keep the formatting panel open while you work, select the Pin icon. The panel stays anchored to the right side of the editor.
In the Markdown editor, select an option in the toolbar to add its syntax at your cursor, or type the syntax yourself.
Write with your team
In the unified Editor and the Advanced WYSIWYG editor, you and other contributors can work on the same article at the same time. You can see who else is editing and where their cursor is as they type. In the unified Editor, this covers articles and page categories. The Markdown editor uses article locking instead, so one person edits at a time. To learn more, read Collaborative editing.
Edit the article's markup
Edit the markup directly when you need precise control, such as adding custom elements or inline styles.
- In the unified Editor, select Markdown view (</>) in the article header. You can write Markdown and HTML in Markdown view. Select Markdown view (</>) again to return to Block view.
- In the Advanced WYSIWYG editor, open Code view to edit the article's HTML. To learn more, read Code view.
- In the Markdown editor, you always edit the source. The left pane shows the syntax and the right pane shows a live preview.
Best practices
- Use slash commands in the unified Editor and the Advanced WYSIWYG editor to insert elements faster than clicking through the toolbar.
- Use templates for recurring article types, such as how-to guides, release notes, and troubleshooting articles, so every article follows the same structure.
- Paste into the right view in the unified Editor: paste Markdown into Markdown view and HTML into Block view.
- Paste as plain text when you copy content from another source, to avoid carrying over unwanted formatting. Press
Ctrl + Shift + Von Windows orCmd + Shift + Von Mac. - Pin the formatting panel in the Advanced WYSIWYG editor when you work on long articles.
- Set a project default editor if your project uses the Advanced WYSIWYG and Markdown editors, so every new article opens in the same editor. To learn how, read Set the default editor for new articles.
FAQ
Can I switch my existing project or articles to the unified Editor?
No. There is no setting in Document360 to switch an existing project or article to the unified Editor. The Editor type option in article settings and the default editor setting switch only between the Advanced WYSIWYG editor and the Markdown editor. Document360 rolls the unified Editor out to projects in phases.
Is the Block editor or the new editor the same as the unified Editor?
Yes. Both names refer to the unified Editor. Block view is one of its two views, alongside Markdown view, not a separate editor.