You can create a Reviewer account by assigning the Reviewer role during user creation. For adding more than five reviewers at once, use the bulk import feature.
When to add a reviewer
- A subject matter expert or stakeholder needs to review articles and leave feedback without the ability to edit content.
- You want to involve someone in the review workflow without giving them contributor or editor access to the portal.
Before you begin
- You must have the Admin or Owner portal role.
- You can add up to 5 email addresses in a single creation. For more than 5, use the bulk import flow below.
- Have the SSO configuration name ready if you are adding an SSO reviewer.
How to create a reviewer account
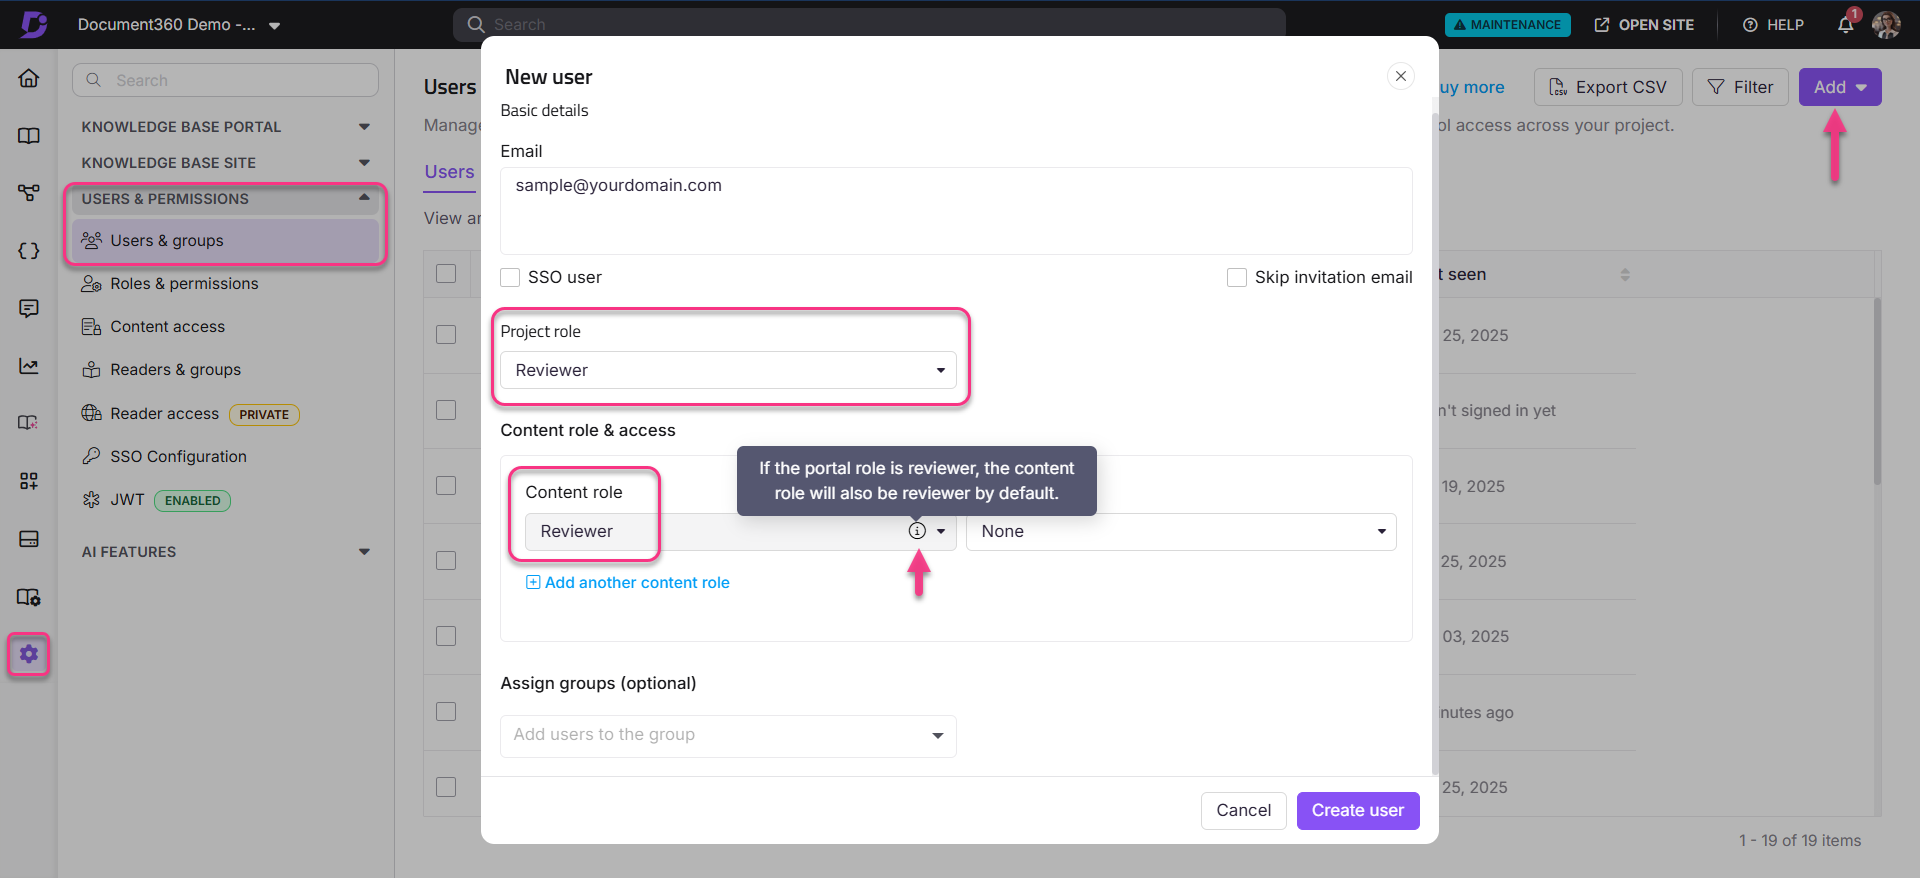
- Navigate to Settings () > Users and security in the left navigation bar in the knowledge base portal.
- In the left navigation pane, navigate to Users and groups.
- Click the Add dropdown at the top right.
- Click User to open the New user creation panel.
- In the Email field, enter the email address of the user to be added. You can add up to 5 email addresses.
- Select the SSO user checkbox if the user uses an SSO login.
- If yes, select the SSO dropdown and select the appropriate SSO configuration.
- Select the Skip invitation email checkbox if you do not wish to send the user an invite via email.
- Select Reviewer as the Project role. The content role will automatically be set to Reviewer.
NOTE
Users assigned the Reviewer portal role will not appear in the Manage content access section at the category or article level. This is expected behaviour because the Reviewer portal role automatically sets the content role to Reviewer and prevents it from being modified through Manage content access.
To assign category or article-level access through Manage content access, set the user's portal role to Admin, Owner, or Contributor, and then manually assign the Reviewer content role as described in step 10 below.
- Alternatively, if another Project role is selected (for example, Owner or Admin), you can manually assign the Reviewer role in the content role dropdown.
- Assign Content access permissions based on the workspace, language, and category as per the requirement.
- If you wish to assign the new user to an existing group, click the Assign groups dropdown and select the desired user group. The user automatically inherits the permissions and access associated with that group.
- Click New user to finish adding the Reviewer account.
Bulk importing reviewer accounts
You can import multiple Reviewer accounts at once by using the bulk import feature.
Before you begin
- You can import a maximum of 500 reviewer accounts at a time.
- Use the Document360 CSV template (downloaded during the import flow). The template includes fields for first name, last name, and email address.
How to bulk import reviewer accounts
-
Navigate to Settings () > Users and security in the left navigation bar in the knowledge base portal.
-
In the left navigation pane, navigate to Users and groups.
-
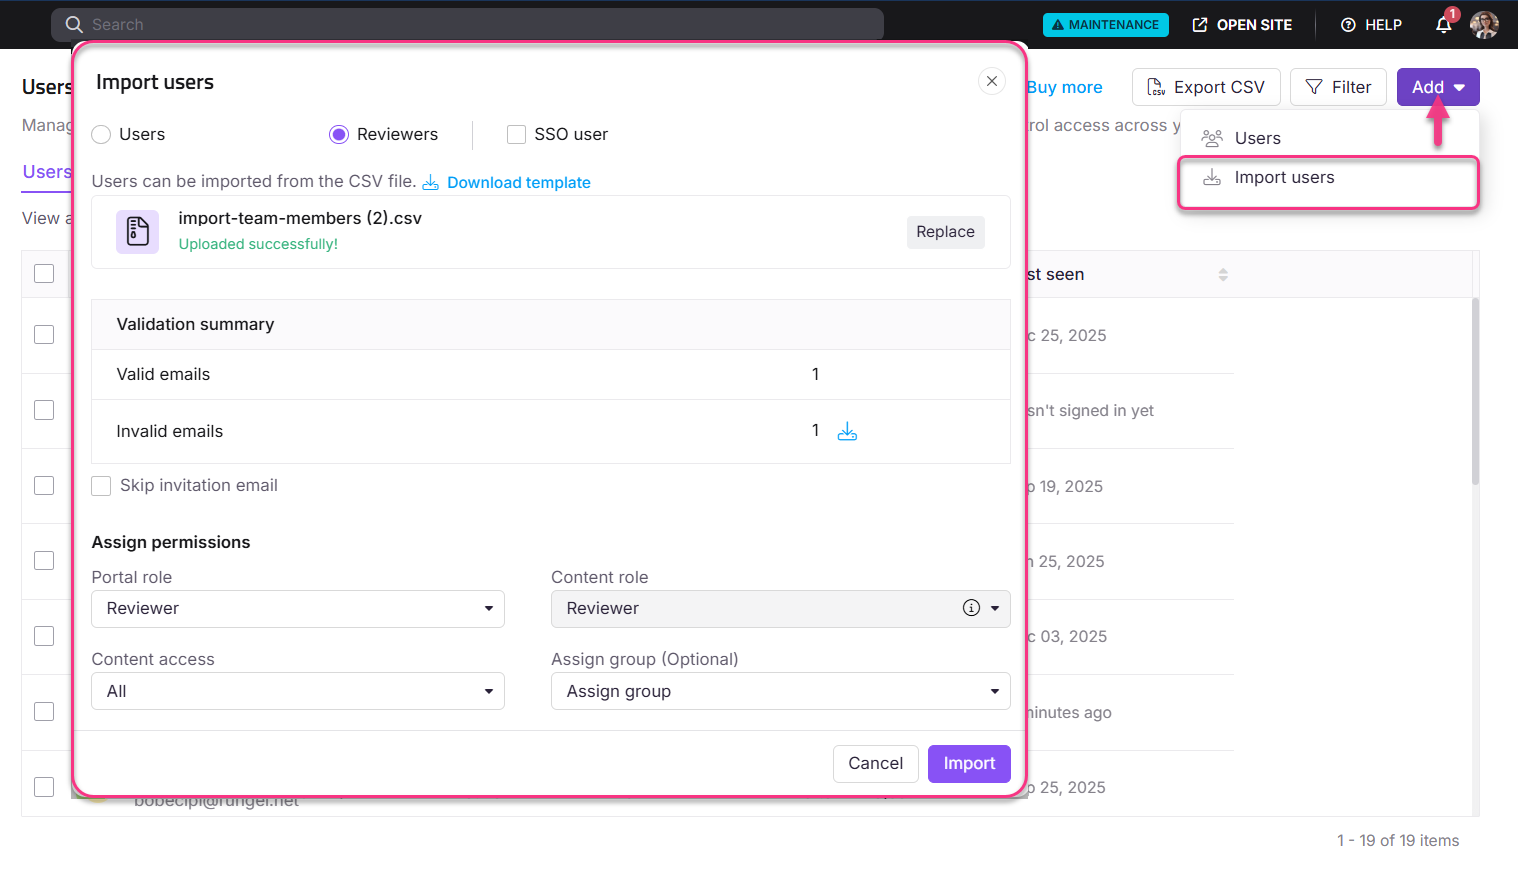
Click the Add dropdown at the top right.
-
Click Import users.
-
Select the Reviewer account radio button.
-
Select the SSO user checkbox to include them as SSO reviewer accounts.
-
Click Download template to download the sample import format.
The downloaded CSV file includes fields for first name, last name, and email address.
-
Drag and drop the file or use the Click to upload option to upload the CSV file from your local storage. The maximum number of users that can be added is 500.
Once the file is uploaded, a Validation summary is displayed showing the number of valid and invalid email addresses in the CSV file.
-
Click Replace if you wish to upload a different file.
-
Assign the desired portal and content roles.
-
Click Import to complete the process.
Considerations
| Item | Detail |
|---|---|
| Emails per single creation | Up to 5 email addresses at a time |
| Bulk import maximum | 500 reviewer accounts per import |
| Content access via Manage content access | Not available when the portal role is set to Reviewer. To use Manage content access at the category or article level, set the portal role to Admin, Owner, or Contributor and manually assign the Reviewer content role. |
Best practices
- If your team uses SSO, add reviewers as SSO users from the start to avoid needing to update authentication settings later.
- Use Skip invitation email only when you are coordinating access manually — reviewers cannot log in until they have verified their account.
- Use the bulk import for onboarding a cohort of reviewers (for example, a team of subject matter experts) to save time over individual creation.
- Assign reviewers to a user group at creation time if multiple reviewers share the same access requirements, rather than configuring permissions individually.