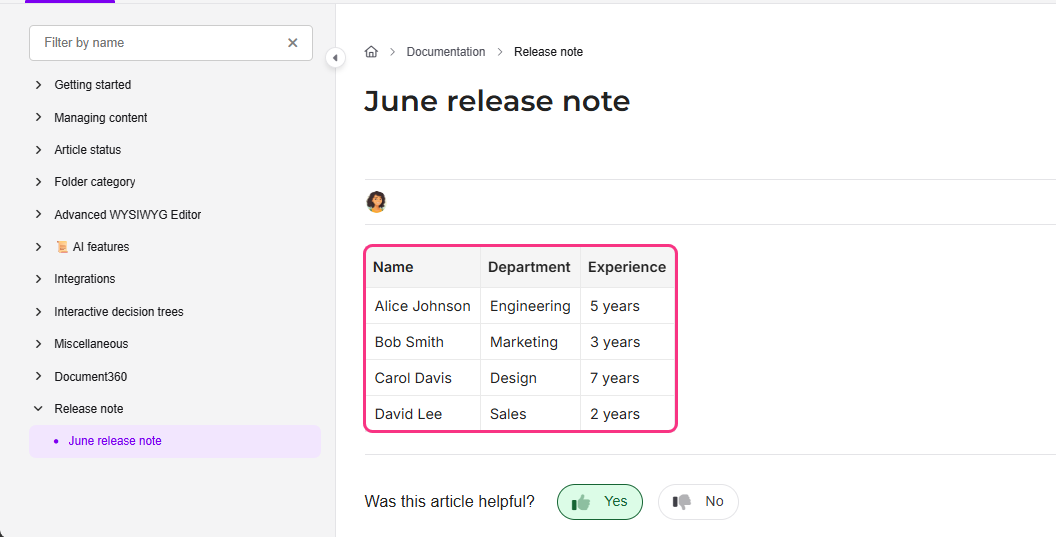
The Change table styles CSS snippet lets you apply consistent styling to all tables in your knowledge base - including borders, padding, header background color, and alternating row colors. By default, tables in Document360 use a minimal style with basic borders. This snippet gives you a ready-made starting point you can modify to match your brand.
How to apply the table styles snippet
- Navigate to Settings () > Knowledge base site in the left navigation bar of the Knowledge base portal.
- In the left navigation pane, navigate to Site customization.
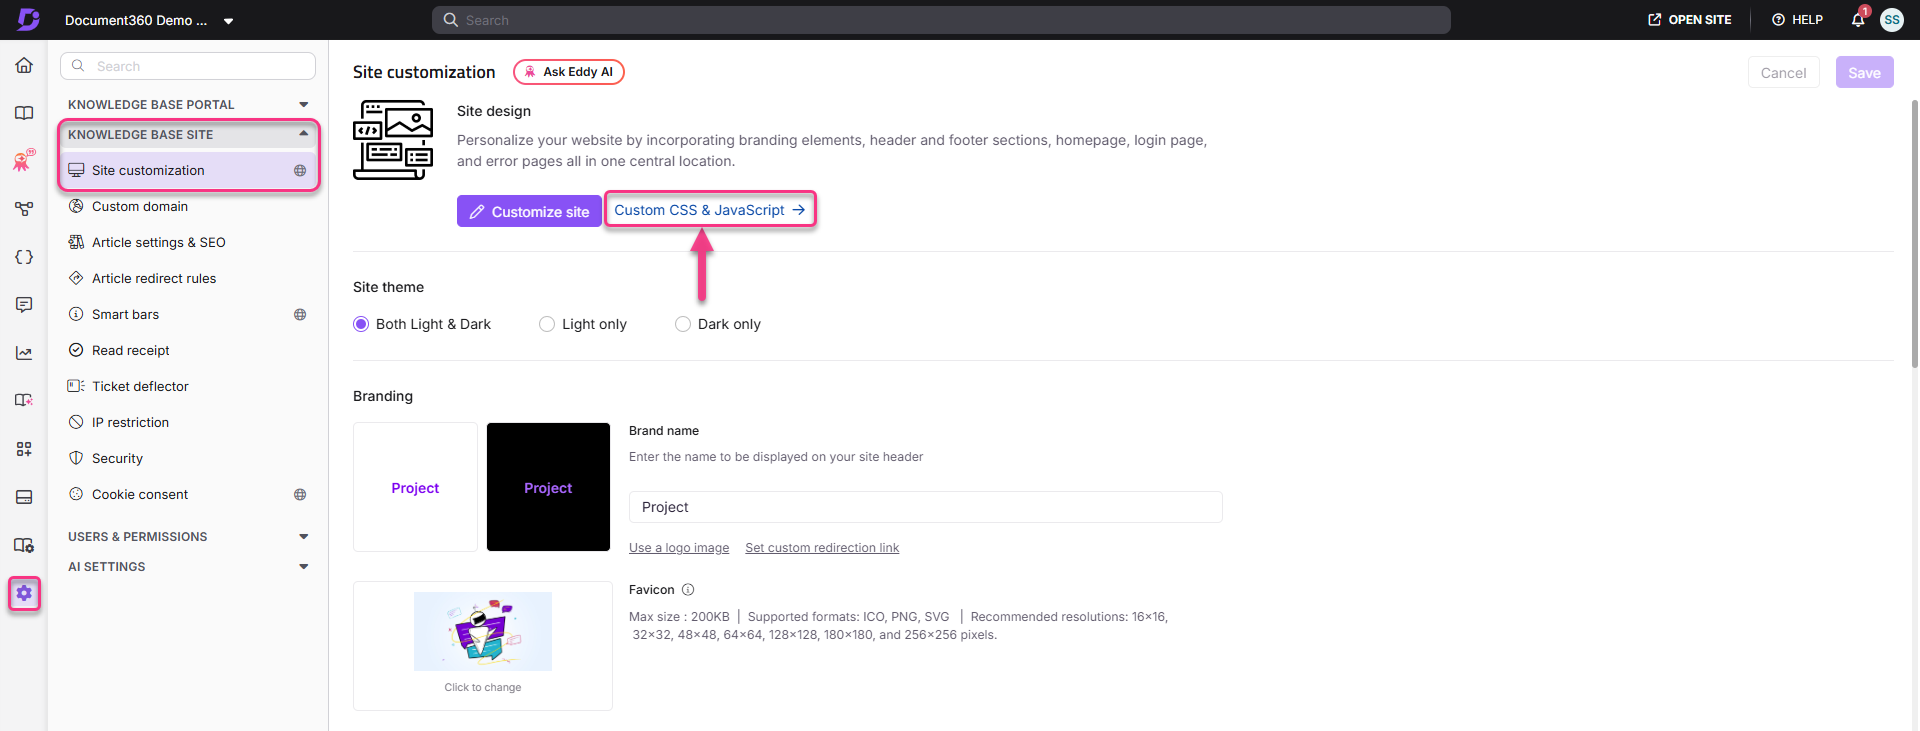
- Click Custom CSS & JavaScript.
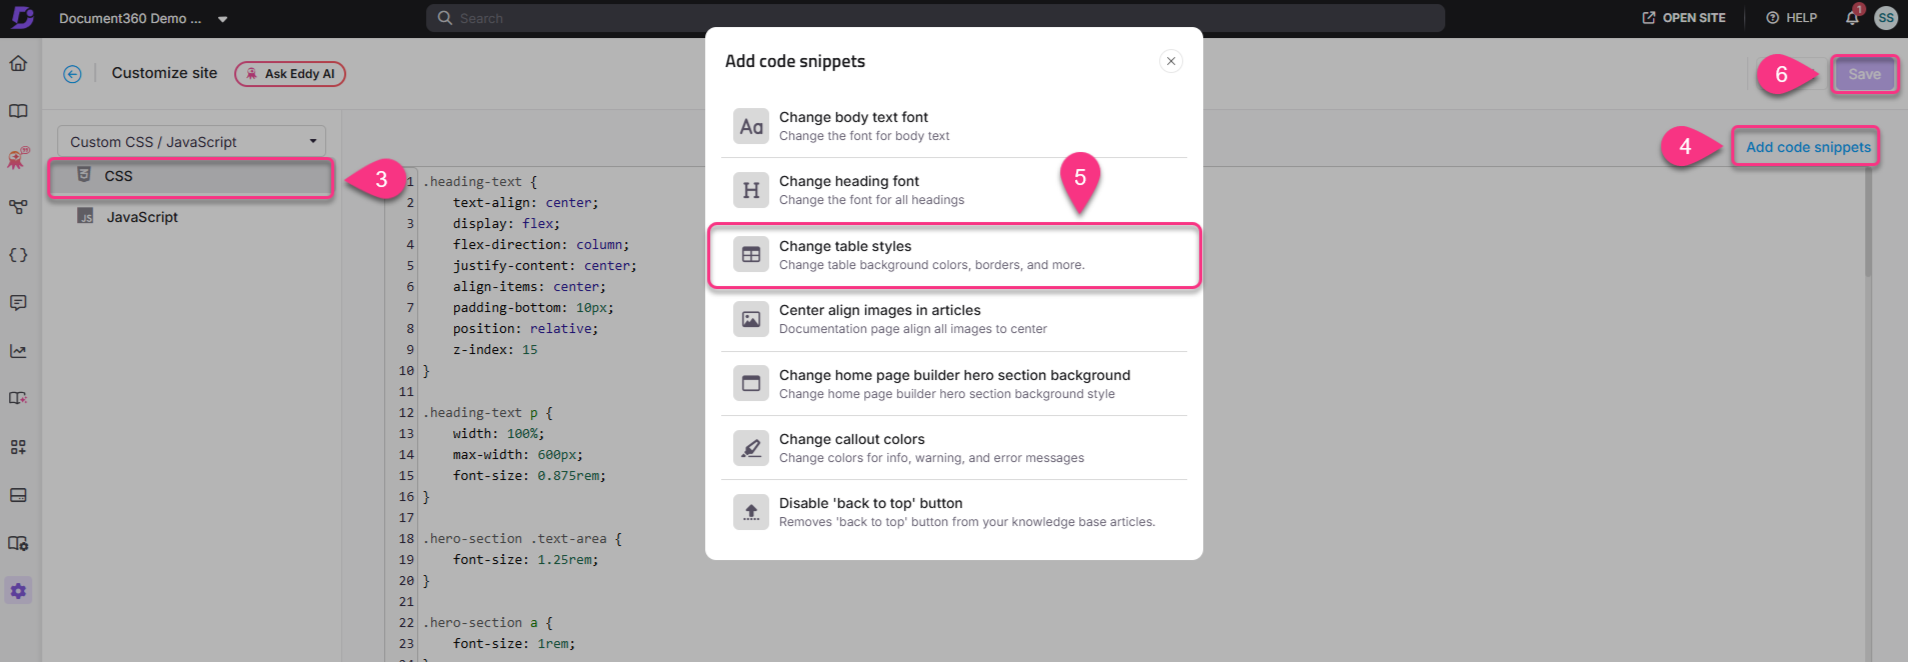
- Select the CSS tab, then click Add code snippets in the top right.
- Click Change table styles. The snippet is inserted into the CSS editor.
- Modify the color values, border widths, and padding values to match your requirements.
- Click Ctrl + S or Save.
How to add custom table CSS
You can also write your own table CSS instead of using the pre-loaded snippet. For example:
table th, table td {
  border: 1px solid #67cfbf;
  padding: 2px 10px;
}
table th {
  background: #fcf8c0;
  font-weight: 600;
}
table th:empty {
  display: none;
}
tbody tr:nth-child(odd) {
  background-color: #f2f2f2;
}
Best practices
- Use alternating row colors for readability - the
nth-child(odd)rule applies a background color to alternate rows, making wide tables easier to scan across rows. - Keep border colors subtle - a light border color (e.g.,
#e0e0e0) is usually less visually noisy than a strong color, especially for tables with many columns. - Test with both sparse and dense tables - your padding and font size choices may look fine in a small table but create alignment issues in a table with many columns or long cell content.
FAQ
How do I remove table borders or grids?
Navigate to {{variable.Settings}} () > {{variable.Knowledge base site}} > Site customization > Custom CSS & JavaScript. In the CSS tab, paste the following code:
.no-border-table table tr,
.no-border-table table th,
.no-border-table table td {
    border: none;
}
The class name is no-border-table - you can customize it to your preferred name. Make sure the class name in your HTML exactly matches the class name defined in your CSS, otherwise the layout will not be applied. Click Save.