Creating a user group in Document360 lets you assign a shared project role and content access level to multiple users at once. Instead of configuring permissions for each team member individually, you group users with the same access requirements and manage their permissions from a single place.
When to create a user group
- Multiple users share the same project role and content access requirements.
- You want to onboard a cohort of users with identical permissions in a single operation.
- You want to update access for a team without editing each user individually.
- You are managing access at scale across large teams or departments.
Before you begin
- You must have the Project Owner or Admin role in the knowledge base portal.
- User accounts must already exist in the project before they can be associated with a group. See Add a user or Import users.
How to create a user group
-
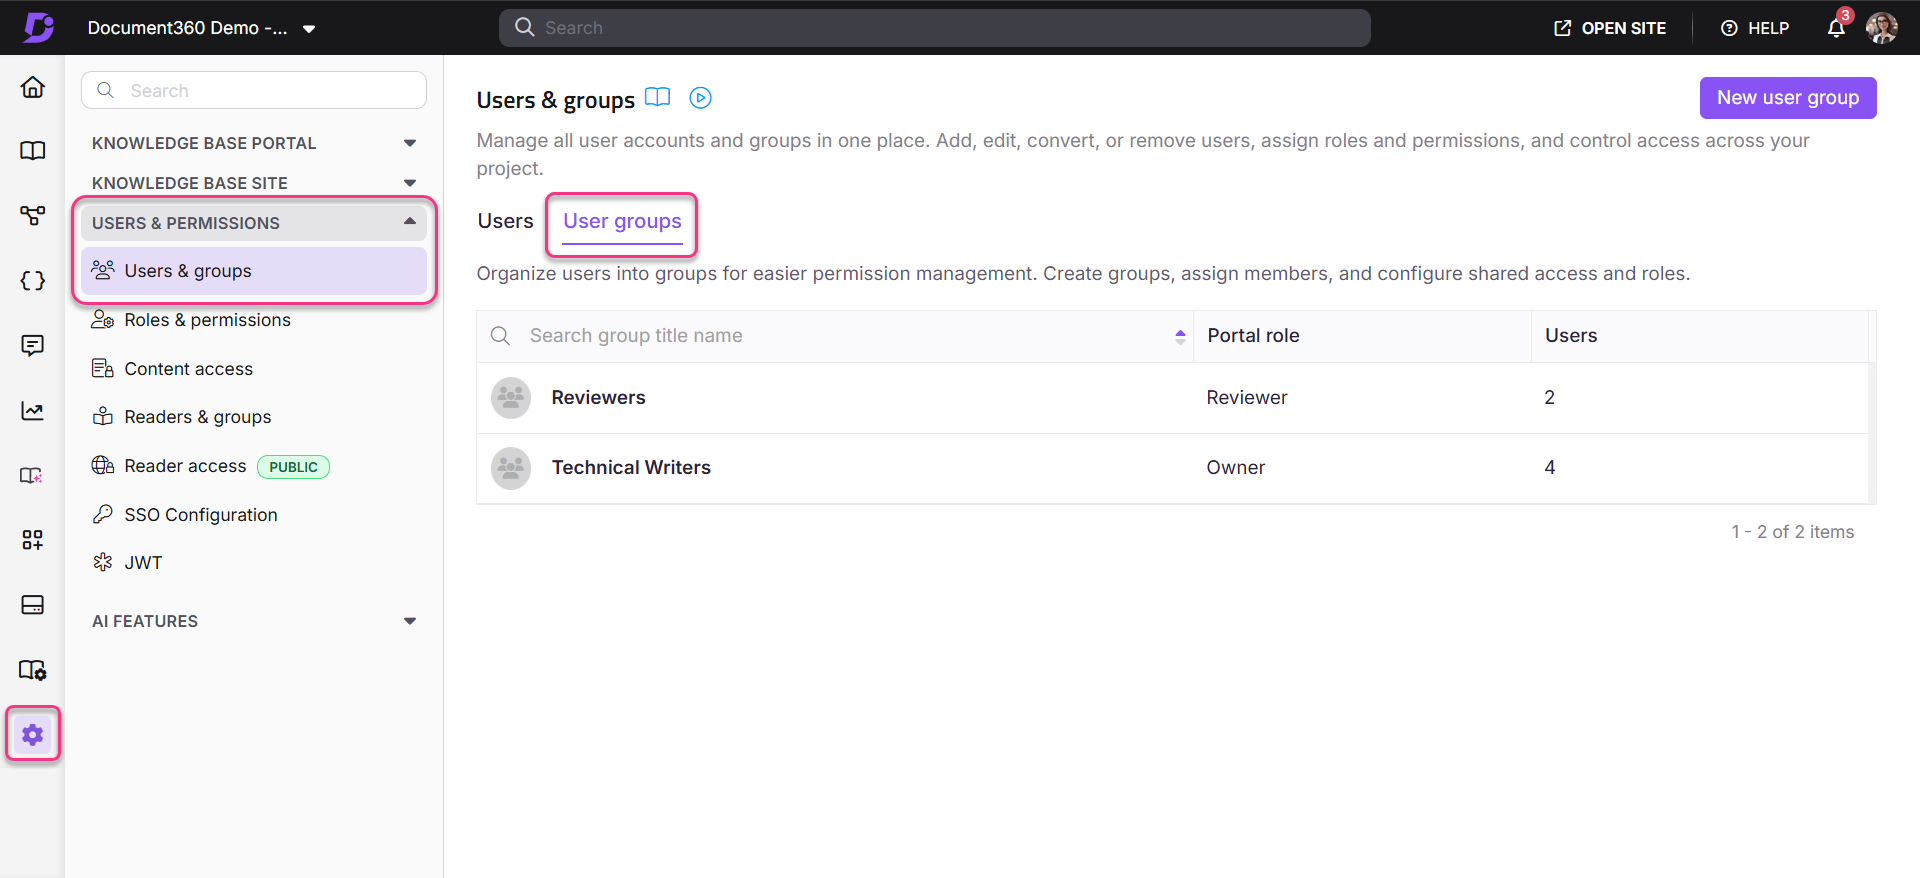
Navigate to Settings () > Users and security in the left navigation bar in the knowledge base portal.
-
In the left navigation pane, navigate to Users & groups.
By default, the User tab will be selected.
-
Navigate to the User groups tab.
A list of existing user groups will appear if any have already been created.
-
Click New user group.
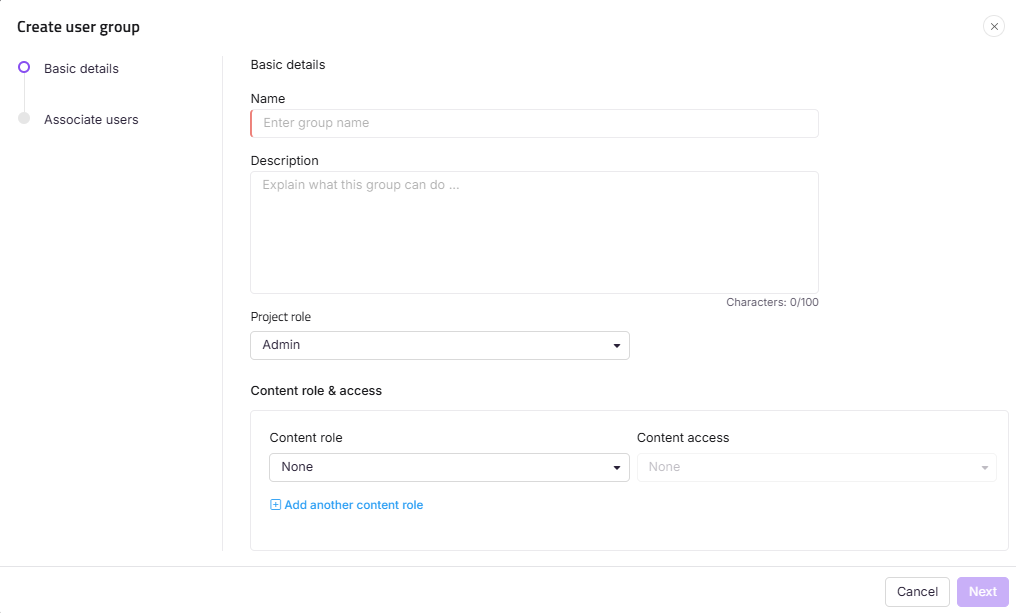
The Create user group panel appears with the Basic details page.
-
Enter your desired group name and description in the Name and Description fields.
NOTE
The Description field can hold up to 150 characters.
-
Select the desired project role for the group in the Project role field.
-
Choose the content role for the group and choose the level of content access for the associated users.
-
If needed, click Add another content role to create an additional content role.
-
Click Next.
-
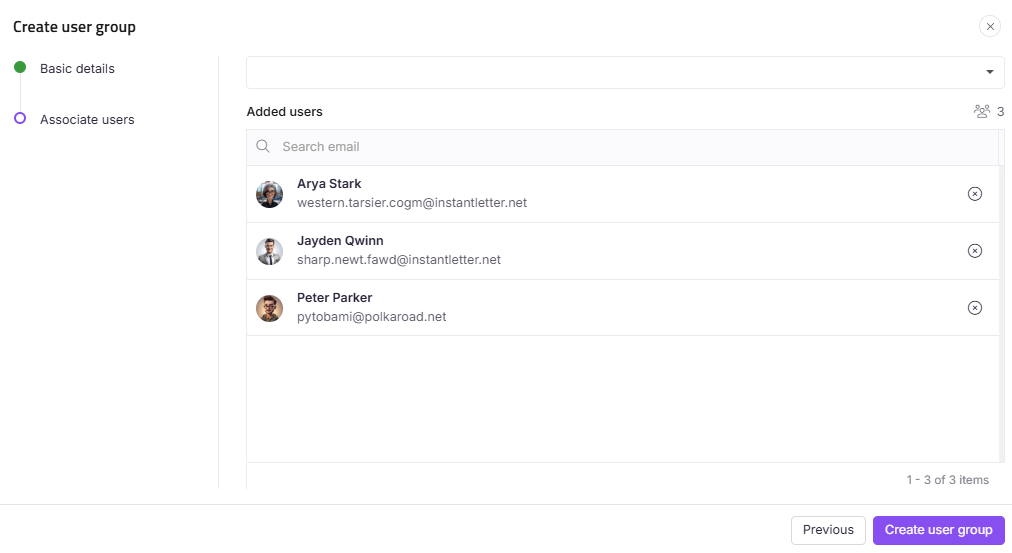
In the Associate user step, add the desired user accounts to associate with the group.
-
Click Create user group.
NOTE
By default, users in user groups are organized alphabetically based on their email IDs.
Export a user group
After creating a user group, you can download a list of its members as a CSV file for auditing or record-keeping.
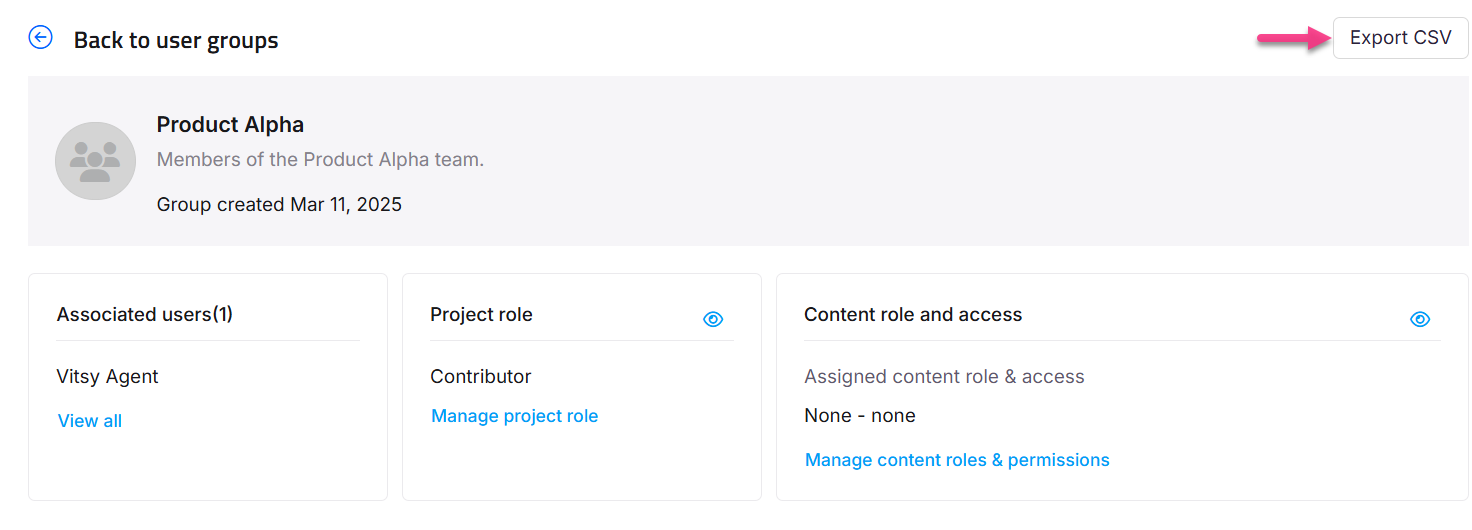
- Click on the desired user group to view its details.
- Click Export CSV in the top right to download the list of users in the group in Excel/CSV format.
Limitations
| Limit | Detail |
|---|---|
| Description length | The Description field accepts up to 150 characters. |
| Multiple content roles | You can assign more than one content role to a group using Add another content role. |
| Role inheritance | Changes to a group's project role or content role apply immediately to all users associated with that group. |
Best practices
- Give user groups descriptive names that reflect their role or team (for example, "Support Team — Editor" or "External Partners — Viewer"). This makes it easier to audit access at a glance.
- Set access at the group level and reserve individual user-level overrides for exceptions only. This keeps permissions consistent and easier to maintain.
- Use Add another content role when the group needs edit access to some categories and read-only access to others, rather than creating separate groups for each access level.
- Export the group member list periodically as CSV to maintain an up-to-date record of who belongs to each group.
- Review group membership before changing a group's project role or content role — the change applies to all associated users immediately.