In Document360, you can add files to articles in two ways — adding and attaching.
- Adding embeds the file directly into the article body as an inline element. Readers can download it from within the article content.
- Attaching makes the file appear as a downloadable link on the right side of the knowledge base site page, above the tags and table of contents — not inside the article body.
Files can be sourced from two locations:
- Local storage — uploaded directly from your device
- Document360 Drive — selected from your project's centralized cloud-based file storage.
How can you use files
- Add a file inline when you have a one-off file specific to a single article, such as a template, data sheet, or configuration file not reused elsewhere
- Add from Document360 Drive for files that appear in multiple articles, such as a shared product specification, release checklist, or standard disclaimer. When you update the file in Drive, the changes are reflected across all articles that reference it.
- Attach a file when you want readers to download a resource without it being embedded in the article content. For example, a downloadable guide, printable checklist, or sample configuration file
Adding a file to an article (inline)
Files added inline are embedded directly in the article body. The file must either be uploaded from your device or selected from Document360 Drive.
In the Advanced WYSIWYG editor:
- Type
/fileand pressEnter. The Insert file panel appears. - Insert the file using one of the following methods:
| Method | How |
|---|---|
| Local storage | Click Click here to upload and select the desired file from your device, or drag and drop the file into the panel. |
| Document360 Drive | Click Open file picker and choose a file from Drive. |
Use the movable block icon to rearrange or delete the file panel within the article.
.png)
After adding a file to an article, readers on the knowledge base site can click the Download icon to download it. The file retains its original name and format.
When selecting from Document360 Drive, you can filter files by:
- Uploaded — All, 7 days, 30 days, 3 months, 1 year, or a custom date range.
- Uploaded by — Filter by specific contributors.
- Type — Filter by file type such as PDF, JPEG, and so on.
- Tags — Filter by tags assigned to files.
Attaching a file to an article (downloadable link)
Attached files appear as downloadable links on the right side of the knowledge base site page and not within the article body.
- Click the More icon in the top right corner of the article.
- Click More article options.
- In the Attachments tab, attach your file using one of the following:
- URL — enter the file URL and click Insert
- Upload an attachment — select your file and click Upload
- Click Save.
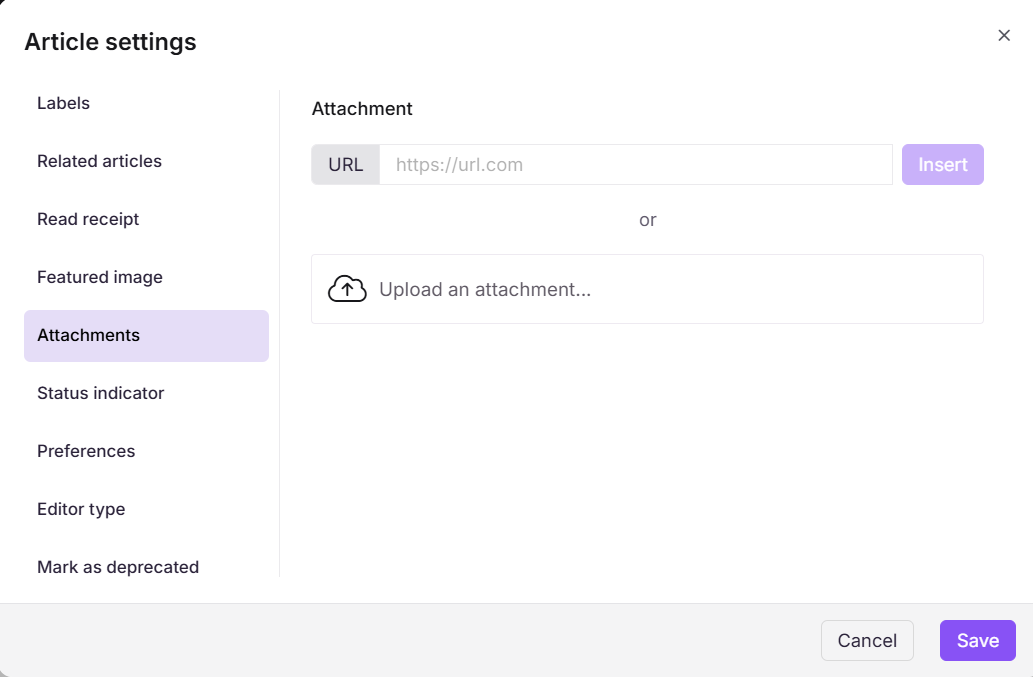
If you attach more than one file, you can arrange the display order by dragging and dropping the file names in the menu. To know more on Attachments, read Attachments.
Document360 Drive
Document360 Drive is a centralized, cloud-based storage solution for storing and managing all files used across your knowledge base — images, documents, videos, and more. Storage limits vary by subscription plan.
Files stored in Drive can be reused across multiple articles without re-uploading. This makes Drive the recommended source for files that appear in more than one article. To know more on Drive, read Managing drive.
Key capabilities of Drive:
- Upload files from your local device.
- Organize files into folders and subfolders.
- Filter files by upload date, contributor, file type, and tags.
- Track file dependencies — see which articles use a given file.
- Download or remove files individually or in bulk.
- Replace existing files with updated versions.
Deleting a file from Drive breaks all article references to that file. Deleted files are moved to the Recycle bin and can be recovered from there. Drive does not maintain version history for files — always back up important files before replacing them.
Best practices
- Use Document360 Drive for any file that may be reused across multiple articles — it eliminates the need to re-upload and ensures all articles reference the same up-to-date version.
- Keep file names descriptive so readers know what they are downloading before they click — for example,
{{ glossary.API}}-integration-guide-v2.pdfrather thandocument1.pdf. - Avoid attaching files via external URL if the source may change or become unavailable — upload the file to Drive or directly to the article instead.
- Before deleting a file from Drive, check its dependencies to confirm no articles currently reference it. Deleted files break all corresponding links in articles.
- If attached files are not appearing on the knowledge base site, confirm the Show article files toggle is enabled under Settings > Knowledge base site > Article settings > Article right section.
FAQ
What is the difference between adding and attaching a file?
Adding embeds the file directly in the article body as an inline element. Attaching places it as a downloadable link on the right side of the knowledge base site page, above the tags and table of contents.
What happens if I delete a file from Drive that is used in an article?
All article references to that file will break. Deleted files are moved to the Recycle bin and can be recovered from there if needed.
Can I reorder attached files on the knowledge base site?
Yes. In the Attachments tab of the article options, drag and drop the file names to arrange the display order.