The Auto assign reader group feature in Document360 automatically grants knowledge base access to readers who sign in through an Identity Provider (IdP), without requiring you to invite them manually. When a reader authenticates via SSO for the first time, they are assigned to the reader groups you have pre-selected in the SSO configuration. This is especially useful for large or frequently changing user bases where readers are managed centrally in the IdP.
Before you begin
- SSO must already be configured for your project using SAML or OpenID Connect.
- You must have existing reader groups set up in your project. If you have not created any yet, see How to create a reader group below.
- You must have the Owner or Admin project role to edit SSO configurations.
If your IdP does not support SCIM provisioning, contact the Document360 Support team to enable the Auto assign reader group feature for your account. To know about SCIM, read SCIM provisioning.
How to enable auto assign reader group
- Navigate to Settings () in the left navigation bar of the Knowledge base portal.
- In the left navigation pane, go to Users & permissions > SSO Configuration.
- Hover over the SSO configuration for which you want to enable auto assignment and click the Edit () icon.
- In the SSO configuration panel, navigate to the More settings tab.
- Turn on the Auto assign reader group toggle.
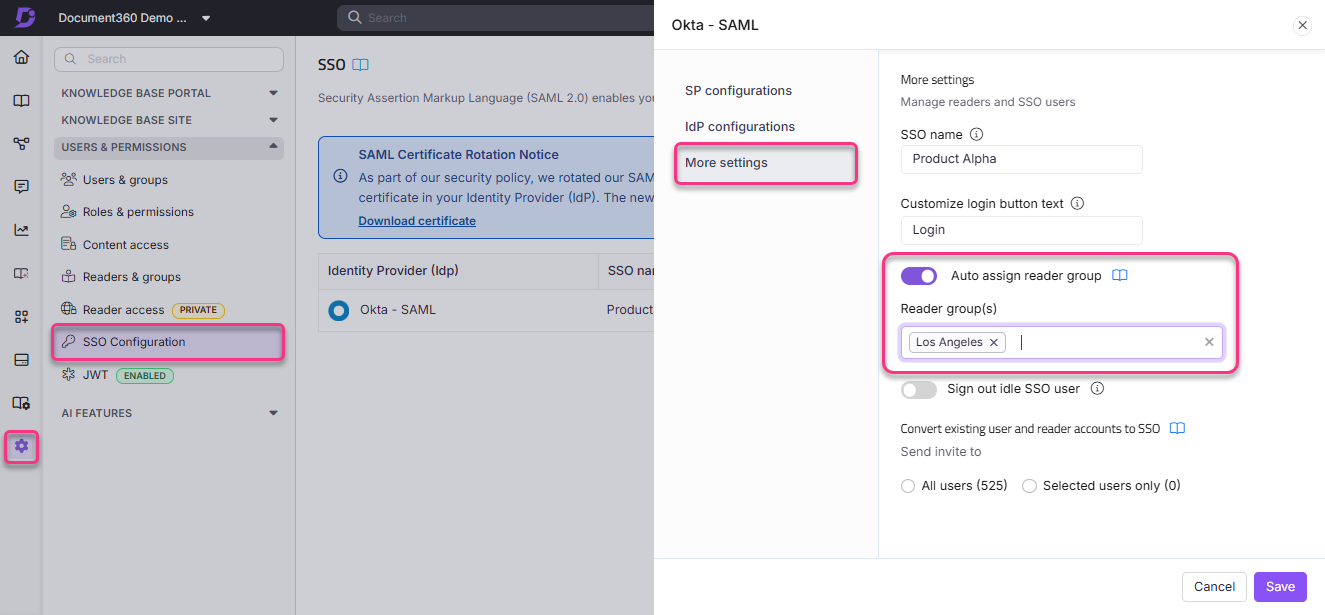
- In the search field that appears, search for and select the reader groups you want to automatically assign to readers on login.
- Click Save.
Readers who sign in via SSO will now be automatically assigned to the selected reader groups upon their first login.
How to create a reader group
If you do not have any reader groups set up yet, you need to create them before enabling auto assignment.
- Navigate to Settings () > Users & permissions > Readers & groups > Reader groups.
- Click New reader group and enter the required details.
- Click Create reader group.
Once the reader group is created, return to the SSO configuration and enable the Auto assign reader group option as described above. To know more, read Create reader groups.
Best practices
- Assign readers to the most restrictive reader group by default. You can always grant additional access individually rather than opening up too much access automatically on first login.
- If your project serves multiple audiences (for example, internal staff and external customers), create separate reader groups for each and configure auto assignment per SSO configuration accordingly.
- Review your auto-assigned reader groups periodically to ensure they reflect your current access control requirements, especially after organizational changes in your IdP.