Document360's screen capture feature lets you capture screens directly from the Editor – without switching tools. You can capture an entire tab or a specific window, and all captures are automatically saved to Drive for reuse across articles.
Before you begin
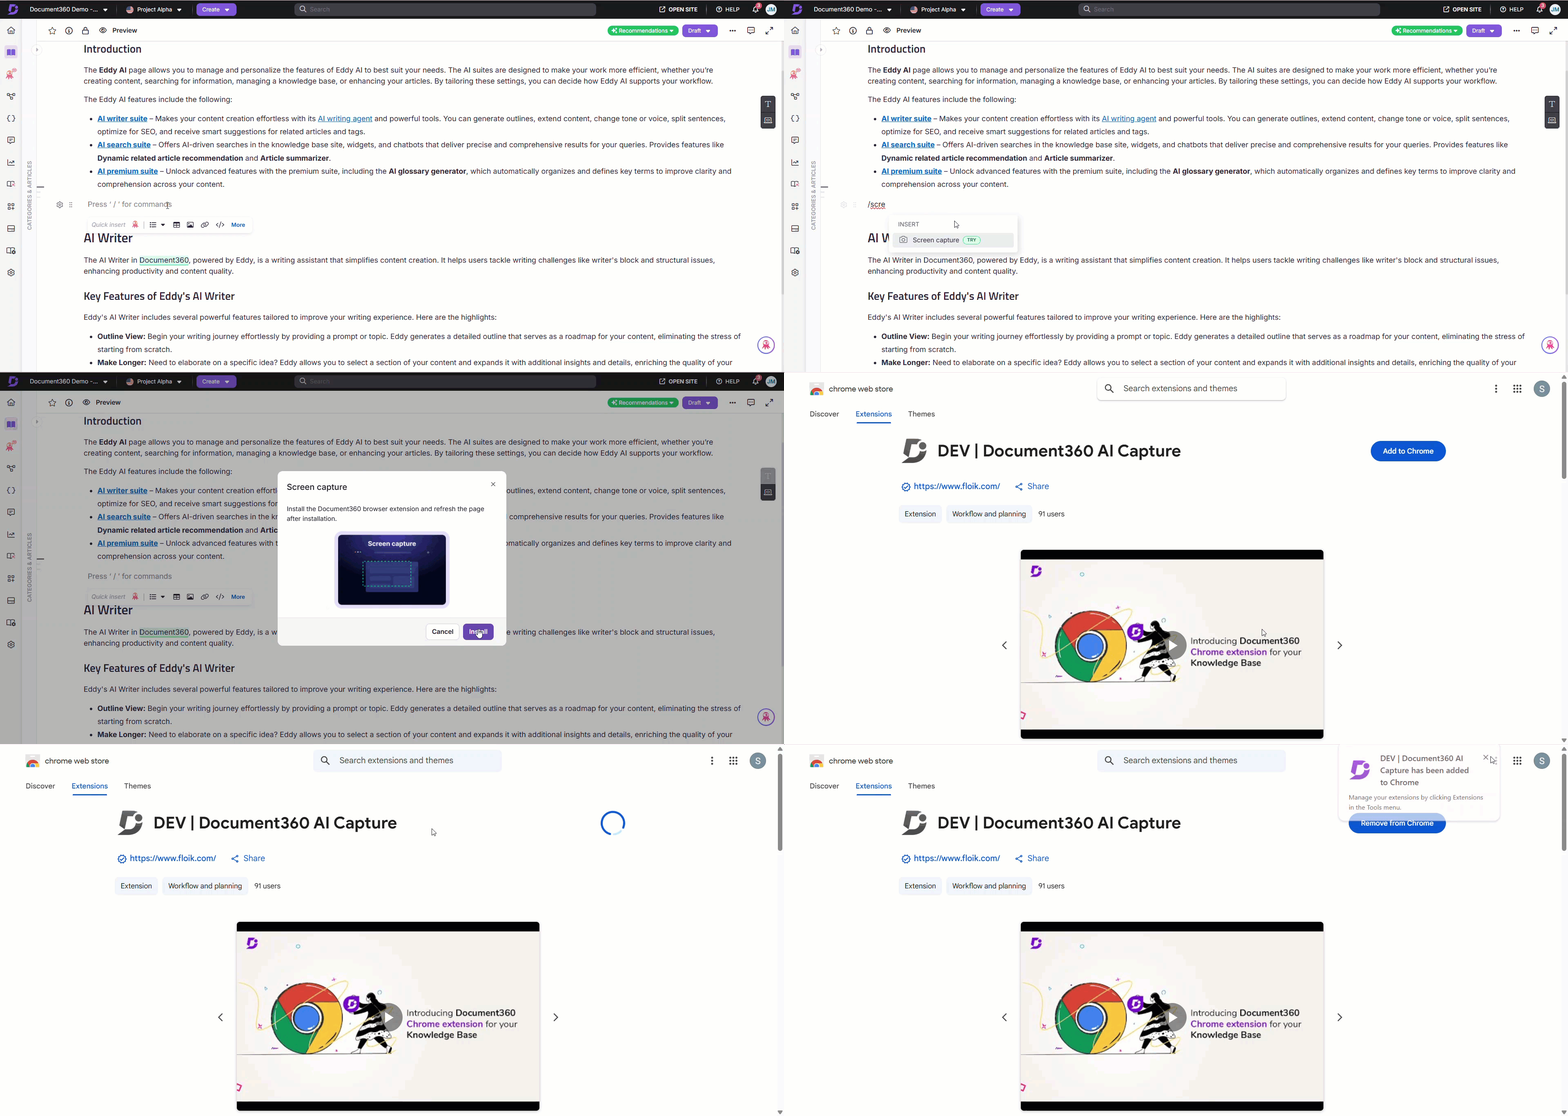
The screen capture feature requires the Document360 AI Capture extension. The extension only needs to be installed once and is supported on Google Chrome, Microsoft Edge, and Brave.
Screen capturing from the Editor
To capture a screen from the Editor,
- Use the slash command
/Screen captureand press Enter. - If you haven't installed the Document360 AI Capture extension, click Install and follow the on-screen steps to complete the installation.
For browser-specific installation steps, see Installing the Document360 AI Capture extension.
-
Once installed, return to the Knowledge base portal.
-
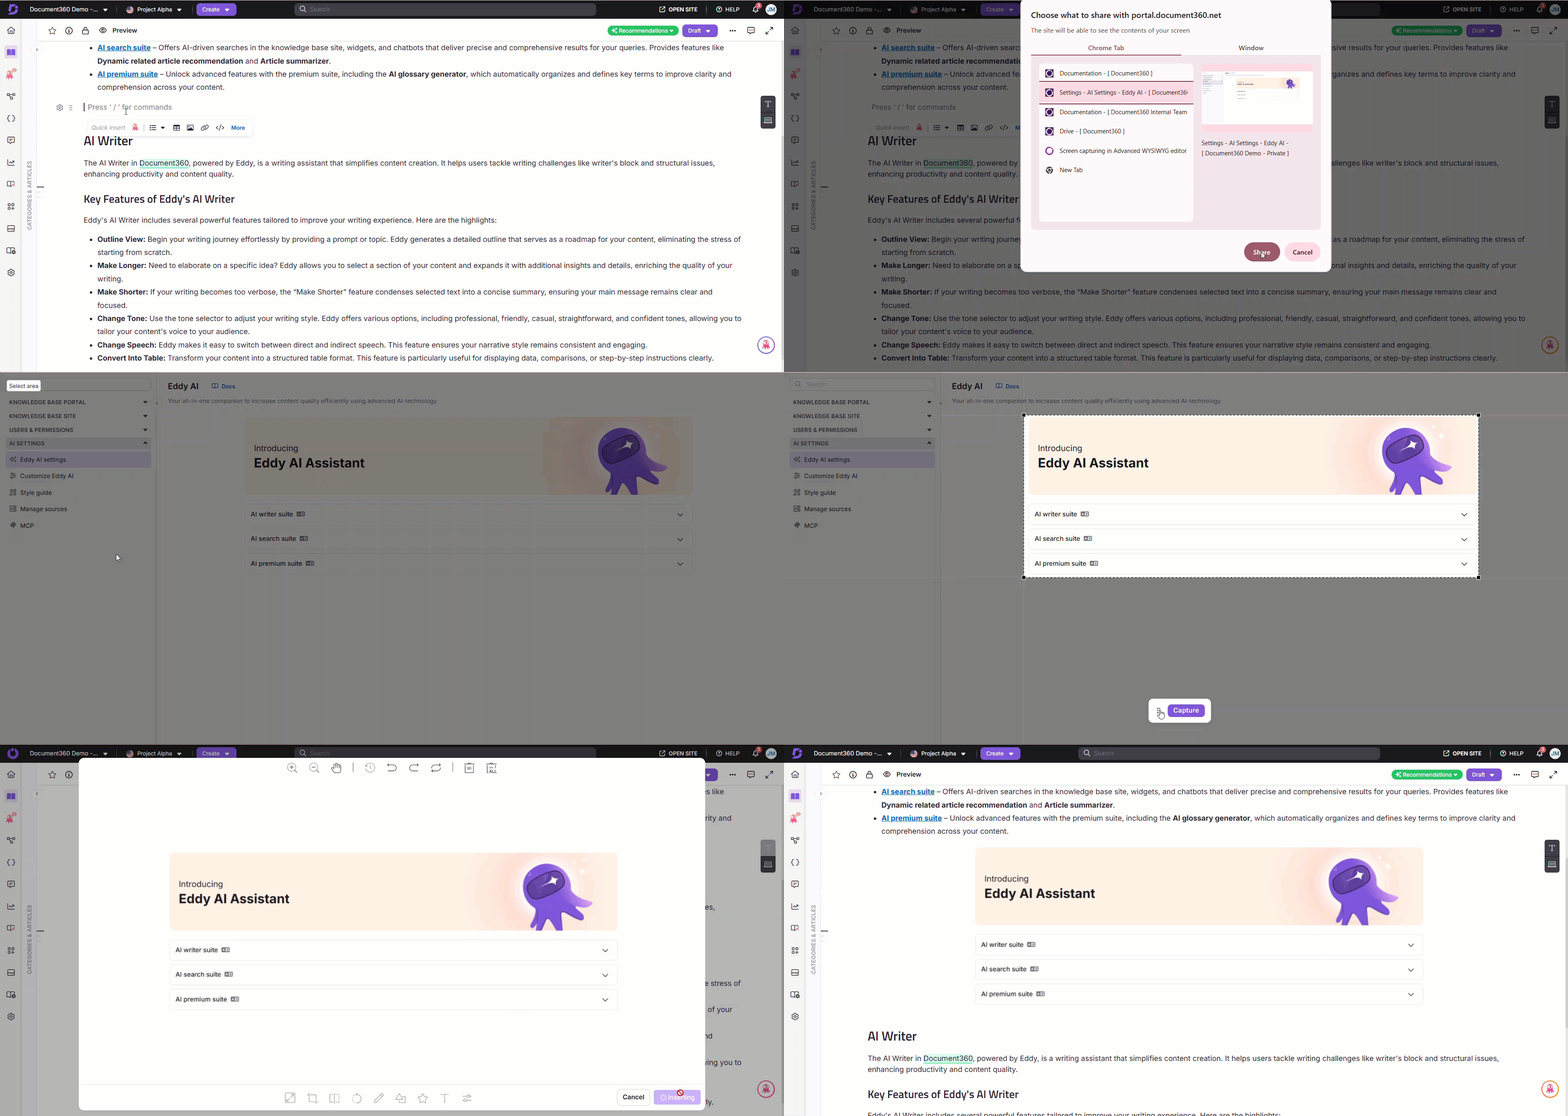
Select the desired screen to capture:
- Browser tab: Captures only the selected browser tab.
- Window: Captures only the selected window.
-
Click Share to proceed.
If a browser tab is selected:
Once you return to the Knowledge base portal,
- The selected browser tab will display a message confirming that the tab is being shared with the Knowledge base portal.
- Click Stop sharing to cancel the capturing process.
- A floating panel appears with the following options to capture the selected screen:
- Visible tab area: Captures the entire tab.
- Selected area: Captures a specific area of the tab.
- You can extend the selection if needed. Once finalized, click Capture.
- Use the Drag and drop () icon to move this floating panel based on your preference.
If a Window is selected:
- The selected window is captured automatically.
- After capturing, you are redirected to the Knowledge base portal.
The captured image appears in a panel with advanced image editing tools such as Resize, Crop, Flip, Rotate, Draw, Shape, Icon, Text, Filter, etc.
For more information, read the article on Formatting an image.
- After customizing the image, click Insert to add it to the article.
- Click Cancel to discard the capture.
- The maximum image size for screen capture is 150 MB.
- Captured images are saved in PNG format, named automatically using the prefix
image_followed by the capture timestamp — for example,image_20250104153021.png. - All captured images are automatically uploaded to Document360 Drive, stored in the default Images folder, and include metadata such as captions and alt text (if provided). These images can be reused in future articles.
FAQ
Can I edit a captured image before inserting it into an article?
Yes. The captured image opens in an editing panel with tools to resize, crop, flip, rotate, draw, add shapes, text, and filters. Make your adjustments, then click Insert.
What happens if I navigate away while capturing a screen?
A panel will appear in the Knowledge base portal indicating that the capture is still in progress.
What happens if a captured image exceeds the maximum size limit?
An error message will appear. To resolve this, reduce the screen area or lower the image resolution before capturing again.
Can I capture screens from any application or only from the browser?
You can capture Browser tabs and application windows. Full desktop screen capture is not supported.