The Import project feature in Document360 lets you bring a previously exported ZIP file into any project, restoring or migrating your articles, category pages, and media files in one step. This is useful when moving content between projects or recovering from a backup. The import process validates the ZIP file before applying any changes, so you can review what will be added before committing.
When to use the import project feature
Use this feature when you need to:
- Migrate content — transfer articles and categories from one Document360 project to another.
- Restore from a backup — re-import a previously exported ZIP file to recover content that was lost or overwritten.
- Consolidate workspaces — merge content from an exported project into an existing workspace that shares the same slug.
Before you begin
- You must have the Editor content role to import a project.
- For custom content roles, your account must have Update and Publish access to the Project Import & Export feature.
- The ZIP file must be a Document360 project export. ZIP files from other platforms are not supported.
- The maximum supported ZIP file size is 1 GB.
- If the ZIP file contains languages not present in the destination workspace, add those languages to the destination workspace before importing.
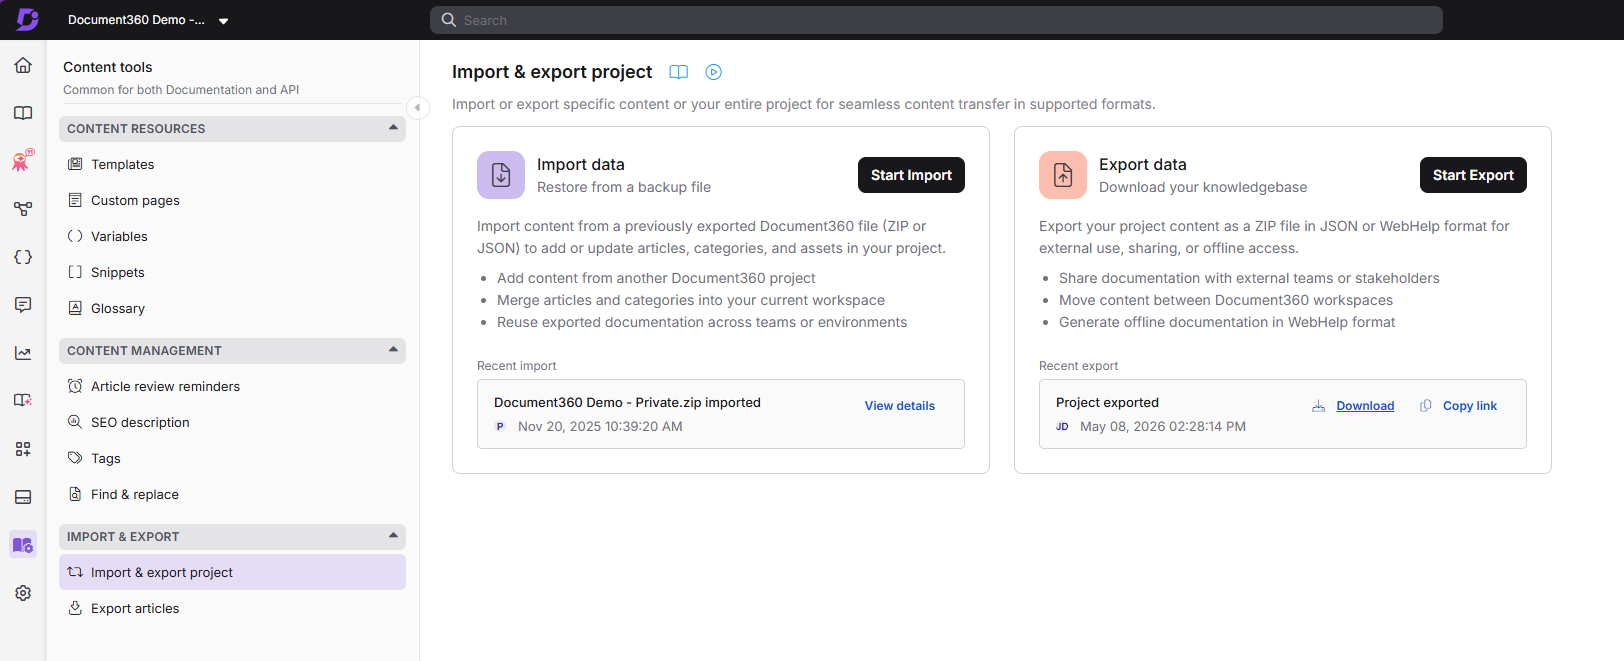
How to import a project ZIP file
- Hover over Content tools in the left navigation bar.
- In the sub-menu, navigate to Import and export > Import and export project.
- Click the Import button.
The Import project panel opens. - Drag and drop your project ZIP file into the panel, or click Upload to select the file from your local storage.
Document360 uploads and validates the ZIP file automatically. - If you need to use a different file, click Replace.
- After successful validation, review the confirmation message, which displays:
- Languages included in the ZIP file
- Number of categories
- Number of articles
- Select the Set article status to publish checkbox if you want all imported articles to be published immediately. If left unchecked, all imported articles are set to Draft.
- Click Import to finalise the process.
All articles and media files from the ZIP file are now available in the destination project.
Importing projects with the same workspace slug
When the workspace slug in the ZIP file matches the destination project's workspace slug, the imported articles and categories merge with the existing content in that workspace.

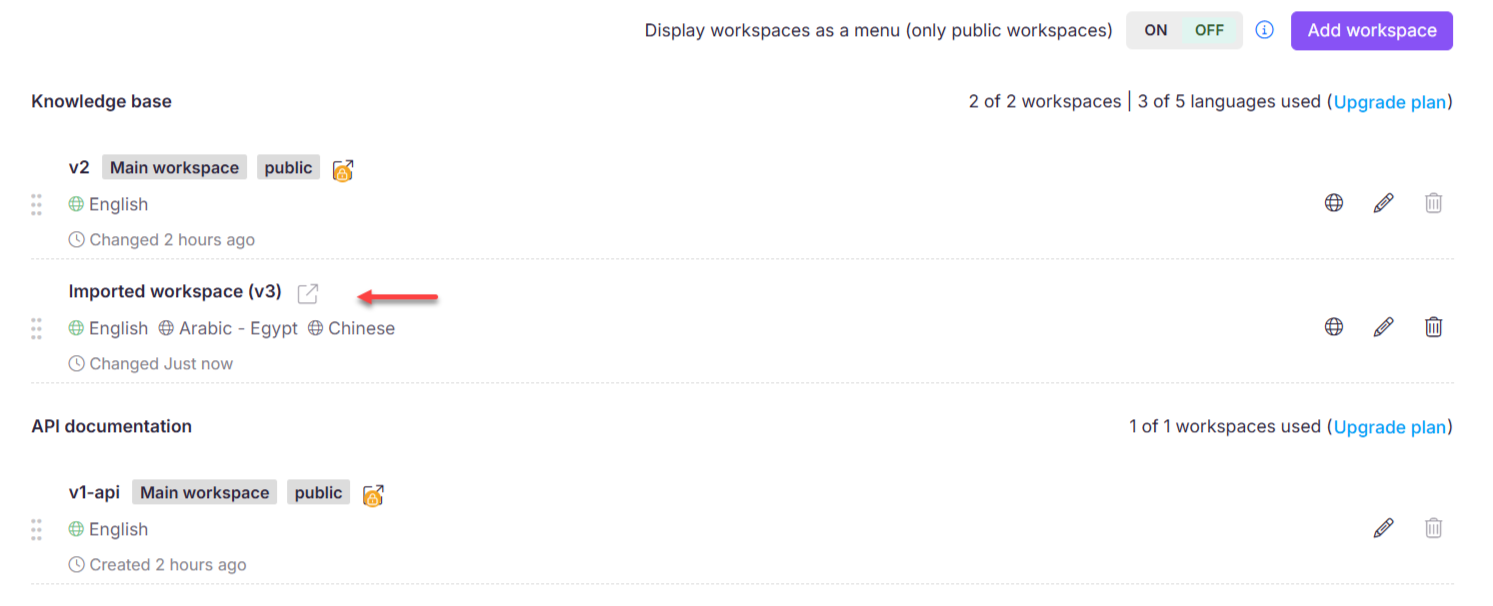
Importing into a project with a different workspace slug
When the workspace slug in the ZIP file differs from the destination project's slug, Document360 creates a new workspace using the name and slug from the imported project. All imported content is added to this new workspace.
Importing a ZIP file into a specific workspace without overriding existing content
To import content into a specific workspace while avoiding conflicts with existing articles or slug mismatches, manually edit the ZIP file before importing it.
- Export the desired categories from your source Document360 project as a ZIP file.
- Extract the ZIP file on your local machine.
The extracted folder contains two directories:- Media — all media files from the project.
- workspace_slug — contains an Articles folder, a Categories folder, and a
workspace_slug_category_articlesJSON file.
- Open the
workspace_slug_category_articlesfile in a code editor. - Update the workspace name and slug to match the destination workspace.
- Save the file and rename it using the destination workspace slug format:
workspace_slug_category_articles.
Example:v2_category_articles - If needed, update the slugs of individual articles or categories, and adjust the language code in the extracted folders.
- Compress all modified files into a new ZIP file named after the destination workspace slug.
- Return to your Document360 project and import the newly created ZIP file following the standard import steps.
The screen recording above demonstrates changing the workspace slug and name from v1 to v2 in the extracted files, re-compressing them, and importing the updated ZIP into the v2 project.
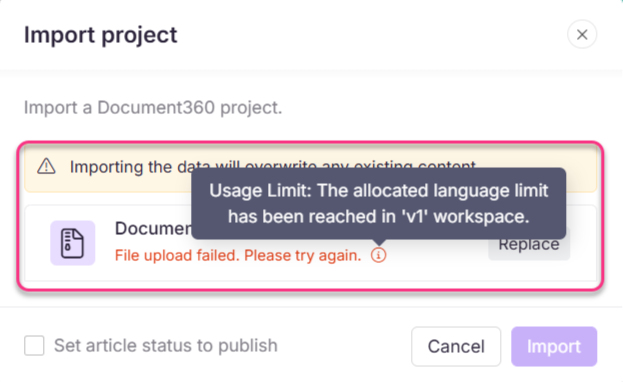
Common import failure reasons
If your import fails, check for the following:
| Reason | Resolution |
|---|---|
| Unsupported features | The ZIP contains workspaces, languages, or features not available on your current plan. Hover over the info icon for details. |
| Mismatched slugs or workspace names | Ensure the workspace name and slug in the ZIP file match the destination project before uploading. |
| Incorrect file format | Verify the ZIP follows the required Document360 export structure. |
| Missing languages in destination | Add the required languages to the destination workspace before importing. |
| Workspace limit reached | If slugs differ, Document360 tries to create a new workspace. If the project has hit its workspace limit, either delete an unused workspace or update the ZIP file so it matches an existing workspace. |
Best practices
- Validate workspace slugs before uploading — mismatched slugs silently create a new workspace instead of merging content. Confirm source and destination slugs match before you start.
- Recreate content reuse elements immediately after import — templates, variables, snippets, and glossary terms are excluded from the ZIP. Recreate them in the destination project right away to avoid broken references in newly imported articles.
- Test with a single category first — for large projects, export and import one category before running the full import. This confirms your slug configuration and workspace mapping are correct before committing to a bulk operation.
FAQ
What happens to my existing content when I import a Document360 project ZIP file?
The outcome depends on whether the workspace slugs match. If the slugs match, imported articles and categories merge with existing content in that workspace. If the slugs differ, a new workspace is created for the imported content. Importing does not affect your project settings, and articles not present in the ZIP file remain unchanged.
Are templates, variables, snippets, and glossary included when importing a project?
No. Content reuse elements — templates, variables, snippets, and glossary terms — are not exported or imported. Only articles and media files are included. You must recreate these elements manually in the destination project.
What happens if I import a ZIP file into the same project it was exported from?
Any articles in the ZIP file that match existing articles in the project will be overwritten with the version from the ZIP. Articles that exist in the project but are not in the ZIP file remain unchanged.
How do I find the workspace slug for my project?
- Navigate to Settings () in the left navigation bar of the Knowledge base portal.
- In the left navigation pane, go to Knowledge base portal > Localization & Workspaces.
- Hover over the desired workspace and click the Edit () icon.
- In the Edit workspace panel, locate the slug in the Slug URL field.
Can I import ZIP files from other platforms into Document360?
No. Only ZIP files generated by Document360's project export feature are supported. ZIP files from other knowledge base platforms cannot be imported.
What is the maximum ZIP file size I can upload?
Document360 supports project ZIP file uploads up to a maximum size of 1 GB.